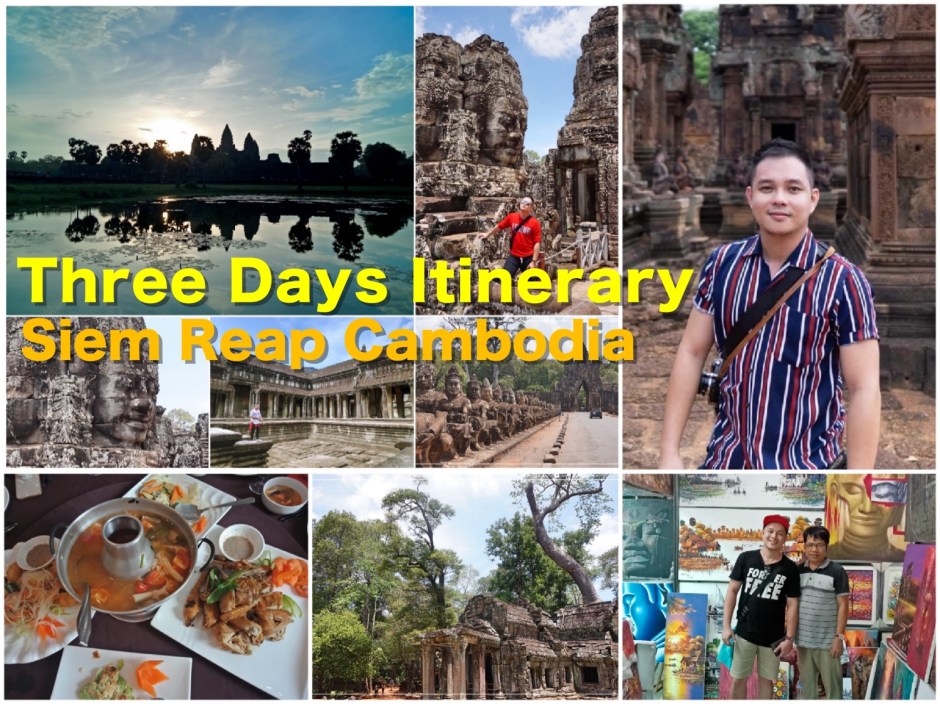
Relaxed Three Days Itinerary:Siem Reap,Cambodia 2019

With all these promo airfares popping almost every weekend, it is now easier for us Filipinos to plan weekend getaways overseas without spending so much. Vietnam, Hongkong, Thailand and Singapore are nearby destinations we usually visit, as these countries are just around 3 hours away by plane, and are Visa-free for Filipinos.

Aiming to encourage people to see beyond the usual, I am uploading a series of blogs shedding more light to a humble Buddhist nation seated between Thailand and Vietnam, which is the Kingdom of Cambodia (…also Visa-free up to 21 days for Filipinos and we have direct flights as well).

Angkor Wat, 2013. Taken during my first visit.

Two weeks ago, I had a chance to revisit Siem Reap,Cambodia. It was my second time to see the city. Still enchanting and deep-rooted as it has always been. Among our neighbouring Southeast Asian nations, Cambodia probably boasts the most intriguing records of ancient times. The Khmer (ancient Cambodian) civilization dates back 802 CE. The preserved ruins and temples tell a lot of stories. Written words will never be enough to describe a Cambodian experience. As such, I am sharing a sample itinerary, expenses and places to see in Siem Reap, with hopes on encouraging readers to include Cambodia up their travel bucket list.
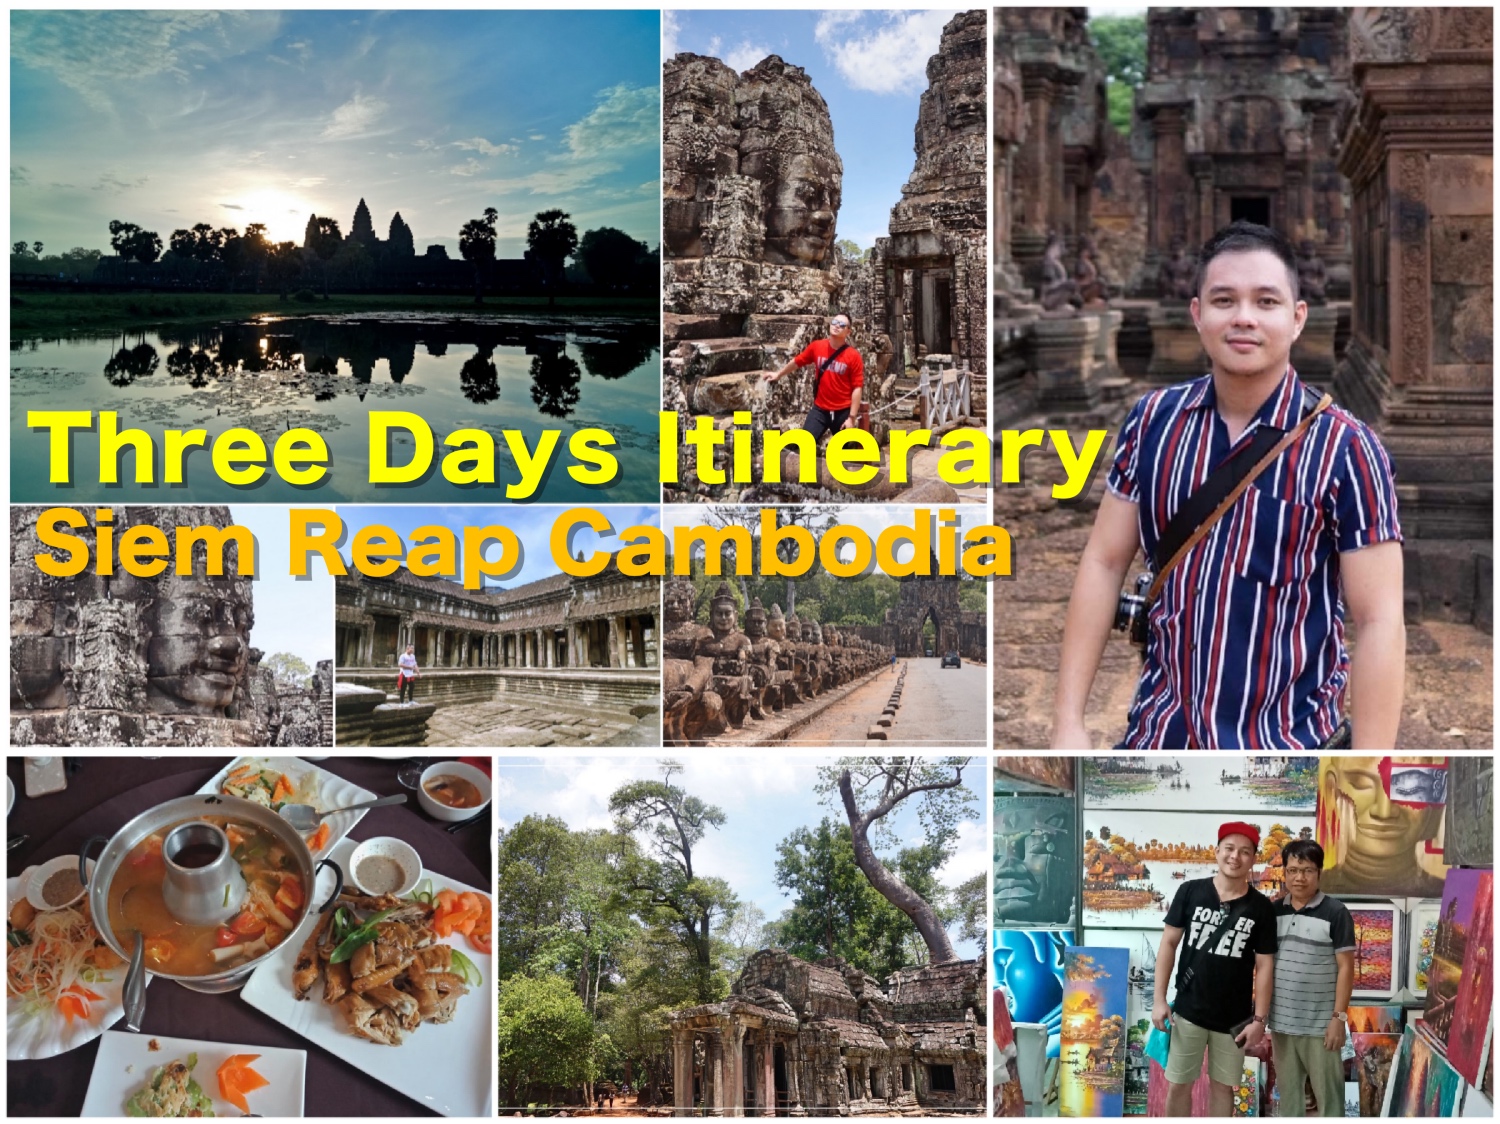
Here’s a sample three-day Itinerary that may help you plan your weekend stay in Siem Reap. I made this itinerary as relaxed as possible.

Take the weekend flight. Cebu Pacific flies Manila to Siem Reap every Tuesdays, Thursdays and Sundays. Take the Thursday flight out, and return on Sunday. Three days in Siem Reap is good enough. For proper schedule and ticket cost, click here.

Day 0 (Thursday): Cebu Pacific flies to Siem Reap in the evening. With this, pwede ka pa mag half day sa work and file a scheduled leave in the afternoon. File mo na din Friday. Don’t forget.

There’s an hour time difference between Siem Reap and Manila. You’ll probably arrive there at 10 PM.

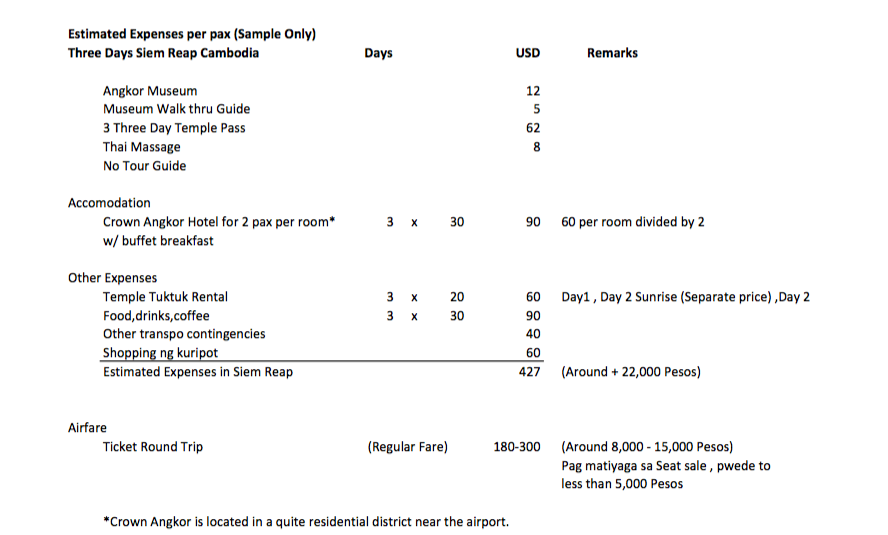
Day 1 (Friday): Siem Reap is most known for its centuries-old Buddhist Temples,made more famous by Angelina Jolie in her movie “Tomb Raider”. Most tourists visit the temple complex immediately on the first day. However, I highly suggest that we visit the “Angkor National Museum” before entering the temple proper.  The museum’s presentation of Cambodia’s historical timeline is impressive. A visit to the museum will give a better perspective and understanding on the history of Cambodia, and on how and why these sacred temples were built. This is highly suggested for history and Architecture enthusiasts. Ticket is only 12 USD. Optional 5 dollars to rent a walk-thru audio guide in English, to further explain each exhibit you are viewing.

Angkor National Museum, 968 Vithei, Charles De Gaulle St.. This is located near the City Center and is not part of the Angkor Complex. Hire a tuktuk to get here. 1 USD-5 USD, depending on distance.

Late afternoon is a good time to visit the temple. Spend your hours at the Angkor Main Temple ’til sunset.

Three Days Temple Pass costs 62 USD per person (One day Pass is also available at 37 USD, and Seven days pass at 72 USD. Kids 12 and below are free, with passport as proof).

In the evening, you may opt to avail traditional Thai massage for relaxation. Casual street massage cost 6 to 8 USD. Spa setting or hotel service at 12 to 20 USD. Your hotels can help you book this if desired.

Glorious sunrise view of the Angkor.

Day 2 – Sunrise at Angkor Wat. Be on site at 5:00 AM to experience the breathtaking moment, as the sun shines striking colours and atmospheric effects against the spiring towers of the Angkor. Spend the rest of the day touring nearby cluster of temples built between 9th to 12th Century
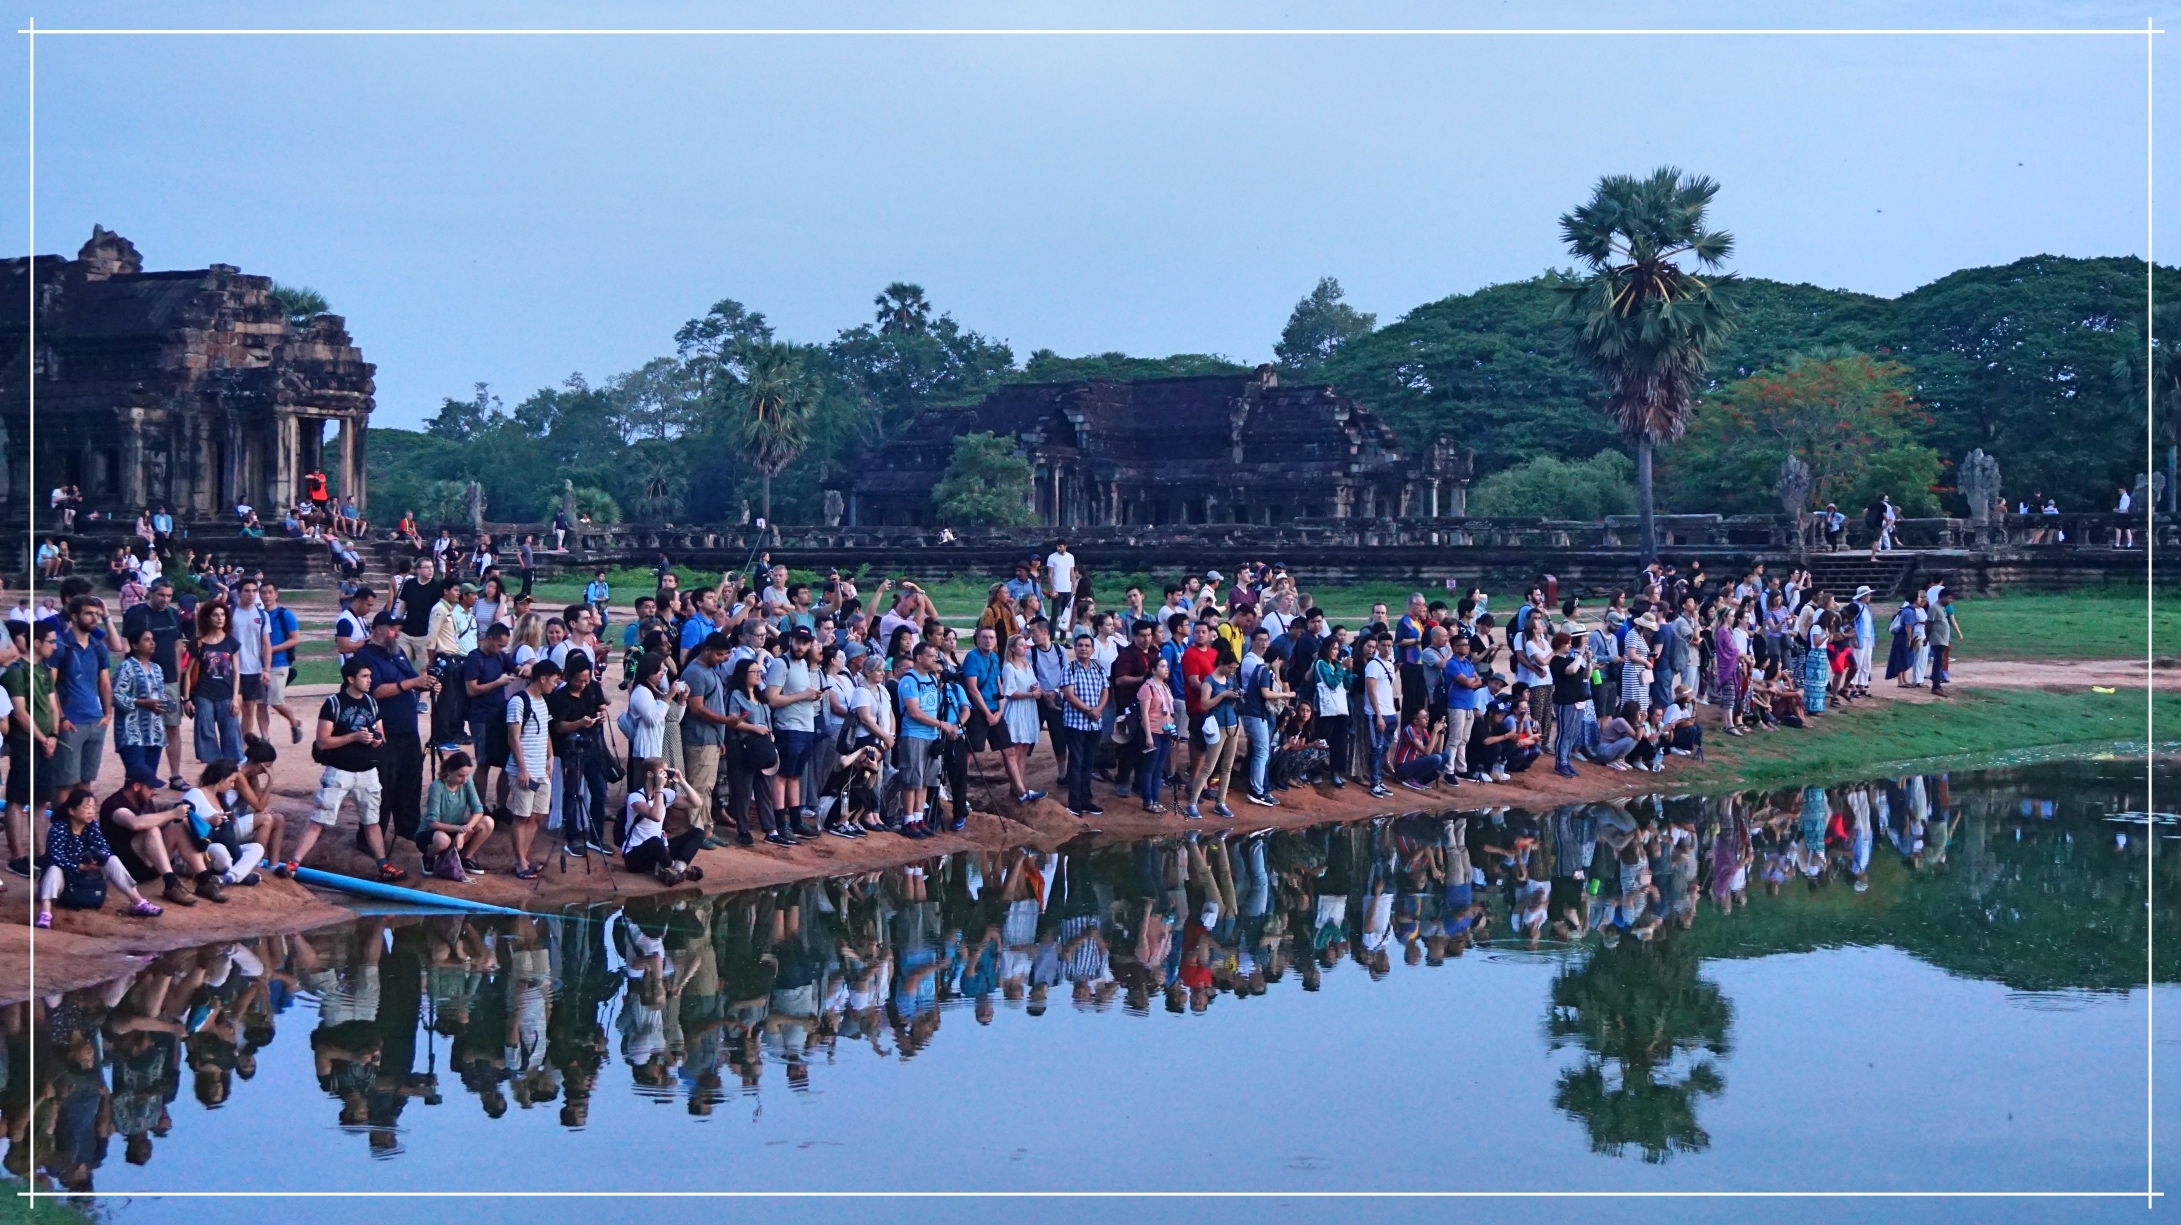
Expect a bunch of spectators with you, as everyone wants a good shot with the reflection of the towers on the moat. Alternatively, you can just sit at a random nearby cafe and wait for sunrise with a cup of coffee. That is a better idea. =)

Bayon Temple. The most intricate temple with 54 towers, decorated with 216 smiling faces of Buddha.

Ta Prohm . The Tomb Raider Temple. (Sidewalk bargains here are the cheapest. Just haggle.)

Banteay Srei. renowned for its intricate decoration of carved sandstone that covers the walls like tapestry. Portrait photo by @Detourista

Tuktuk drivers normally charge 25 USD for a whole day service (Driver and car included). However, a trip to Banteay may require an additional 5 USD, as this cluster is around 30 minutes away from the rest of the temples.

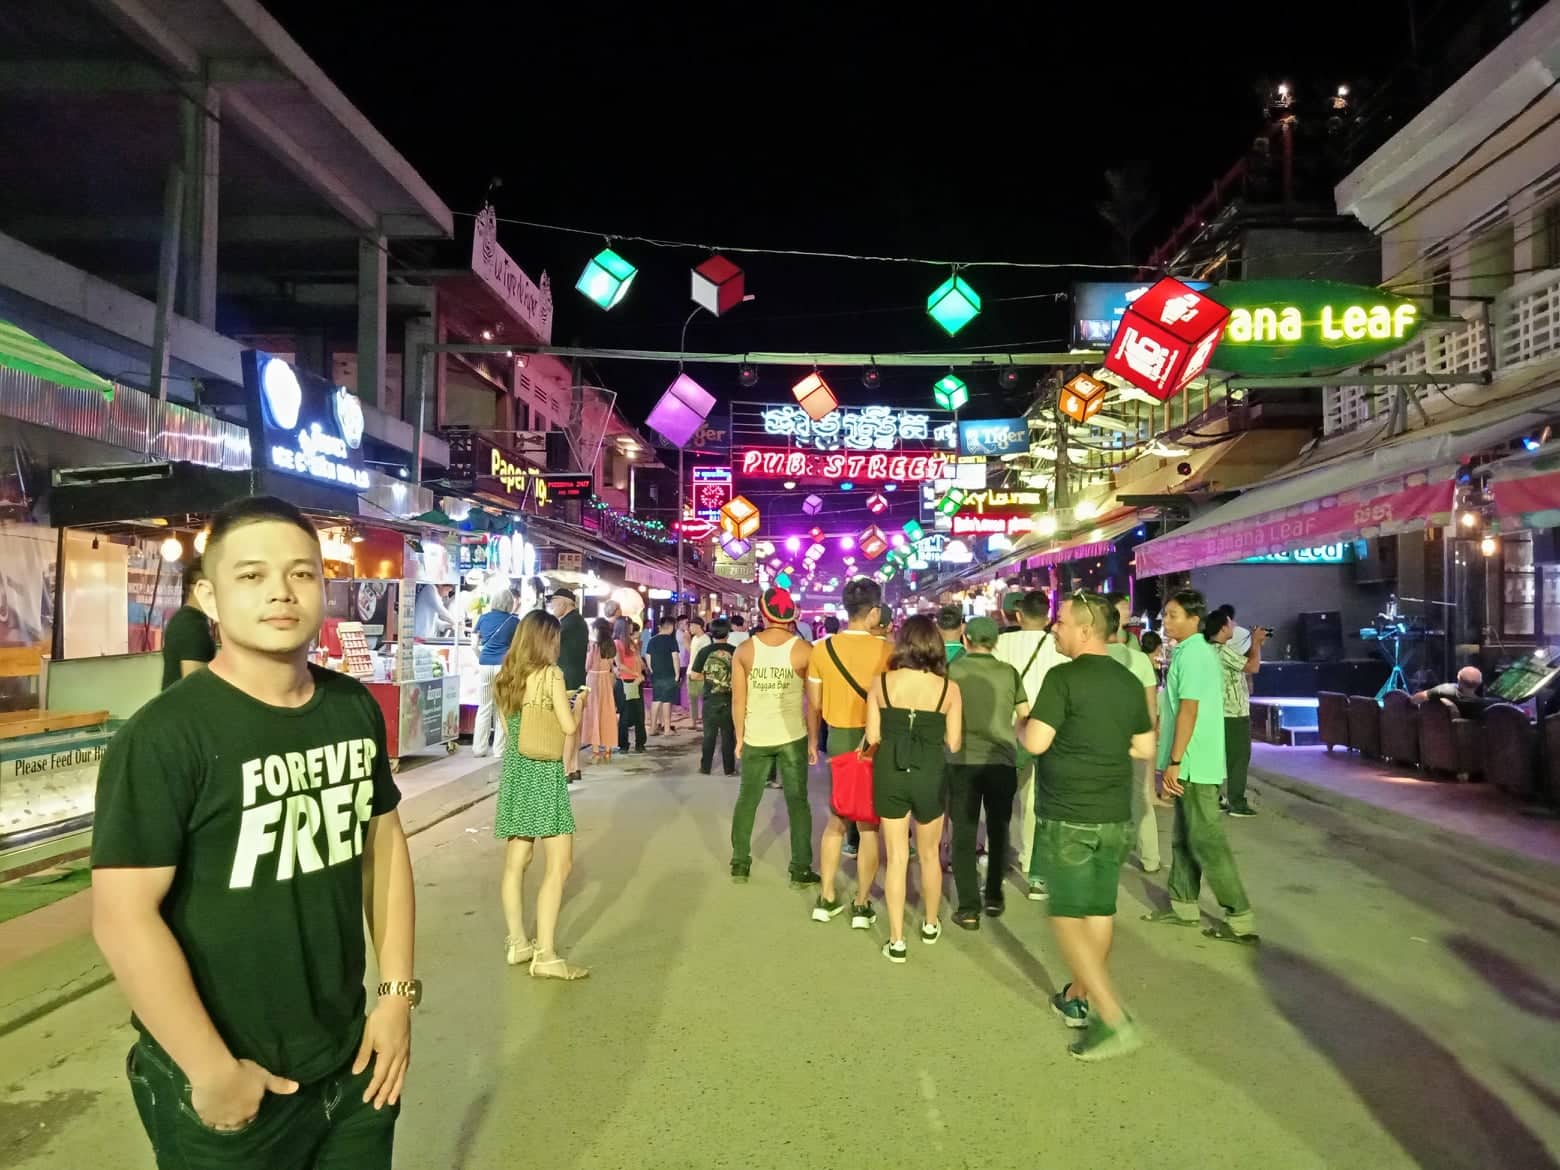
After whole day temple hopping, spend the Saturday night at Siem Reap’s city centre Pub street.
Day 3 (Sunday): Shopping day.  Siem Reap local products are cheap. The main old market is the best place to haggle and shop in the morning. The Art Centre Market in front is also worth visiting.  For the rest of the day, you may just laze around the artsy cafes and restaurants while waiting for your flight. Cebu pacific has a Sunday evening flight back to Manila. Back to work on Monday. =)
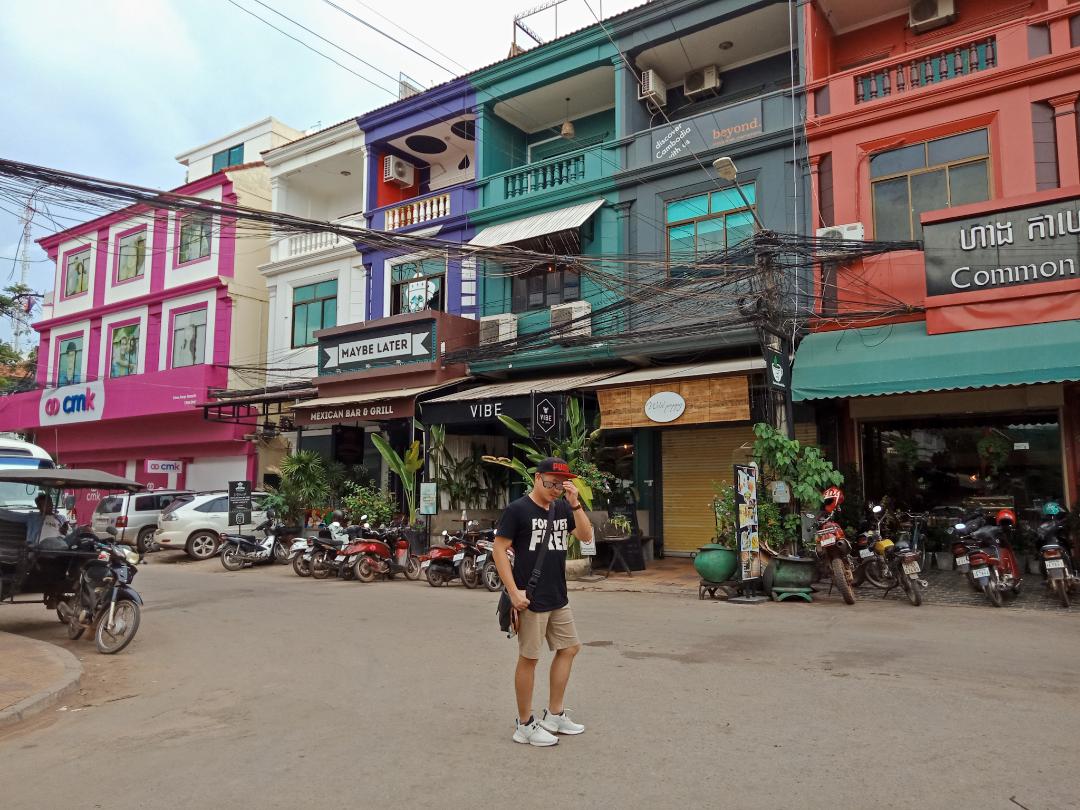
Kandal Village – Artsy district of Siem Reap. Burst of color everywhere.
Chitchat with a local artist from the Art Centre Night Market
European Architecture influence is very still evident in modern day Siem Reap, as they were once a colony of France.

Rough Budget :

Where we stayed:

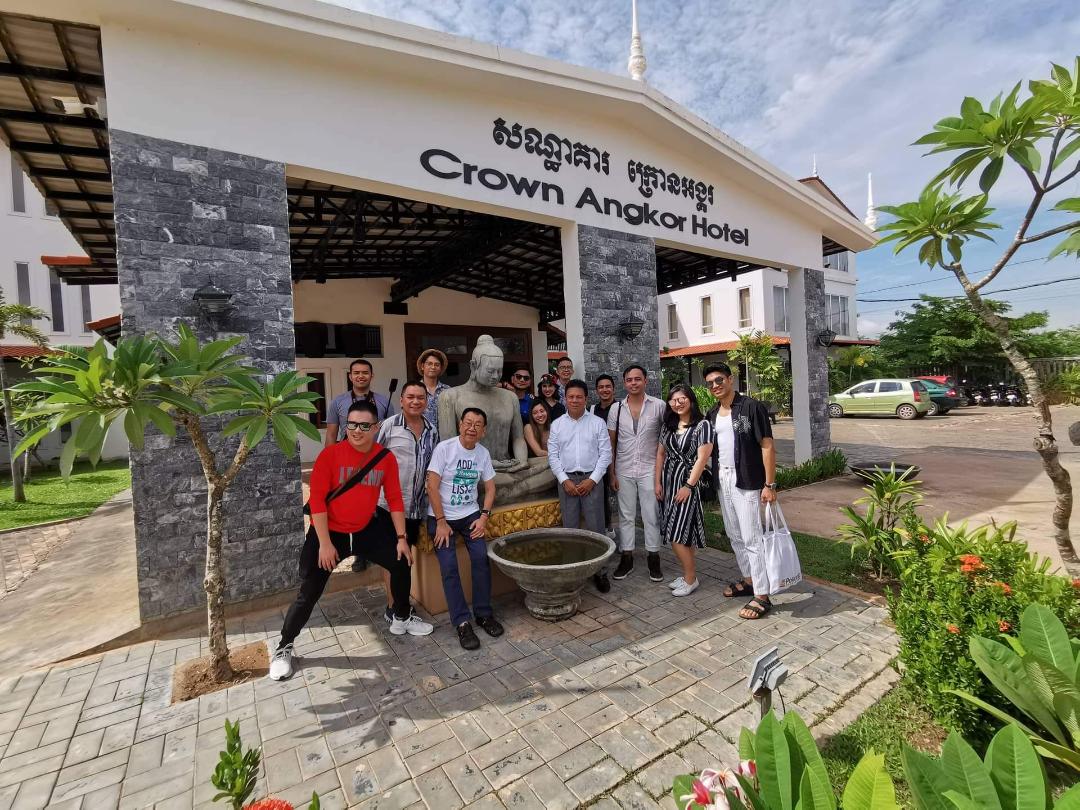
Crown Angkor Hotel (link here). Hotel pool area photo grabbed from hotel’s official Facebook page with permission.


Related links:

One Day Angkor Wat Sample Itinerary

Siem Reap Commercial District

Foodtripping Around Siem Reap

One Day Payday Sale for Davao City Hub #CebuPacific

This payday, Cebu Pacific is holding a seat sale today (January 30) for flights from its hub in Davao City. Fly to Bacolod, Iloilo, Bohol, Tacloban or Zamboanga for as low as PHP99 (base fare).

Go on a food trip to experience Chicken Inasal in Bacolod; or the famous Iloilo Batchoy; or party the night away at the famous TawHai–Asia’s largest floating bar. Visit heritage churches and the world’s smallest primate in Bohol, or discover the wonders of Kalanggaman Island in Leyte.

Travel period from March 6 to July 31, 2019.

cymera_20181126_160945

Cebu Pacific mounts over 148 flights per week to and from the Davao City International Airport, with direct connections to Bohol, Bacolod, Cagayan de Oro, Cebu, Dumaguete, Iloilo, Manila, Tacloban and Zamboanga; as well as to Singapore.

The latest seat sales can be found on the Cebu Pacific official Twitter (@CebuPacificAir) and Facebook pages. To book flights, visit www.cebupacificair.com or use the official Cebu Pacific App, downloadable from the App Store or Google Play.

Japan MULTIPLE Entry Visa Approved! (An Application Guide)

Yes, bes! I just got my passport back from the agent, with an approved Multiple Entry Visa to Japan, valid for 5 years. And I am sharing with you guys how I was able to complete the process.

PAANO at SINO BA ANG QUALIFIED FOR MULTIPLE ENTRY?

As per Japan Embassy website, here are the terms and conditions for issuance,

(1) Applicant with history of travel as temporary visitor to Japan in the last three (3) years ; has no known violation of domestic laws of Japan nor had problem with immigration regarding entry and status during the period of stay ; and has sufficient financial capacity to support expenses for travel and stay. This is where I qualified. Kailangan makapunta muna ng Japan within the recent 3 years. I’ve been to Japan once lang last Nov 2018.

(2) Applicant with history of travel as temporary visitor to Japan in the last three (3) years; has no known violation of domestic laws of Japan nor had problem with immigration regarding entry and status during the period of stay; and, has several history of travel as temporary visitor to G7 countries (excluding Japan) in the last (3) years.

Screen Shot 2019-01-21 at 10.41.29 PM.png

(3) Applicant with abundant financial capacity, kahit di pa nakapag-Japan. This is very vague because it doesn’t say how much funding should be shown as proof. baka 1 Mn.

(4) Spouse or Child of (3) above thru affidavit of support. Ask your lawyer about this.

—-0—-

Now moving forward, here are the steps I did.

(Step 1) I tapped with a recognised travel agency for this application, since DIY/Personal application is NOT accepted by Japan Embassy.  The visa application fee costs P 1,700.00. I made it clear that this is not my first, and I am applying for multiple this time.  The agency provided my with blank forms to fill, though downloadable naman din from the embassy website. I spent P 1,700.00 because I am based here in Davao City. I’ve read that fees in Manila could go for as low as P 950.00 only.

(Step 2) Here are the requirements I’ve submitted. Basically, similar lang din as what I’ve submitted for my first application.

  1. Valid Passport
  2. Completed Visa Application Form  but check the (✔)Multiple option. The agency gave me a set of this. They also check/correct.
  3. 2 copies Colored Photo, 4.5cm x 4.5cm , white background with name,birthdate and signature at the back. most recent lang po pwede (do not repeat what you submitted for other visas)
  4. Daily Schedule in Japan or the Tazai Yoteihyo (to be discussed below)
  5. Bank Certificate (latest)
  6. Income Tax Return 1701 clear Photocopy for the self employed (latest)
  7. DTI Registration for the self employed
  8. Request for Multiple Entry Form. The agency gave me a sheet of this, which looks like this. download.jpgOn the bottom box, you make a statement on why you are requesting for Multiple. I stated there that I am going on March, and again on September with the family, and also hoping for the Olympics 2020. Your statement should make them accept that you have valid reasons to revisit. Make or break this part.
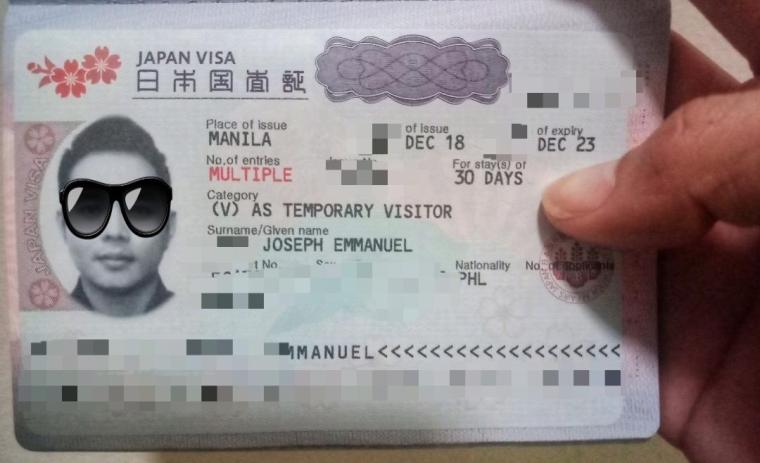
(Step 3) Submit documents to the Agency . Pay the fee ( P1,700 yung akin sa Davao). 

(Step 4) Magpa Novena ka na walang palpak sa mga papeles mo. lol. Sit back and wait lang. The agency naman  will most likely check your documents if they comply.

I submitted my documents December 15,2018 and got the result January 3,2019.

thumbnail

—0—-

Other Tips and Tricks:

(1) Ito ang Itinerary format na sinumbit ko for my supposed March 2019 trip.  Mock up IT lang po,no need to strictly follow. screen shot 2019-01-21 at 10.32.06 pm

(2) For employed, provide ITR 2316 photocopy, plus valid employment certificate with salary detail and approved dates of leave for the upcoming trip. Photocopy company ID also.

(3) Kung government employee ka, kailangan mo mag secure ng Authority to travel from your head (plus bring your ID) kasi yung Immigration Officer naman ng NAIA ang sisita sayo without the approved document.

(4) Airline Ticket and Hotel Bookings are NOT required. However, on the form, you will be asked for an address and contact No. in Japan.  I just gave them the address of the hotel from my first visit.

(5) When to apply? The earliest is 90 days before the intended trip. as per blogs.

(6) How much bank funds I showed for this? Around a 120k.

(7) I did not submit na PSA Birth certificate since I am a returning tourist. B.Cert is only required for first timers.

(8) The beauty of applying thru an agency is that they will check your documents and forms for errors and they text you for update so sulit na din ang fee.

(9) First time applicant? click HERE.

(10) For application assistance, you may get in touch with Traveloft Travel and Tours,Inc.

(11) Cebu Pacific flies from Mactan Cebu to Tokyo (Narita) DAILY. Click here to search for your best dates.

GOODLUCK =)

One Day Tour Around the Heritage Sites of Kyoto

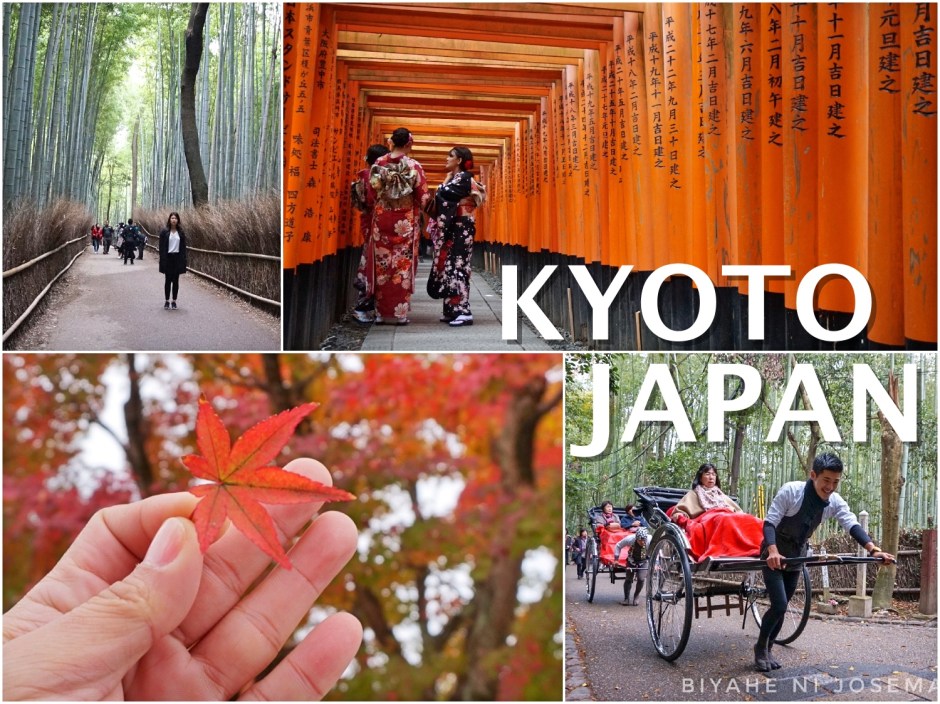
Kyoto is considered as the cradle of Japanese culture and religion. Being the former capital for many centuries, Kyoto houses 17 of the most well preserved UNESCO World Heritage Sites in Japan today. Kyoto is indeed a top place to visit for the culture junkies. In addition, the city is also offers the best views of autumn, as well as spring. Having so much to see, Kyoto ideally deserves 3 days of your vacation time in Japan. However, when the vacation leaves are numbered and you only have one day to see Kyoto(say a side-trip from Tokyo or Osaka), I arranged a easy sample tour covering four must visit heritage sites in and near Kyoto area. These places are easy to reach by train (and covered by JR Train pass, if you have).

—Arashiyama District—

Arashiyama is a district on the western side of Kyoto, Japan. It also refers to the mountain across the Ōi River, which forms a backdrop to the district. Arashiyama is a nationally designated Historic Site and Place of Scenic Beauty.

Getting there: From Kyoto Station,take JR Sagano Line to JR Saga-Arashiyama Station. Train ride takes around 30 mins. From the arrival station, everything is walkable. Fare: around 600 Yen (300 PHP) RT. No payment required if you have a JR (Train) Pass (See Pass details here). Entrance Fee: None! It is a small town/district that is open for all. Best time to visit: Morning at 7:30 AM.

A leisurely walk can take around 2 to 3 hours. Be sure to check out the shops along the main road. Daming free tastes! Lol Coffee is also great to pair with this view.

Arashiyama is a perfect spot to experience lush autumn landscaping. While some ancient temples with manicured gardens charge a little amount as entrance fee, there are several pocket gardens around the corners that are free for all.

The Bamboo Grove in Arashiyama is one of the 17 UNESCO World Heritage Sites found in Kyoto. No entrance fee as well to see this. Place is flooded by tourist at around 9 am onwards.It is best to be early.

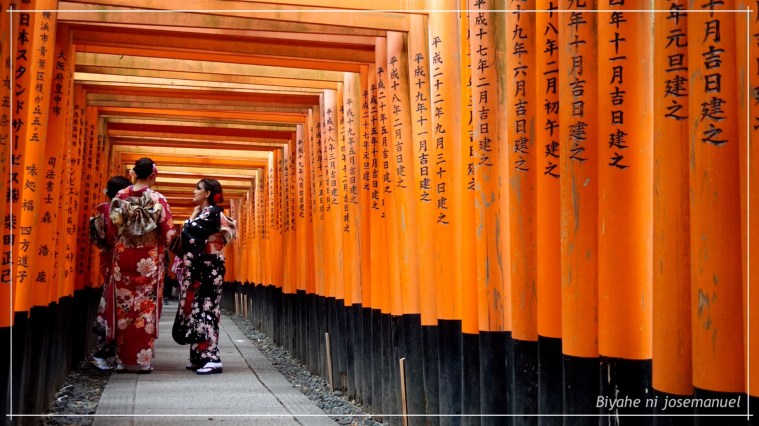
—Fushimi Inari Shrine – Shrine of the Ten Thousand Red Torii—

Fushimi Inari Taisha is the head shrine of the god Inari, located in Fushimi Ward in Kyoto. The shrine sits at the base of a mountain, also named Inari. This Shinto shrine is dedicated to Inari, the god of rice, sake, and prosperity. Shinto is Japan’s ethnic religion.

The establishment of the sacred grounds date back to 711 A.D. Today, the shrine is said to hold over 10,000 Torii (gates). A Torii is a traditional Japanese gate found at the entrance of a Shinto shrine, symbolically marking the transition from the earthly to the sacred.

Getting there: From Kyoto Station,take JR Nara Line to JR Inari Station. Train ride takes around 5 to 10 mins. The Shrine is just outside of the station. Fare: around 300 Yen (150 PHP) RT. No payment required if you have a JR (Train) Pass (See Pass details here). Entrance Fee: None for the shrine,as this is a public ground for worship. However, if opted, the museum entrance fee is only 300 yen, which includes access to some lovely displays on sake brewing as well as complimentary sake for guests to take home. Best time to visit: Morning at 7:30 AM. In my case however, I opted to visit Arashiyama in the morning and gambled with the flock of afternoon tourists in Inari. As such, I have no decent photo of myself. dami bombers. lol.

Josemanuelphonekyoto68

Tip: If time allows, you may proceed to Nara from Fushimi Inari, which is another tourist spot 30 minutes away from Inari Station (Same line, JR Pass covered as well).

—Gion District—

Gion is Kyoto’s entertainment district where the thriving Geisha culture is still being practiced. To see a Geisha woman (if you are lucky), be at Gion at about 5:30 p.m., where these women are on their way to the scheduled evening engagements, all made up in their traditional kimono and make up. Also in Gion is the Starbucks branch located inside a traditional tatami house.

Josemanuelphonekyoto77

Getting there: From Kyoto Station,take bus 100 or 206. Bus ride takes around 15 mins. Get off at Gion Bus Stop. Then use Google Maps to navigate. Gion district is just at the opposite side of the bus stop.Fare: around 200 Yen (100 PHP) RT. Entrance Fee: None. Best time to visit: late noon, 4 pm onwards for a chance to see the Geisha women.

—Kiyomizu-dera Temple—

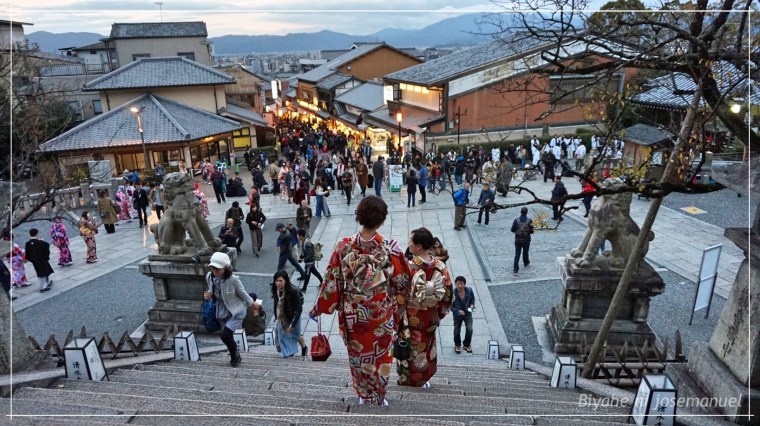
A short walk up the hill from Gion stands Kiyomizu-dera Buddhist Temple. The temple is part of the Historic Monuments of Ancient Kyoto UNESCO World Heritage site. The temple offers a great overlooking view of Kyoto.

Entrance Fee: 200 yen. Best time to visit: Sun down to evening.

josemanuelkyoto10

josemanuelkyoto7

Where to Stay in Kyoto:

K’s House Kyoto – Backpacker’s style accommodation. An overnight stay costs around 1400 to 1500 Pesos on weekdays (via agoda). Price differs for weekends.

Kyoto is a popular tourist destination, especially during autumn. As such, hostel prices are relatively high as compared to Osaka. When touring Kansai Area (Kyoto+Osaka+other nearby’s), it would probably be cheaper to stay in Osaka and just arrange a day visit to Kyoto, since these two cities are only 30-40 minutes apart by train (which is also included with the JR pass).

——000——-

I visited Kyoto together with Himeji and Hiroshima. Will post a complete costing on these 3 cities combined. Stay tuned. =)

For Japan Visa application guide, click here.

I flew to Narita(Tokyo) from Cebu City via Cebu Pacific Air daily direct flight. Kyoto is around 2.5 to 3 hours by train from Tokyo. For plane ticket bookings, click this.

Tokyo Three Days Itinerary For The Weekenders

Mga beshies and readers of mine from VisMin, may good news ko! Cebu Pacific will now be flying DAILY from Cebu to Tokyo-Narita and back starting December 1,2018. Excited much? Yes, we are!tokyjosemanuel40I once asked a travel-enthusiast friend why she keeps on coming back to Tokyo. She cheerfully gave me four reasons: the beautiful season-based cityscape,the ultra-modern facilities, the Ginza shopping district and the level up food trip experience. Tokyo,Japan is definitely among the top travel destinations of Filipinos for a lot of reasons. And with the CebPac daily flight from Mactan Airport, traveling to Tokyo shall now be more practical for us living in Visayas and Mindanao. Flying time only takes 4 to 4.5 hours.

Got a long weekend coming? Tara, lets go-Tokyo!

——-000——–

So, excited na mulaag? Wait lang, guys. Secure your Tourist Visa first. Wag kayong ano! Check the link below for guidelines.

Easy Japan Tourist Visa Guide for Filipinos

——-000——–

The Weekenders’ Itinerary:

Day Zero (Thursday): We left Cebu-Mactan Airport in the morning and arrived in Tokyo-Narita around 3:00pm. We went straight to Tokyo-Ginza shopping district because shopping is priority! Joke lang. I just window-shopped with my friends. The biggest Uniqlo  Flagship Store is located in Ginza. 12 Storeys lang naman, mga bes! All seasons Uniqlo products. bakanteha na imong credit card for this. 

Ginza district is lined with ultra-modern architecture and posh shop interiors to inspire every designer’s creative lobes.

Ginza district gets even more amazing with its bright lights at night.

Day One (Friday): Cultural Immersion Day.  We spent the day in Tokyo’s Old District-Asakusa for a temple visit and experience traditional Japanese hobbies.

  • Gold fish scooping activity at Asakusa Kingyo (Budget 1500 Yen/pax)
  • Sensō-ji -Asakusa Temple Visit (Free Entrance)
  • Traditional Candy Making at Ameshin-Asakusa (Budget 3000 Yen/Pax)
    • Address: Hanakawado Studio1F Hori bldg, 2-9-1 Hanakawado, Taito-kuHours: 10:30~18:00 Closed on Thursday.
    • (link: http://www.ame-shin.com/en/)

Day Two (Saturday): Modern Day Activities.  Here, we got to experience the latest ultra-modern entertainment facilities of Tokyo.

  • MORI Building Digital Art Museum by EPSON teamLab (Budget:3200 Yen/pax)
    • Interactive Visual Art Museum for all ages.
    • Location : Odaiba
  • Quick Photo Op at Gundam Statue in Diver City Mall, Odaiba

tokyjosemanuel93.jpg

  • Virtual Reality Amusement  Center at Sky Circus Sunshine 60 Observatory
    • (Budget : 1200 Yen/Pax + add fees on specific rides)
    • Business hours 10 AM to 10 PM

Sky Circus also offers one of the best overlooking views of Tokyo Metropolitan at sunset.

  • Night out at Shinjuku

Day Three (Sunday): Last minute shopping. Flight home is scheduled at around 2 PM. arrive in Cebu-Mactan Airport at around 6:30 pm

——-000——–

Where to Stay:

Option 1: Business Hotel

  • Hotel Villa Fontaine in Tamachi .
  • Top rated.
  • Budget : around 12,000 Yen/night.
  • High end toilet fixtures. Superb amenities. Breakfast Buffet included.
  • 10 mins, walking distance to Tamachi Station.

Option 2: Hostel Living-Capsule/Shared Room Type

  • Ryokan and Hostel Wasabi in Nippori, Tokyo.
  • Top rated.
  • Budget : 4000 to 5000 Yen/night
  • 2 minutes walk to Mikawashima Station (JR Jobar Line). 3 Stations away from Tokyo Station.

    ——–000000———

Rough Budgeting in Php (Sample expense breakdown using option 2, Hostel Stay)

  • Regular Airfare (4 months advance) with Cebu Pacific Direct 15,000 Pesos RT
  • Visa = 1,000 Pesos via travel agency
  • Data Sim = 800 Pesos via TravelSim PH
  • Hostel Wasabi = 2000 Pesos per Day x 3 days (Though there are cheaper options naman. google nyo nalang)
  • Food Allowance = 1500 Pesos per day x 3 days (I swear, Sapat na to if di ka nmn climber)
  • Transportation/Train rides = 700 per day x 3 days
  • IT Entrances/Souvenirs/other expenses = 10,000 Pesos
  • Total Estimated budget = 40,000 Pesos
  • Uniqlo Shopping = Swipe!
  • New Camera = Swipe! 12 months to pay.
  • Other Climber’s expenses= Swipe! Charot.

For ticket bookings, click here.

I purposely gave a realistic costing because it is better to fly prepared than maging dukha doon sa Japan. But kayang kaya naman to lower this costing; particularly on airfare. Alam ko, abangers tayo ng sale eh. hehe.

——–000000———

More Blog posts on Tokyo to Follow:

  1.  Tokyo Video-Blog
  2. Detailed Hostel Living in Tokyo Video-Blog
  3. Foodtrip Around Tokyo and Beyond
  4. Japanese 7-11. 1000 Yen Lunch Challenge Video-Blog
  5. Maximizing JR – Unlimited Bullet Train Pass . Is it worth the money?

Stay Tuned. =)

Easy Japan Tourist Visa Guide for Filipinos

Hi Guys! I just came back from my Japan trip and I will be posting a series of blogs re the ups and downs of my journey for everyone’s future travel reference. So much stories to tell; from all the bento kiosks and good ramen shops that I found, to getting lost on Japan’s massively overwhelming train network. But first, fundamental requirement muna tayo guys. I will be discussing below the basic requirements for Tourist Visa Application. Hope this helps!Collage_Fotor_Fotor.jpg

Now is really a good time to visit Japan as Cebu Pacific will start flying Daily from Cebu to Tokyo-Narita and back, starting December 1, 2018. This direct flight made the travel time more practical for us living in Visayas and Mindanao.  Flight only takes 4 to 4.5 Hours. And we don’t have to go though any NAIA fiasco na. Cebu-Mactan Airport is more chill (I swear!) and Prettier.

BASIC TOURIST VISA REQUIREMENTS (SINGLE ENTRY)

  • Philippine passport. Must have a signature and at least 2 blank pages. Must have at least 6-months validity.
  • A duly filled up visa application form. You may download it at https://www.ph.emb-japan.go.jp/files/000163096.pdf
  • ID picture. 4.5cm x 4.5 cm. Write your name and birthdate on the back side. Paste it on the application form.
  • Birth certificate from PSA. Must be issued within the past one year. Old birth certificates issued with NSO logo is not valid anymore. Dapat yung colored paper na with PSA logo, which you can order and pay online via https://nsohelpline.ph .  If may alterations or errors on your birth details, settle that muna with the agency.
  • Marriage certificate from PSA. Only if you’re married. If not, deadma.
  • Daily schedule. Your itinerary in Japan. It doesn’t have to be super detailed. Just indicate your projected date of arrival and departure, and the places you wish to visit during your stay on a day to day format (Day 0, Day 1, Day 2 etc).
  • Income tax return Photocopy (ITR Form 2316 for employees or Form 1701 for self employed). I also submitted the receipt or Landbank Deposit Slip for the ITR.
  • Bank certificate. Issued within the past 3 months. This part is very subjective. Some blogs say you are supposed to maintain +++100,000 Pesos. But i know people who had 50,000 Pesos only for a proposed 3 days trip, and she still got approved.
  • Optional na, but it is also best to submit a certificate of employment with your salary, position and company contact information. This will help you prove that you are indeed returning to the Ph and will not be TNT there. If self employed, a copy of your DTI Registration will suffice.
  • Photocopy of other government ID’s like SSS, Tin, Pag ibig, Postal, if have lang. but optional. Photocopy of Company ID also if employed. provide 3 specimen signatures on every copy.

Tips and Reminders

  • All documents, application form, itinerary etc must be printed on an A4-size paper.
  • Do not Staple or fold your documents. Folder nyo lang with clip.
  • Printed or hand written application form is OK. Black ink is preferred. No erasures.
  • If you cannot provide ITR and employment certificate, you may still take your shot by writing a cover letter explaining your side. Pero magdasal ka na. lol
  • And as I always recommend to my readers, especially for first timers, that “if you are unsure of the process, get a travel agency to sort out your documents for a fee.” For Davao residents, Traveloft, Inc. can assist you. (https://www.facebook.com/traveloft.davao/ )
  • We are NOT required to book flight or hotel yet. However, the application asks for a flight number and an address in Japan. To get a flight number, just log on to Cebu Pacific website and get the regular flight details. For the address in Japan, just write down your desired hostel or hotel (realistic to your budget/bank certificate, of course). The travel agency can help you with this.
  • Unlike other visa processes, Japan visa application cannot be submitted directly to the Japanese Embassy. All applications must be submitted through an accredited travel agency.  For the list, visit https://www.ph.emb-japan.go.jp/itpr_ja/00_000253.html; or just go to your trusted travel and tour, they can probably connect you to the nearest accredited agency in your region.
  • Application fee is at 1000 to 1,500 Pesos.
  • Once approved , your passport with visa sticker will be returned to you via your chosen agency. Releasing time takes 5 to 10 working days.
  • Application may be submitted as early as 3 months before your travel date.  Single entry Visa usually allows 15 days stay, at 90 days validity upon approval.
  • And lastly guys, this guide, like any other guide blogs, do not assure 100% approval. Ang iyong kapalaran ay nakasalalay parin sa iyong mga sariling kamay, kung malinis ba ito o hinde. Charot! Just provide all necessary documents and pray for the stars to align in your favour. Charot again! Mag patulong kayo sa travel agency oi!

And that’s it! I hope this checklist will be of help sa mga mag aapply.  Please note that this application guide only tackles Single Entry Tourist Visa. For Multiple Entry Tourist Visa, I will post a separate blog on that, if I got one na. For other types of Visa such as business, seafarer or Fiance, please check the Japanese Embassy website for the specific guidelines. For Application with Guarantor or sponsoring relatives in Japan, refer also to the embassy for your specific process.

To check on flight schedules, click here official Cebu Pacific Website.


Random Shots:Queenstown,New Zealand

Queenstown, the scenic South Island holiday spot, is probably the most popular destination in New Zealand among international visitors. Queenstown was once a gold mining town. But today, the city is a favoured destination for high-octane outdoor activities and mountain climbing. Although the place is hyped by its outdoor-ish image, Queenstown will still be fully enjoyed by vacationers who prefer laid back strolls and a lazy trip of sightseeing and dining experience. Count us in on that! Here are some of the snapshots and must sees for the lazy vacationers like me.

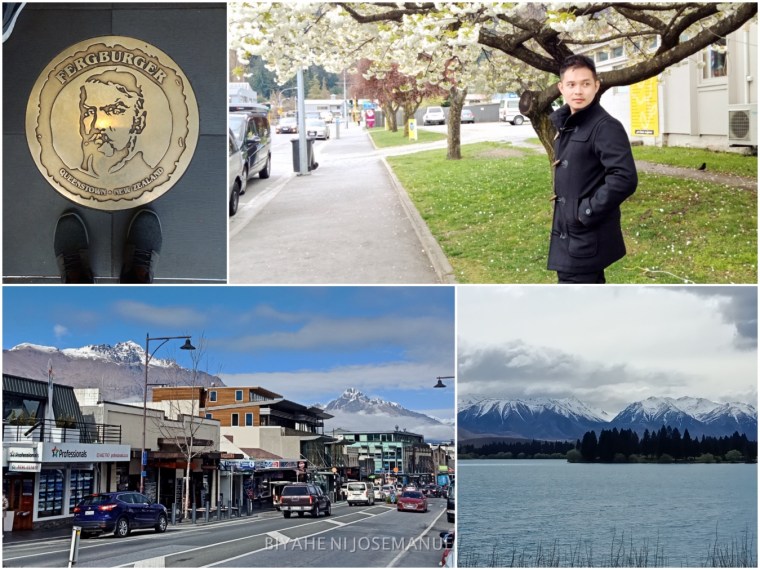
collagenzaustralia6Queenstown sits on the shores of the South Island’s Lake Wakatipu, set against the dramatic Southern Alps. Imagine the view, guys! With such background, uhmm… perfect jud mag model model. loljoke. Pose anywhere you like because every corner of this town is seriously photogenic and is entrance free!

queenstownjosemanuel23queenstownjosemanuel38

Queenstown is also a heaven for foodies. Must try is the ever famous Fergburger. Giant Angus Beef Patty in a seriously hefty set of bun with everything in it. This burger has become a NZ culture in itself. A Staple must try in Queenstown, that lines can already be seen even at an early 8 A.M. And since Queenstown is a holiday spot that never run out of tourists, fergburger closes at 5 A.M. For the employees, rest is only for the weak. lol. Fergburger is priced at 18 Dollars (700 Pesos) but it could seriously feed 2 hungry pax or 4 Annilou’s (A friend with small appetite).  Typical complete meal in NZ by the way is between 10 to 18 Dollars for a sandwich/burger and 15 to 22 Dollars for a rice or Middle Eastern meal. Coffee is usually at 6 Dollars up.

Puhoi Chocolate drink is also a must try! just around 4 Dollars (P 160) a bottle.  Don’t be bothered by the cold, Patagonia Ice cream is also a must try.

The highlight of this trip really is my first Snow experience. Lol! As a boy from the sun-burnt city of General Santos, getting up close and personal with snow is a seriously big deal! So yeah, me and Richmon went up the Coronet Peak where the Remarkables Ski field is located. The highest point of the peak is at 1,649-metre.

The 45 -mins. bus ride from Queenstown costs 20 Dollars (800 Pesos) RT. There is a specific bus solely serving this route every hour during the day. Just ask around sa mall where to fine the Remarkables office. QT town centre is pretty small, you definitely won’t miss a thing.

Photos by Richmon. Entirely shot using #Oppo. collagenzaustralia3

  • Entrance to the ski field is free of charge.
  • Ski experience starts at 130 Dollars(5,500 Pesos) with gears and coaching.
  •  Lockers are available for 10 Dollars (400 Pesos).
  • Drinking water is free,as to everywhere in New Zealand. Tap water is very safe to drink,by the way.
  • Wearing sunblock is a must due to direct exposure to the sun (even if it’s cold up there).
  • Don’t forget to bring a Shaded  Eyewear as the entire peak is almost entirely covered with white and it is seriously glaring.
  • Dress appropriately. Layer is a must. Plus a non-slip closed footwear. Snow covered ground is slippery.
  • A Legit food hall is available. usual prices are at 12 to 16 Dollars( 500 to 700 Pesos) per meal.
  • Bring Milk, ube and others to enjoy your own halo-halo up there. Loljk. Do not eat the snow.
  • Start a snowball fight if you like.

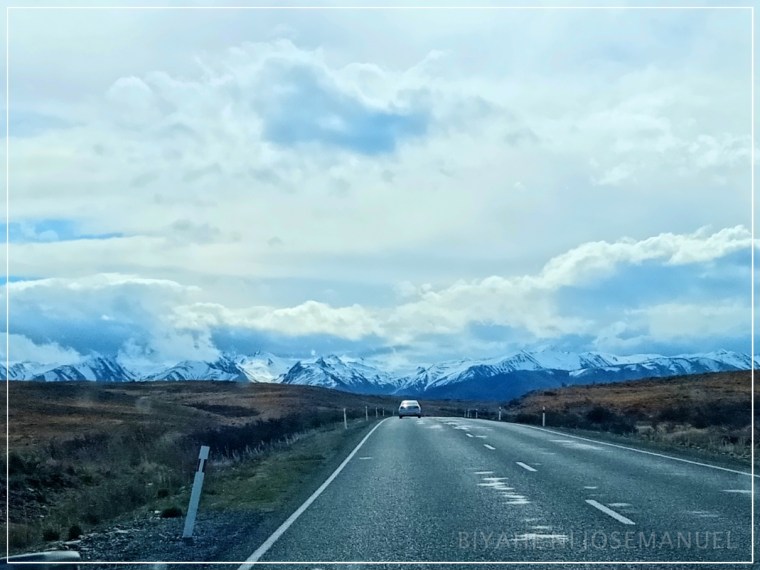
Queenstown is served by its own International Airport. However, we opted to land in Christchurch and drove our way to QT via Lake Tekapo. That’s 7-8 hours of scenic ride. Our road trip was hosted by Richmon’s brother, Eric, who is based in Christchurch.

Lol! Full blog of this to follow! Watch out. =)

Christchurch blog here. https://iamjosemanuel.com/2018/11/02/random-shotschristchurchnew-zealand/

Visa Application link here. https://iamjosemanuel.com/2018/04/22/new-zealand-tourist-visa-for-filipinos-2018-online-application-guide-with-photos/

Random Snapshots:Lake Tekapo,New Zealand

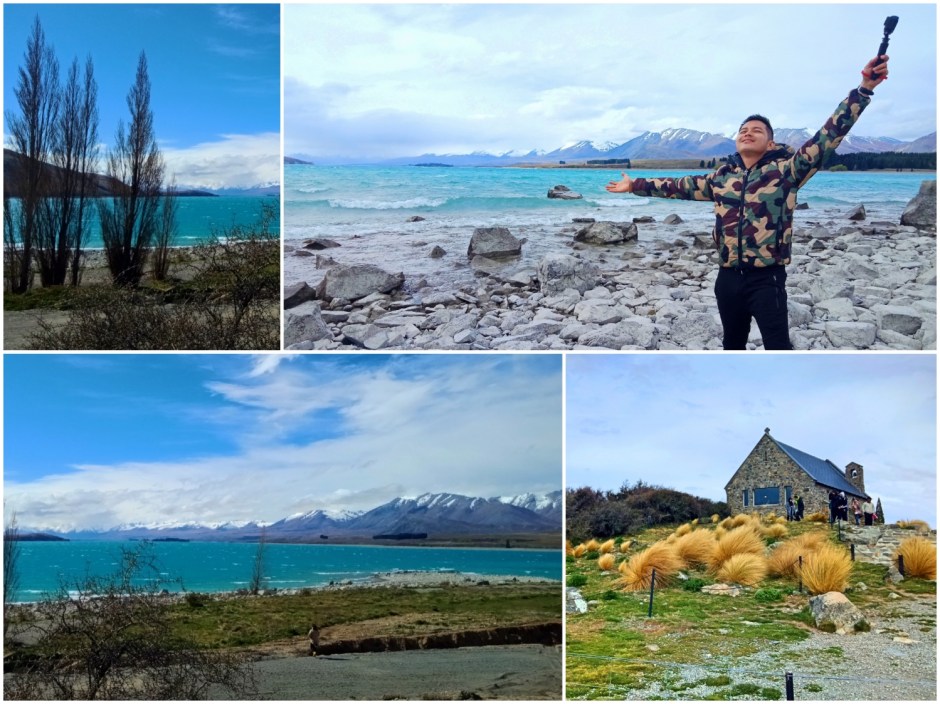
Without any reservations, Lake Tekapo is one of the most beautiful places I’ve visited on earth. We only stayed here for a few hours during our way to Queenstown, but the place left me in wonderment. Truly an unforgettable sight to treasure.

Picturesque by day and dazzling by night, Lake Tekapo is part of a UNESCO Dark Sky Reserve, making it the perfect spot for stargazing.  queenstownjosemanuel15On the shores on the lake you’ll see the beautiful Church of the Good Shepherd, where the altar window frames a perfect view of the Southern Alps beyond the lake (newzealand.com)queenstownjosemanuel16Lake Tekapo is about three hours drive south-west of Christchurch in the Mackenzie Basin. The township faces north across the remarkable turquoise coloured lake to the mountainous drama of the Southern Alps. Lake Tekapo gets its intense milky-turquoise colour from the fine rock-flour (ground by glaciers) which is suspended in the water.queenstownjosemanuel59Best seen between April and September, Lake Tekapo is known for it’s clear nights and lack of light pollution, making it a great viewing destination. queenstownjosemanuel13Wasn’t able to experience Tekapo star gazing though. More reason for me to revisit the place someday. An overnight stay would have been ideal. queenstownjosemanuel18Passing through Lake Tekapo, it took four more hours to reach Queenstown. There are bus tours that covers these place from Christchurch, but the best option for tourist really is to rent a car and drive at your own pace and stops. Our road trip was hosted by my Richmon’s brother, Eric.

Video Blog of the whole roadtrip shall be uploaded very soon.

——-000——–

Here’s a preview of Queenstown. Lakas maka artista ng place. Chos!

collagenzaustralia6

collagenzaustralia3

Visa Application link here.https://iamjosemanuel.com/2018/04/22/new-zealand-tourist-visa-for-filipinos-2018-online-application-guide-with-photos/

Random Shots:Christchurch,New Zealand

New Zealand is mainly divided by two large islands; the Te Ika-a-Maui  of the North, named after the sacred fish of Maui, and the Te Waipounamu of the South, which means “rivers of green stone”. Popular NZ destinations like Auckland and Wellington is located in the North Island, while Christchurch and Queenstown is located in the South.

For this New Zealand trip, we spent most of our days in the South where my companion’s family resides. From Auckland, we flew 2 hours by Air New Zealand to Christchurch. We also did a road trip to Queenstown via Tekapo, which was the highlight of this vacation. I shall have a separate post on that. For now, here are some snapshots around the lovely city. Big shoutout and Thanks to Richmon’s brother, Eric, for hosting and touring us around.

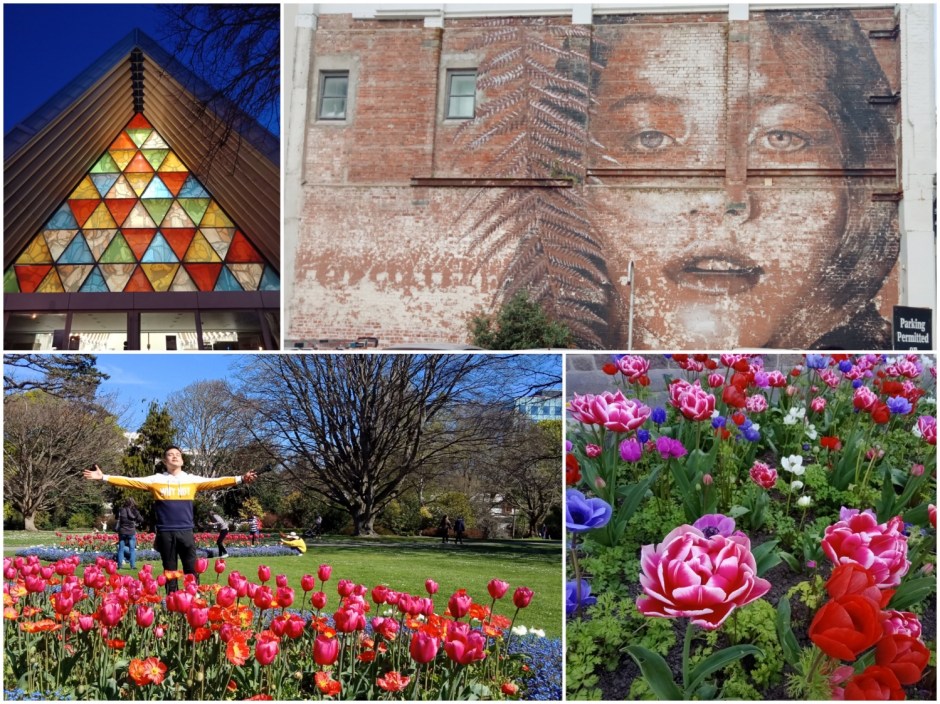
We popularly see September, October, November as Fall/Autumn months as it happens across Europe, Korea,Japan and the Americas. It is different, however, on the lands down-under, as these months are Springtime. This is the perfect time to visit as the weather is expectedly favourable and colours are popping out everywhere. In addition, you still get to experience snow on the higher grounds (such as in Queenstown during our trip).

queenstownjosemanuel1

The Botanical Garden in Christchurch is a must see. The Museum is also located inside the garden compound. And it’s free of charge.

queenstownjosemanuel3

The City also boasts its Architecture. Streets are lined with contemporary buildings, using current materials and methods of construction. There are no high rises though; mostly low to mid-rise. Must sees are the The Cardboard Cathedral (a transitional Anglican Diocese of Christchurch with colorful facade) and the Hoyst Cinema Building. Check out the interiors as well.


Enthusiasts of architecture will definitely enjoy a stroll around the city centre, which is fairly walkable, with patches of greens and tree-lined parks and a charming- well cared stream the flows across the park. Wall murals and are also a thing around Christchurch.

Model model around the streets is also tolerated in Christchurch. Lol.

Drop by Rockpool bar at Hereford St. for some tummy fillers that will never disappoint. Their BBQ Ribs and Smoked Salmon Pasta are to die for.

Queenstown blog is up next. Stay tuned. =)

Going to NZ? Check out this EASY TOURIST VISA Application guide here link. https://iamjosemanuel.com/2018/04/22/new-zealand-tourist-visa-for-filipinos-2018-online-application-guide-with-photos/

Auckland Photos are also shared here. https://iamjosemanuel.com/2018/10/30/random-snapshots-aucklandnew-zealand/

Random Snapshots: Auckland,New Zealand

Dreamy, surreal, unspoilt scenery. After visiting New Zealand, a whole new level of appreciation for a foreign land had been set.

Dream-like ocean views, lush green valleys, snow capped surrounding mountains, our short trip to New Zealand offered us a glimpse of good things that the country offers. The country enjoys peace, progress, opportunities and abundance. No wonder a lot of our Filipino friends opted to relocate there. Nasabi ko din actually sa sarili ko, ” I want to live here”.

Arriving in Auckland, me and Richmon opted to see in the capital city muna, before we headed to the south island where his family lives.  In Auckland, we were hosted by Richmon’s relatives, Ate Mary Ann and Kuya Mario Molera, who’s been living in NZ already since the 1990’s.

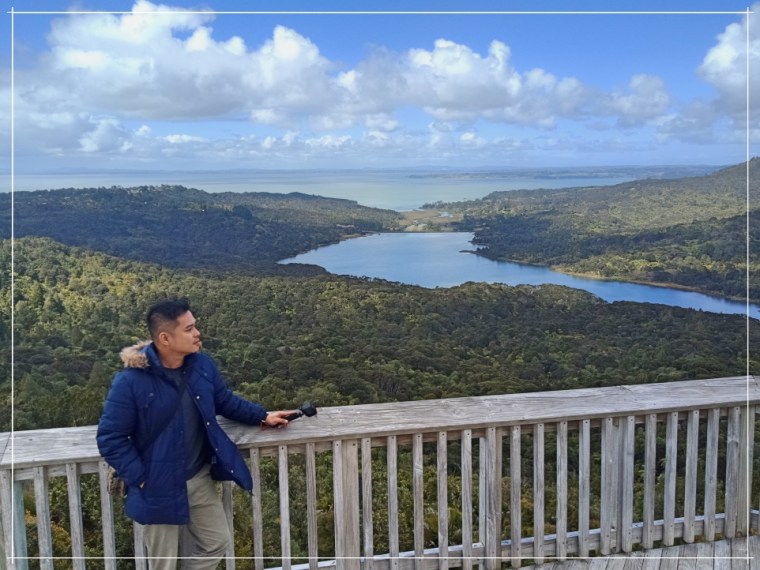
Having only two nights to spend definitely wasn’t enough to see all the nearby spots. With out limited time, we opted to see the natural sceneries of the west coast, instead of driving to the popular Rotorua and Hobbiton down south. Together with our lovely hosts, we did a road trip west of Henderson to the surreal ocean views facing the Australian-Tasman Sea.

Here are some snapshots of our DIY west coast day tour plus a glimpse of Auckland downtown. All thanks to Kuya Mario and Ate Mary Ann! =)

aucklandjosemanuel2
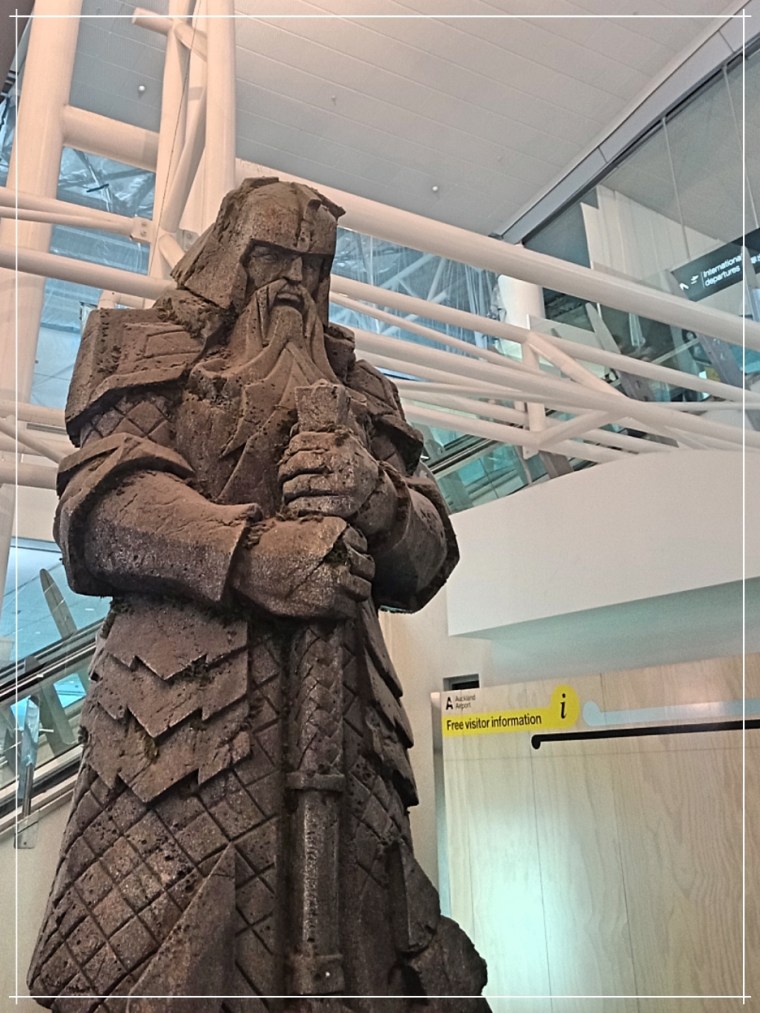
Auckland International Airport gave the Middle Earth feels as these giant 16′ Dwarven statues greet you at the arrival lounge. 

aucklandjosemanuel7

aucklandjosemanuel6
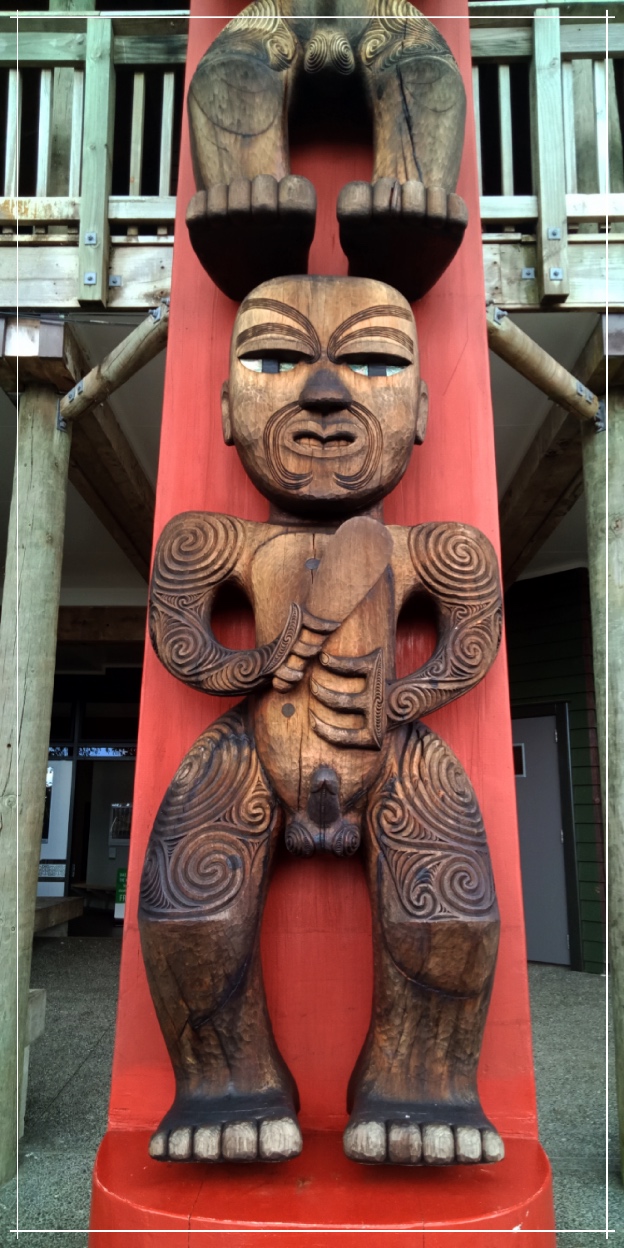
Arataki Visitors’ Centre

aucklandjosemanuel13

aucklandjosemanuel12
Muriwai Beach
IMG20180928151508
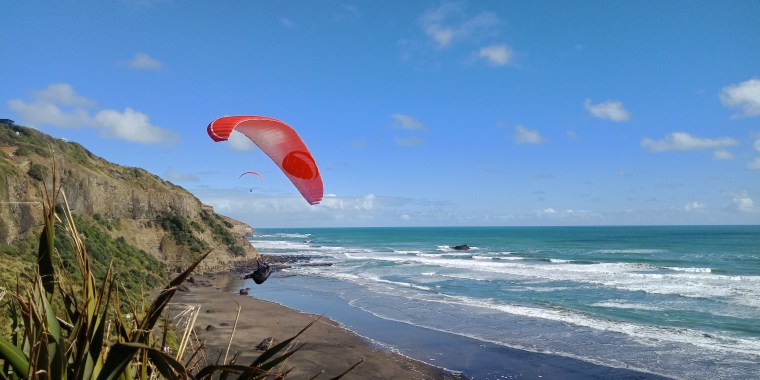
Paragliding around Muriwai Coast

aucklandjosemanuel23

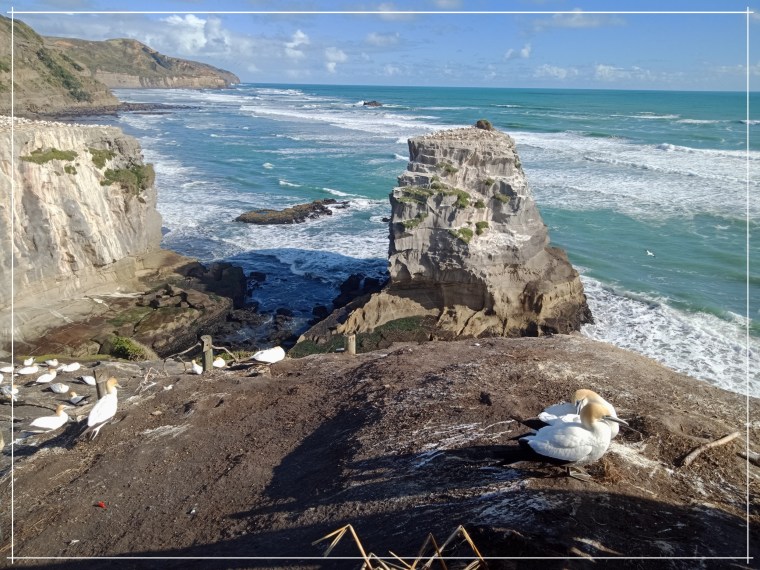
The Highlight of this day tour was definitely seeing flocks of migratory Gannet birds nesting on their natural habitat by the cliffs of Muriwai. Surreal experience to! I did not expect seeing this at all. Kuya Mario did not mention. It was a surprise!

aucklandjosemanuel21
Gannet Bird Sanctuary at Muriwai Cliffs

aucklandjosemanuel22aucklandjosemanuel24aucklandjosemanuel25

Here are some random shots and binge eating moments around Auckland City.

aucklandjosemanuel3

aucklandjosemanuel20
The Auckland Crew

And this concludes our two nights stay in Auckland. Christchurch and Queenstown are up next. Stay tuned.

We flew to Auckland, NZ with AirasiaX Via Kuala Lumpur; smooth nine hours travel time, with a quick – 90 minutes lay over in Gold Coast, Australia. Airport Transit Visa to Australia shall only apply if your lay over exceeds 4 hours.  So for this trip, no need!

How we secured our NZ Tourist Visa?  Check my detailed blog on the link below . below https://iamjosemanuel.com/2018/04/22/new-zealand-tourist-visa-for-filipinos-2018-online-application-guide-with-photos/