Highlights of Malaysia ASEAN Influencers Programme (MAIKOL 2019)

Last August 26 to 31,2019, twenty five active bloggers and influencers from different ASEAN countries gathered in Kuala Lumpur, to participate in the Malaysia ASEAN Influencers and Key Opinion Leaders programme (MAIKOL 2019). The 6-days programme offered the participants a fun and engaging ‘Experience Malaysia’ activities and cultural exposure, aiming to promote Visit Malaysia 2020 tourism campaign.

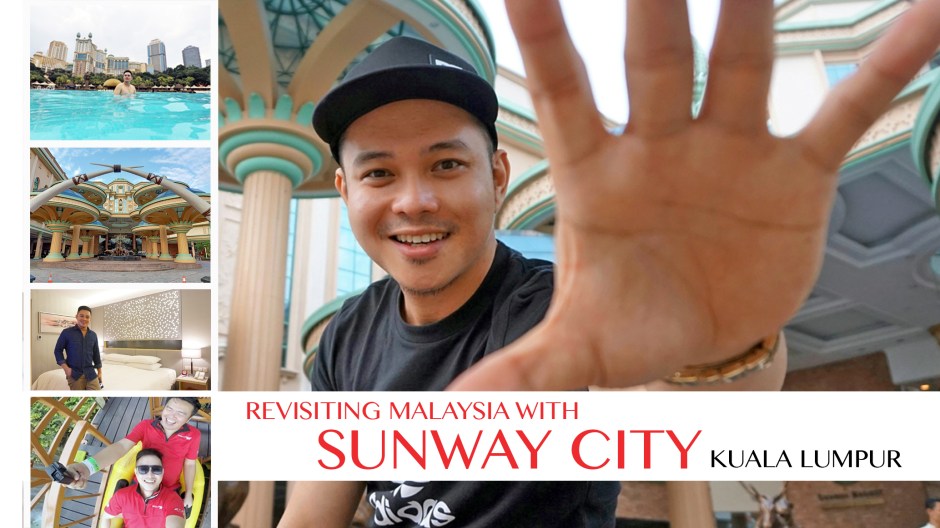
The programme was spearheaded by Tourism Malaysia of the Ministry of Tourism, Arts and Culture (Malaysia). They participants were hosted and sponsored by Sunway City Kuala Lumpur, with Airasia as partner airline.

Day 01

The activity kicked off at Kuala Lumpur. Day 01, the arrival day, was all about introduction, preparation and briefing over a sumptuous Malaysian dinner with the officers and major sponsors.

Day 02

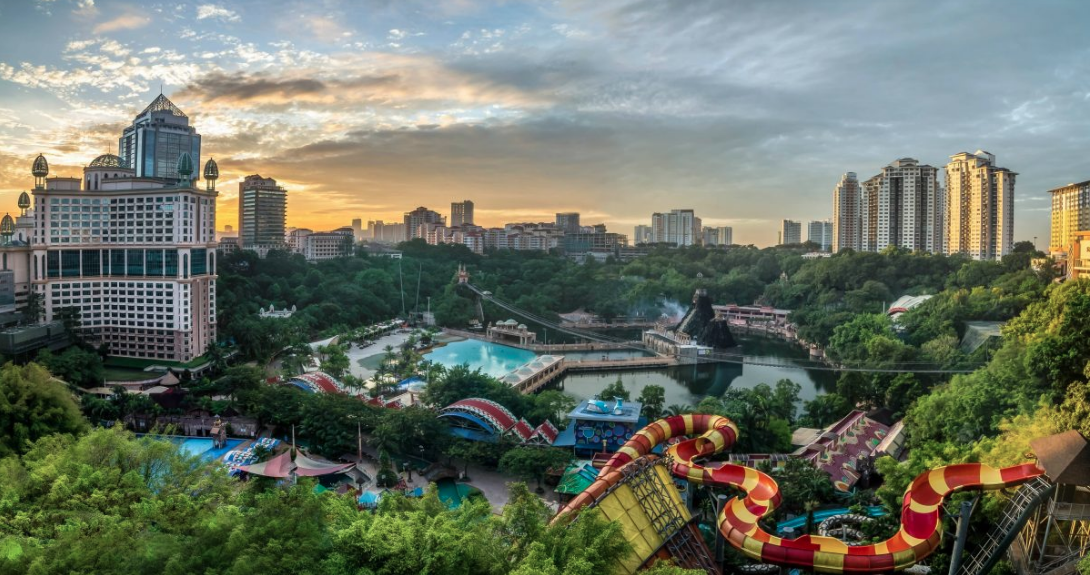
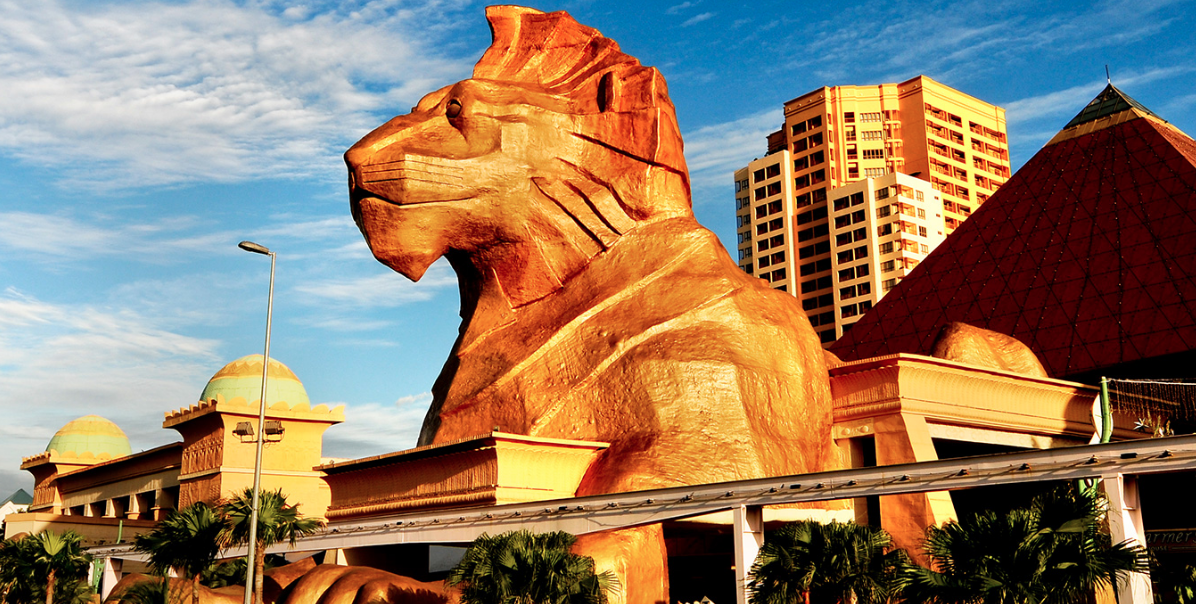
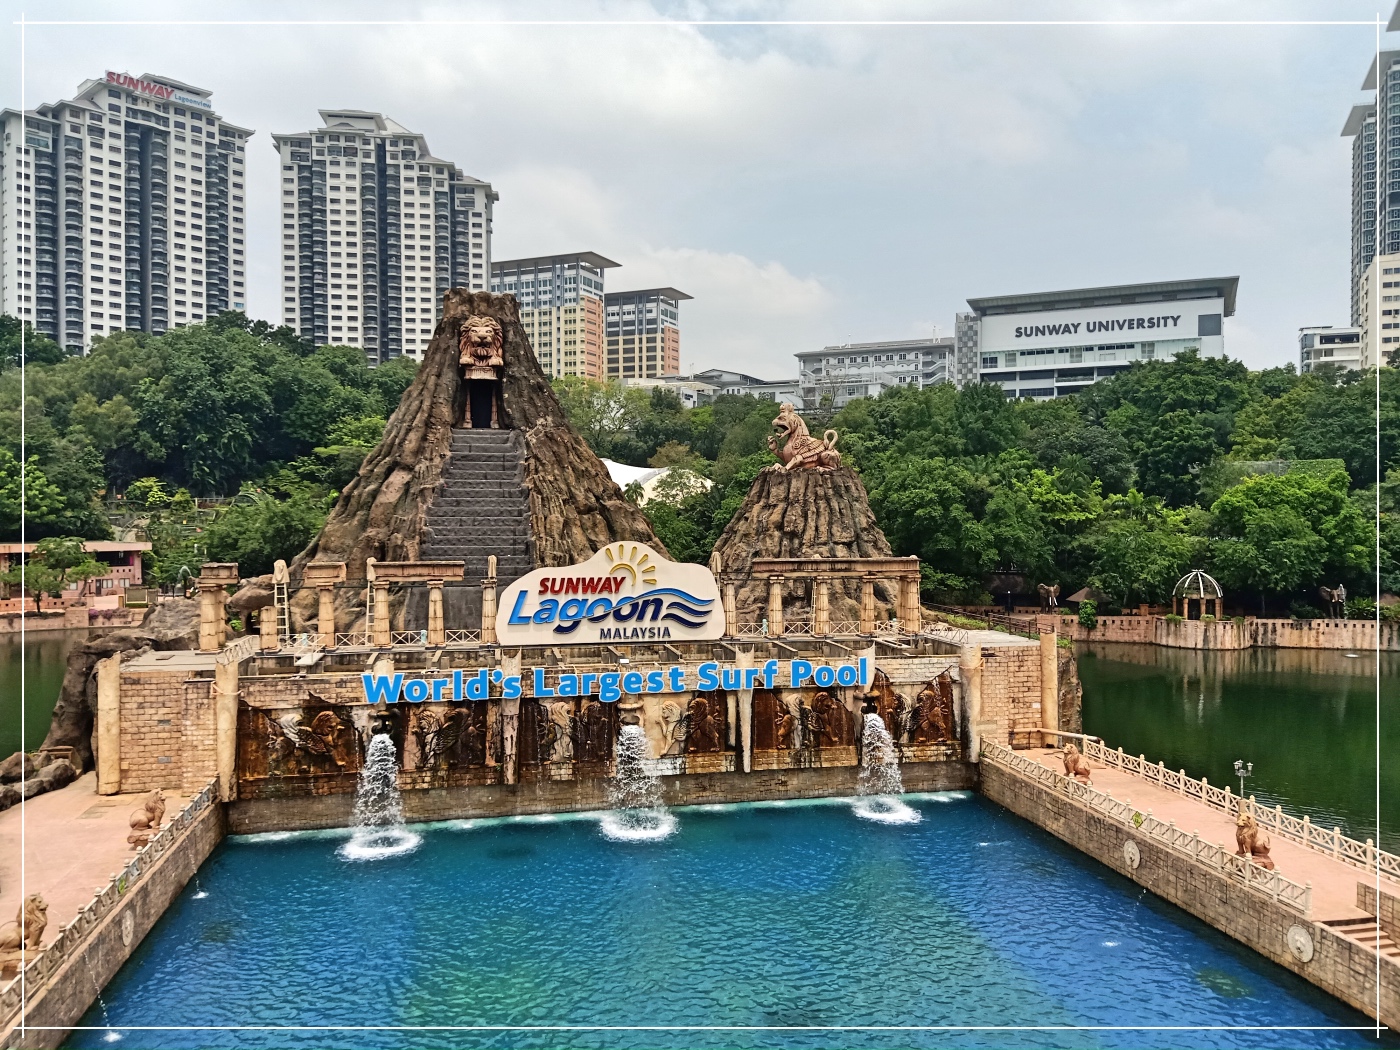
Day 02 was a highlight, as the participants spent one day to enjoy Sunway Lagoon Amusement Park. Among the popular rides were the river rapids and scream coaster. Day 02 afternoon was spent at the Sunway Lagoon, which is the world’s largest surf pool to date. Check out the complete Sunway Experience and short video blog by clicking here.

Day 03 

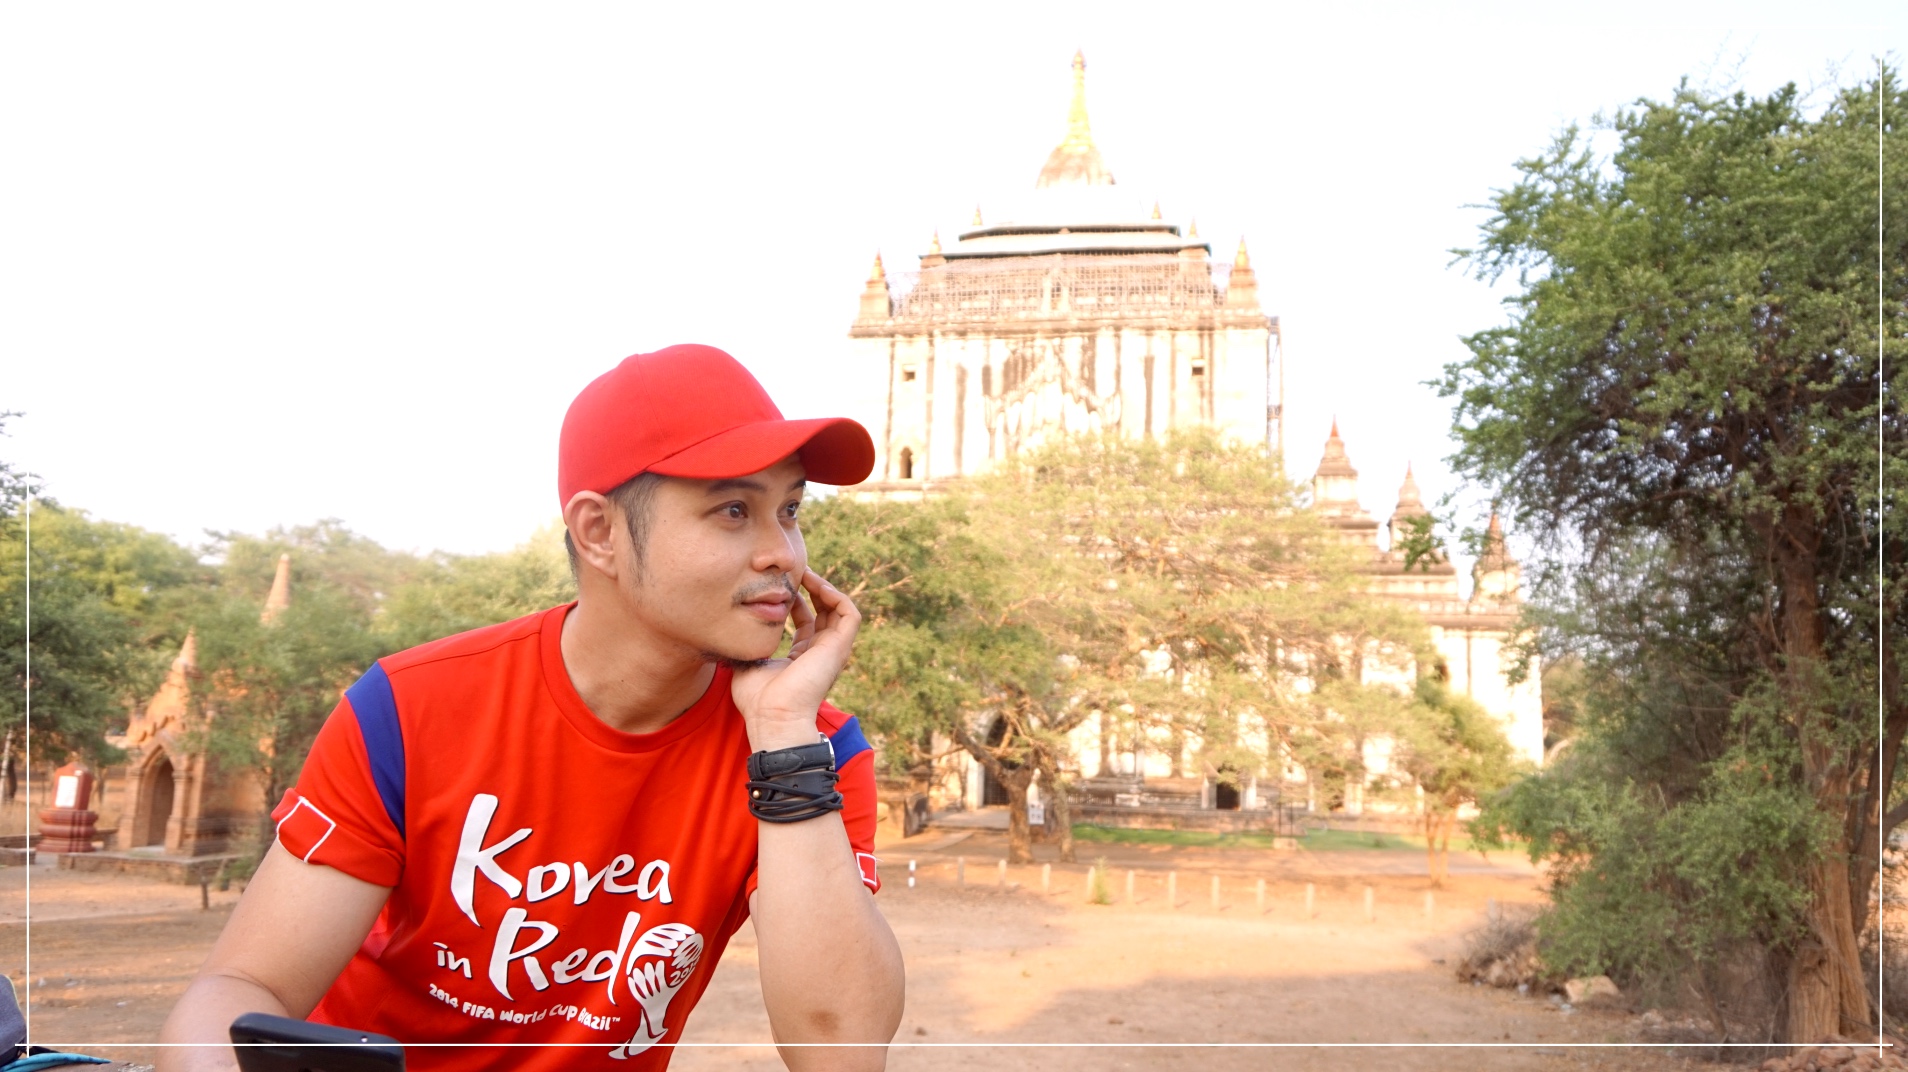
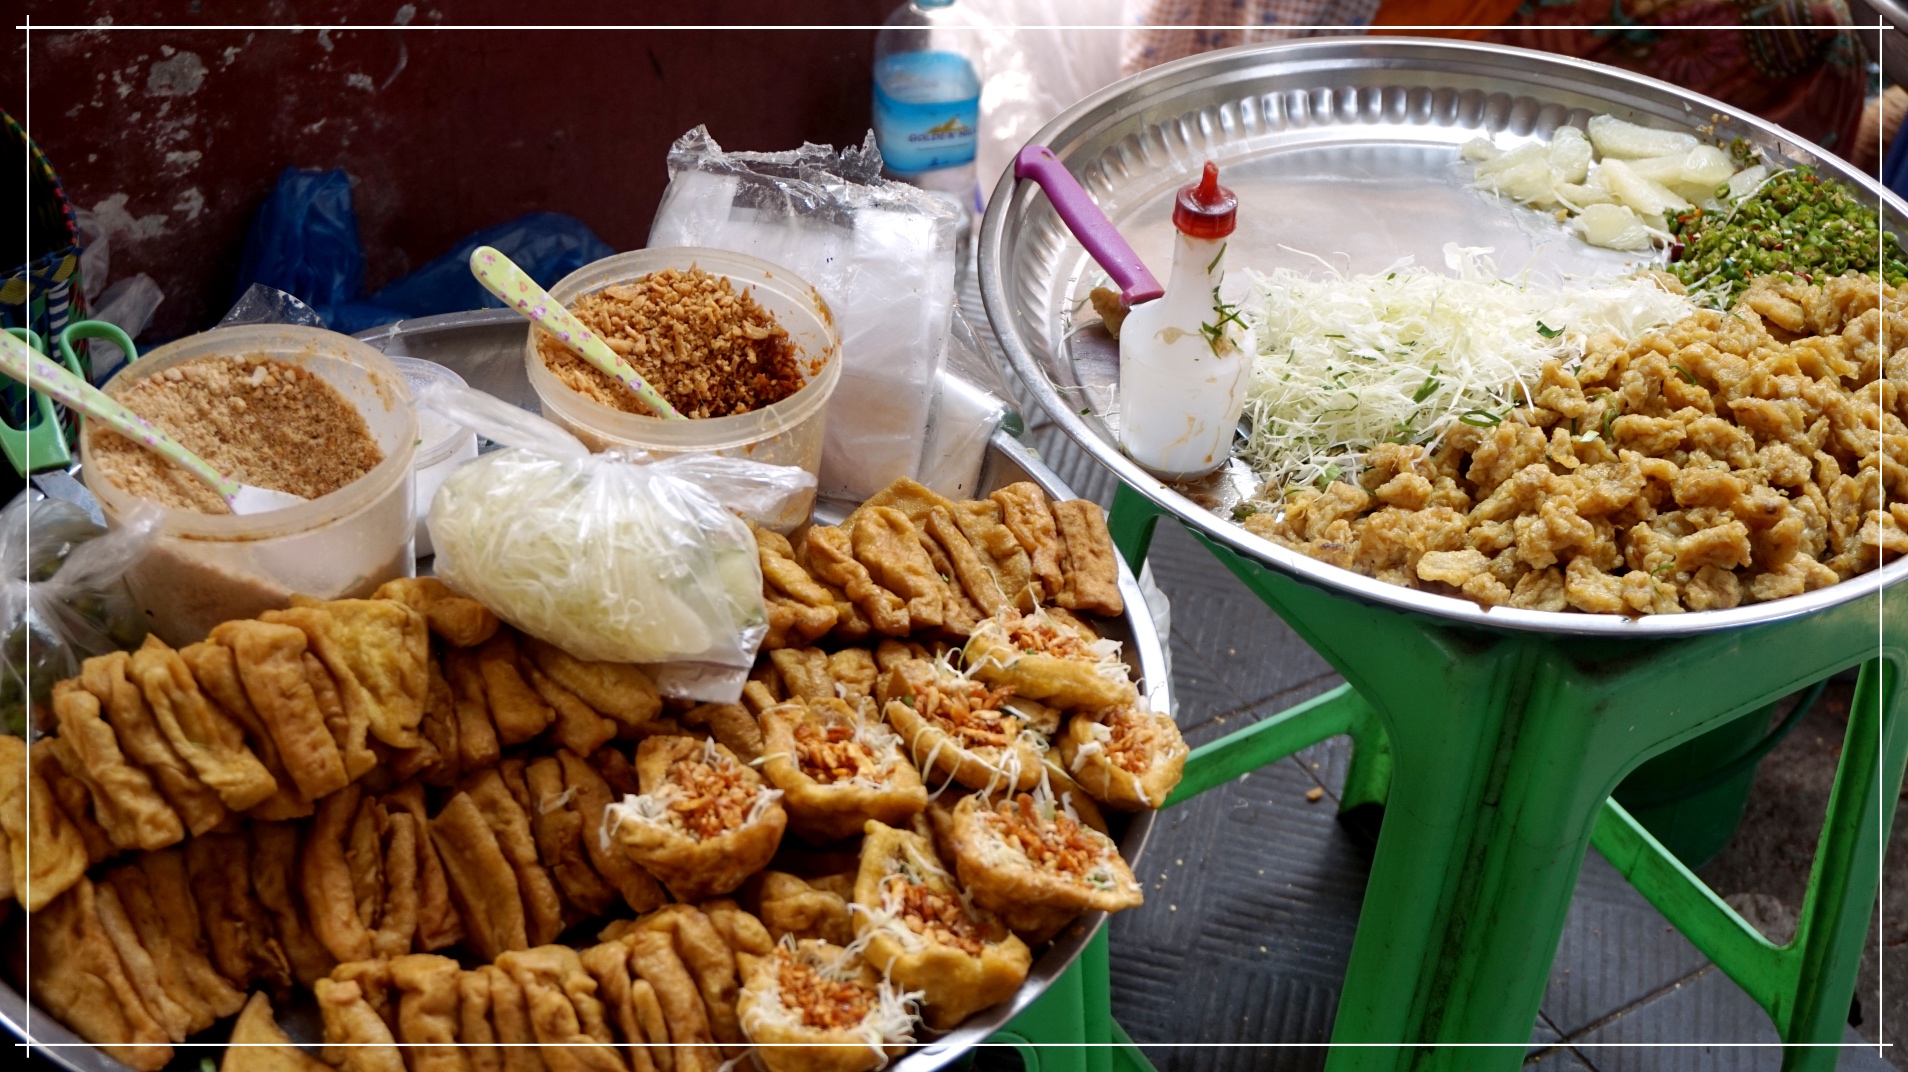
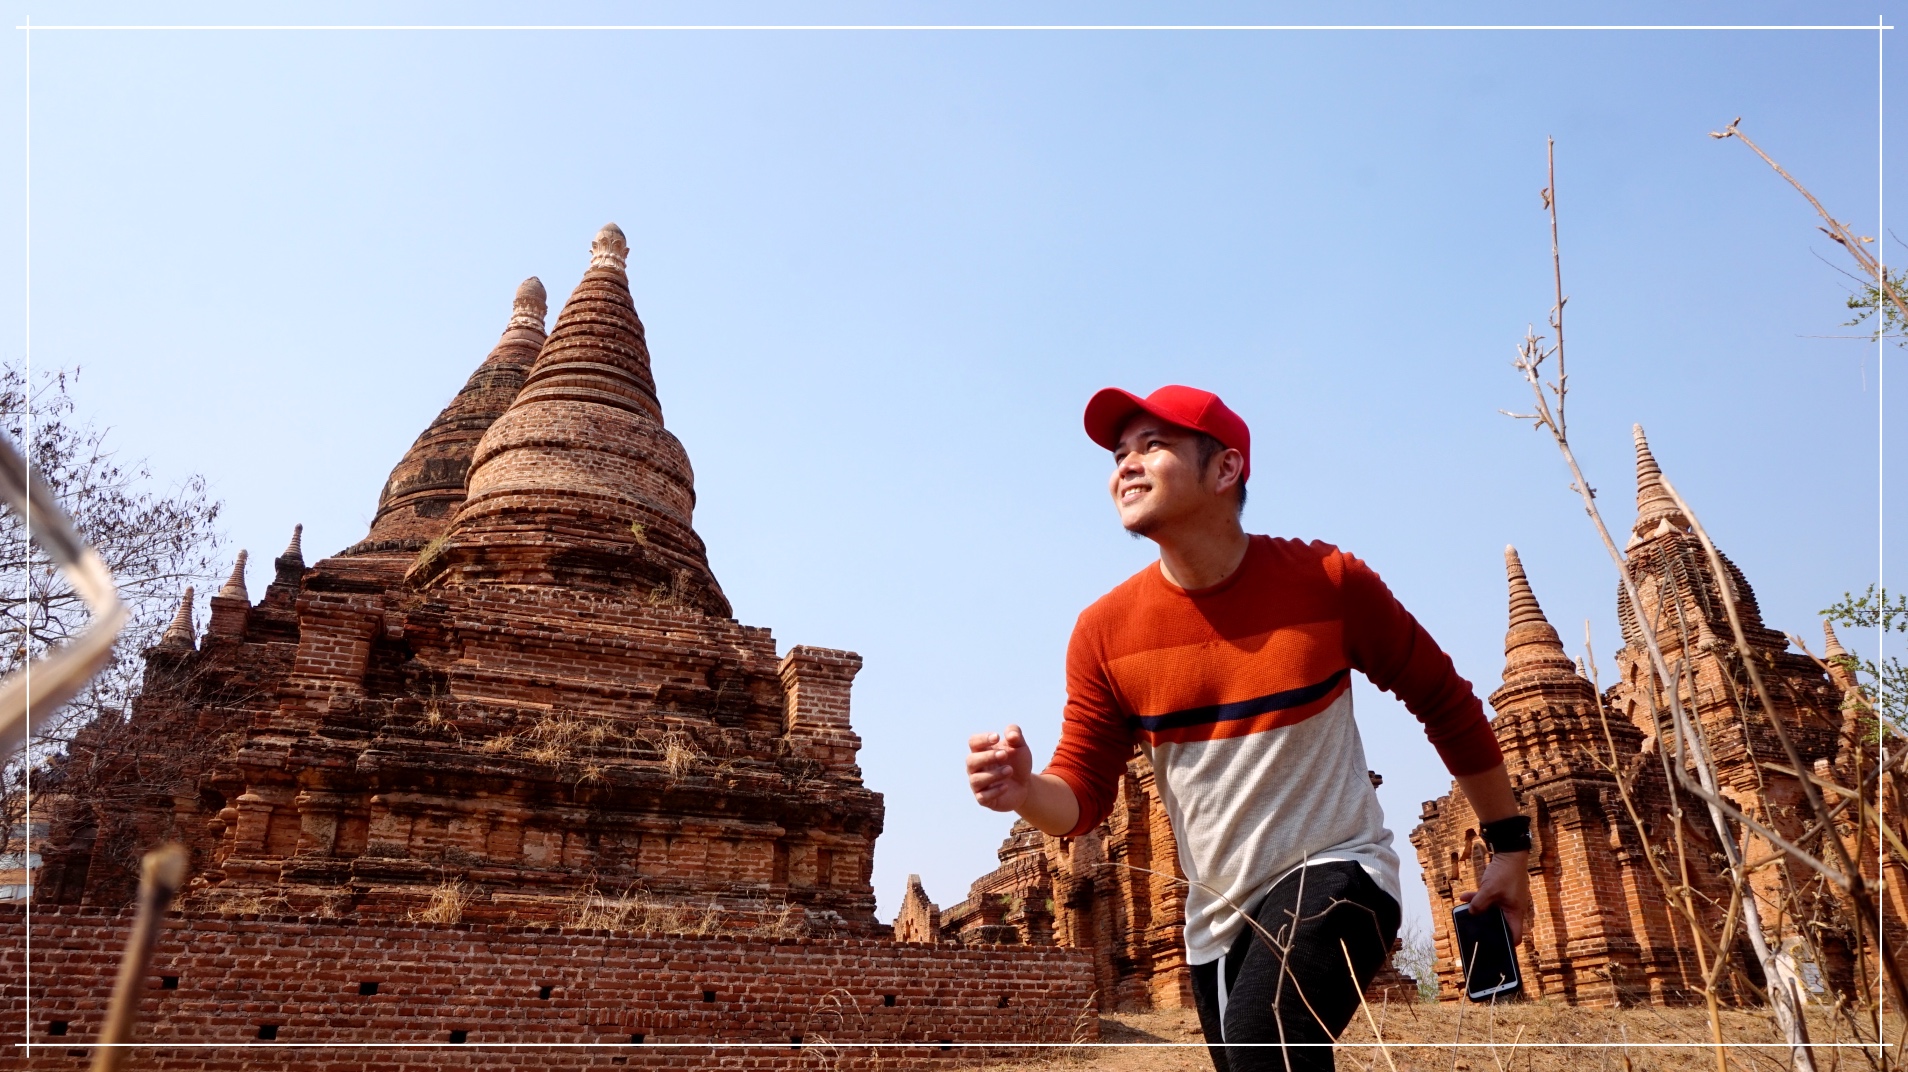
The main assignment of the activity was to let the participants see and experience Malaysia beyond the metropolis of Kuala Lumpur. On day 03, all twenty five bloggers and influencers were sent as solo travelers or in pairs to different provinces across the country, given the freedom to make their own itineraries at the assigned place for 2 days. A number of participants took the intercity train to Kedah, Ipoh etc. Two participants explored Sarawak. Reggy (Indonesia), Sam (Cambodia) and I flew to Sabah. I was particularly assigned to visit Tawau and Lahad Datu, which is located on the east coast of Sabah. My flight took three hours per way by Airasia direct.

Tawau, Sabah

Beautifully set at the east coast and facing Celebes Sea, Tawau is the third-largest town in Sabah, after Kota Kinabalu and Sandakan. Tawau is a fast developing industrial town, mainly sourcing on Palm Oil industry.  Blessed with fertile soil, Tawau is also popular for their cocoa products, which is said to be among the best chocolate raw material producers in the world. Apart from its industrial image, Tawau is best known as the gateway to some of the most well preserved rainforest and conservation areas in Malaysia (in the world actually). It is impossible not to notice its lush green hills and flat lands as the plane is descending.  Among the highlights of my Tawau Trip was a quick half day trek to the Tawau Hills Park rainforest and see some of the tallest rainforest trees in the world up close. A trip to the popular Teck Guan Coco Museum is also worth mentioning. I hoarded boxes of chocolate drinks, as they are perfect giveaway to friends.

At the entrance way of Tawau Hills Park.

If given more time, it would have been nice to drive two more hours to Semporna and the other beach resort-islands, which is said to offer one of the best diving and snorkeling sites in the world. For tours, you may get in touch with Sabah booking though their official website by clicking here.

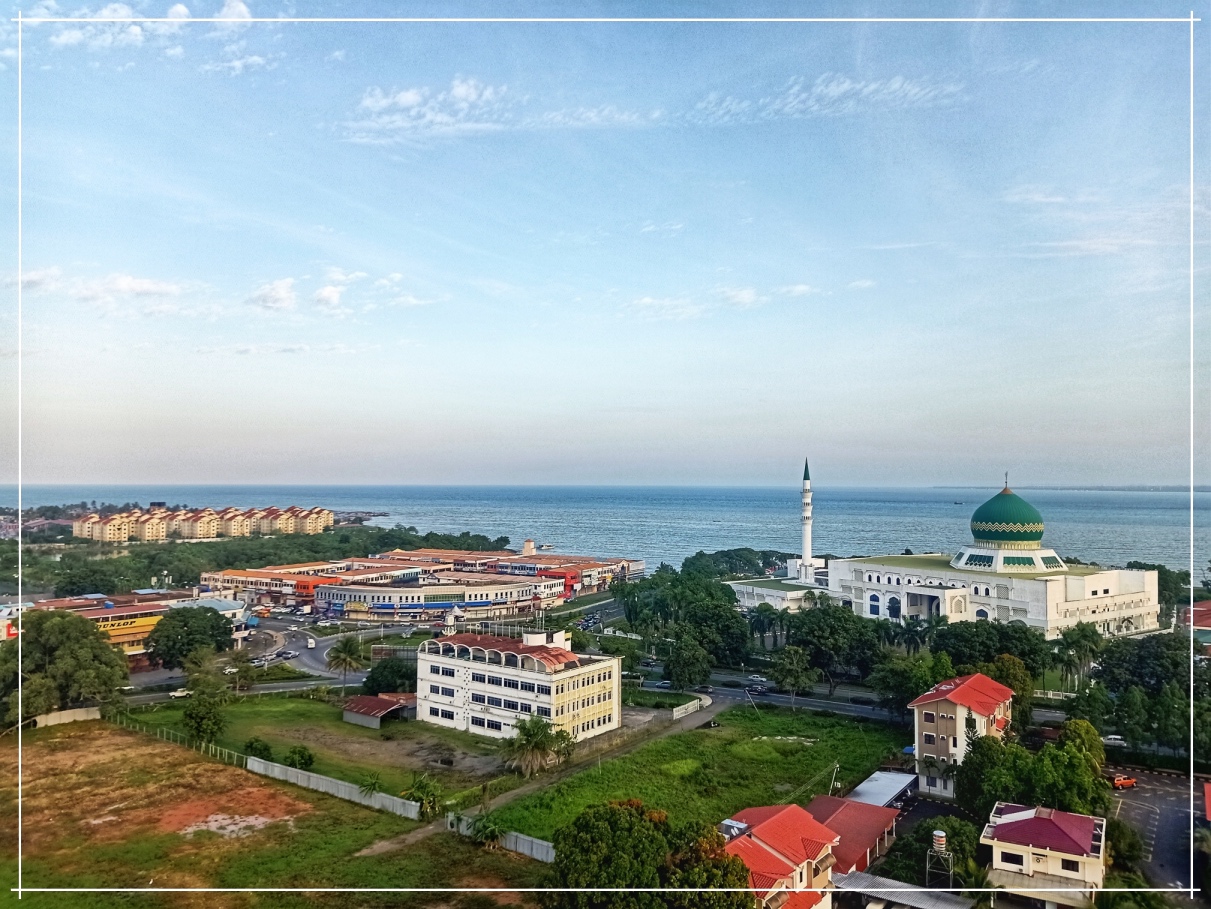
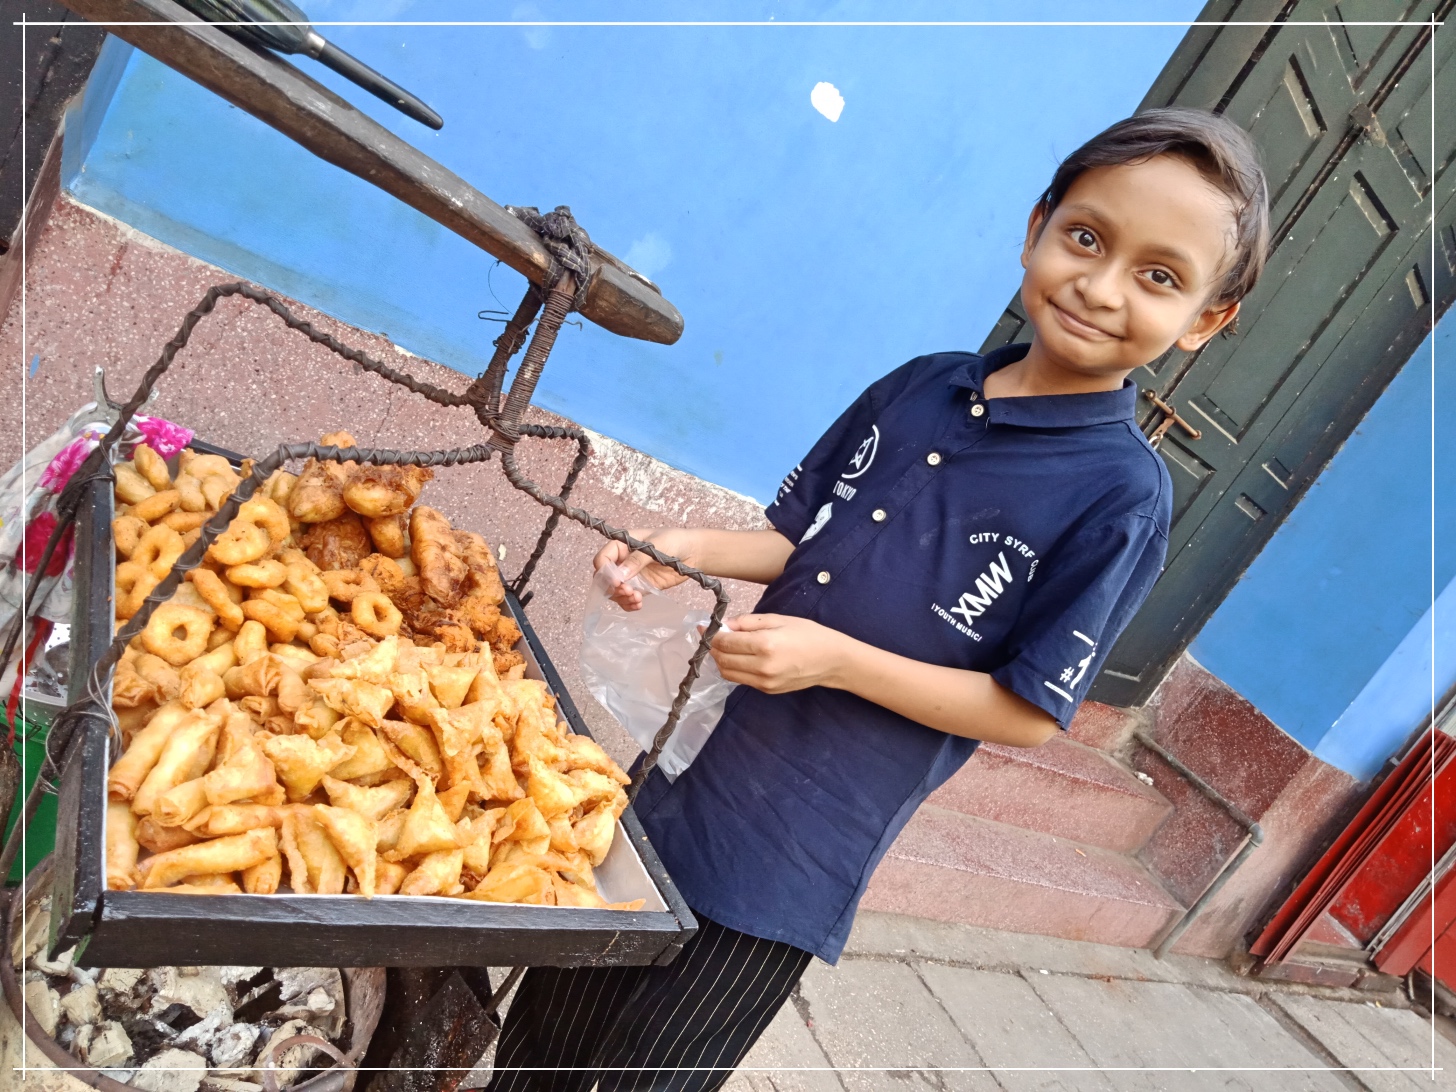
Day 04 – Lahad Datu, Sabah

View of Denver Bay as seen from Danum Valley Field Tower

On my day 04, i was assigned to explore Lahad Datu, which is around + 2 hours drive by land. Lahad Datu is a humble town, also sourcing mainly on the palm oil industry. On my way to my assignment, I dropped by Danum Valley Conservation Area Field Centre. Danum Valley is a 438 square kilometres tract of relatively undisturbed lowland dipterocarp forest in Sabah, Malaysia. It is one of the richest rainforest in the world, having more than 200 species of plants/trees in just one square hectare. Danum Valley is also home to numerous exotic Southeast Asian birds, pygmy elephants, the elusive Sumatran Rhino and Bornean Proboscis monkey.  I wasn’t able to see the animals at their natural habitats as they are located 60 km deeper into the forest. However, I was able to see the vast green lands and the breathtaking view of Denver Bay from the 7 storeys high field centre tower. Lahad Datu is located right at the coastal line of Denver Bay, which can also be seen from the tower.

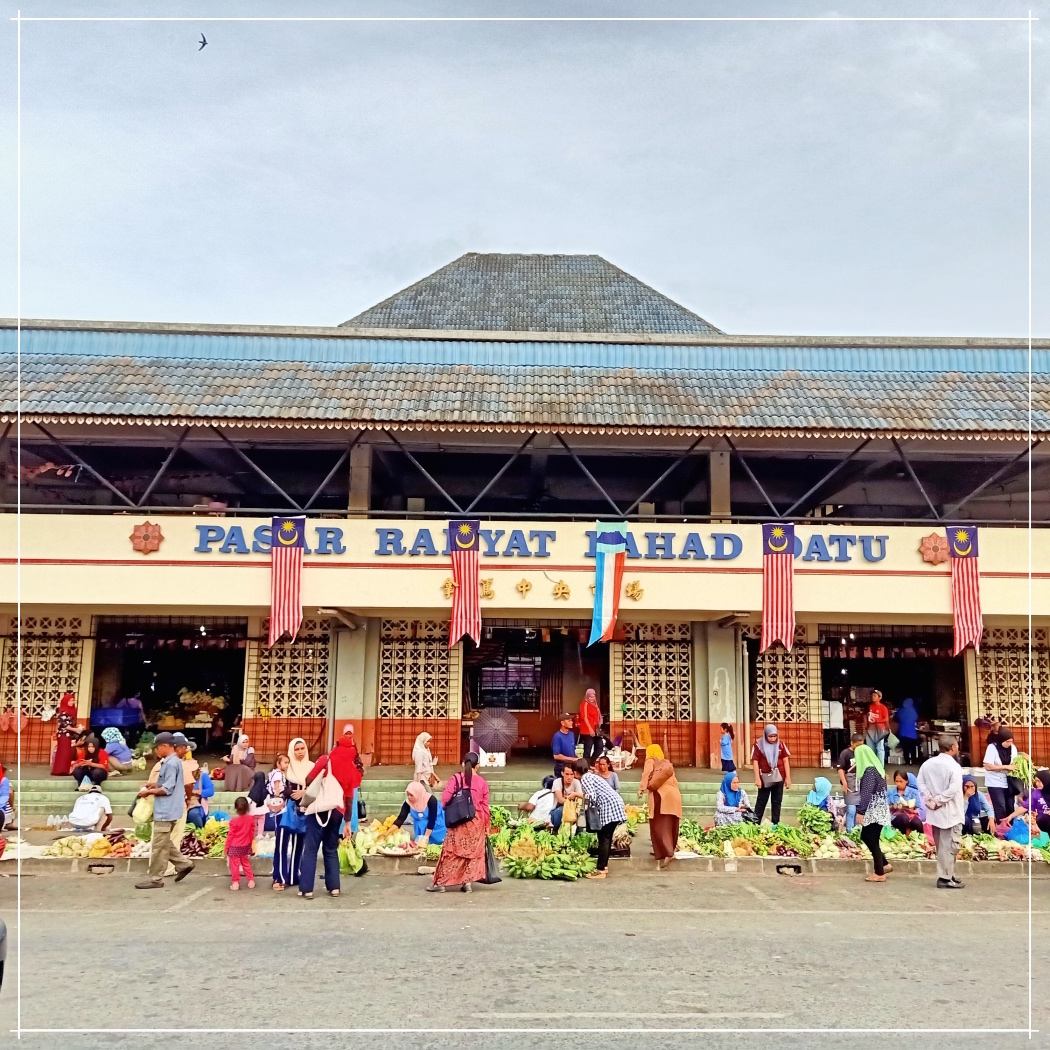
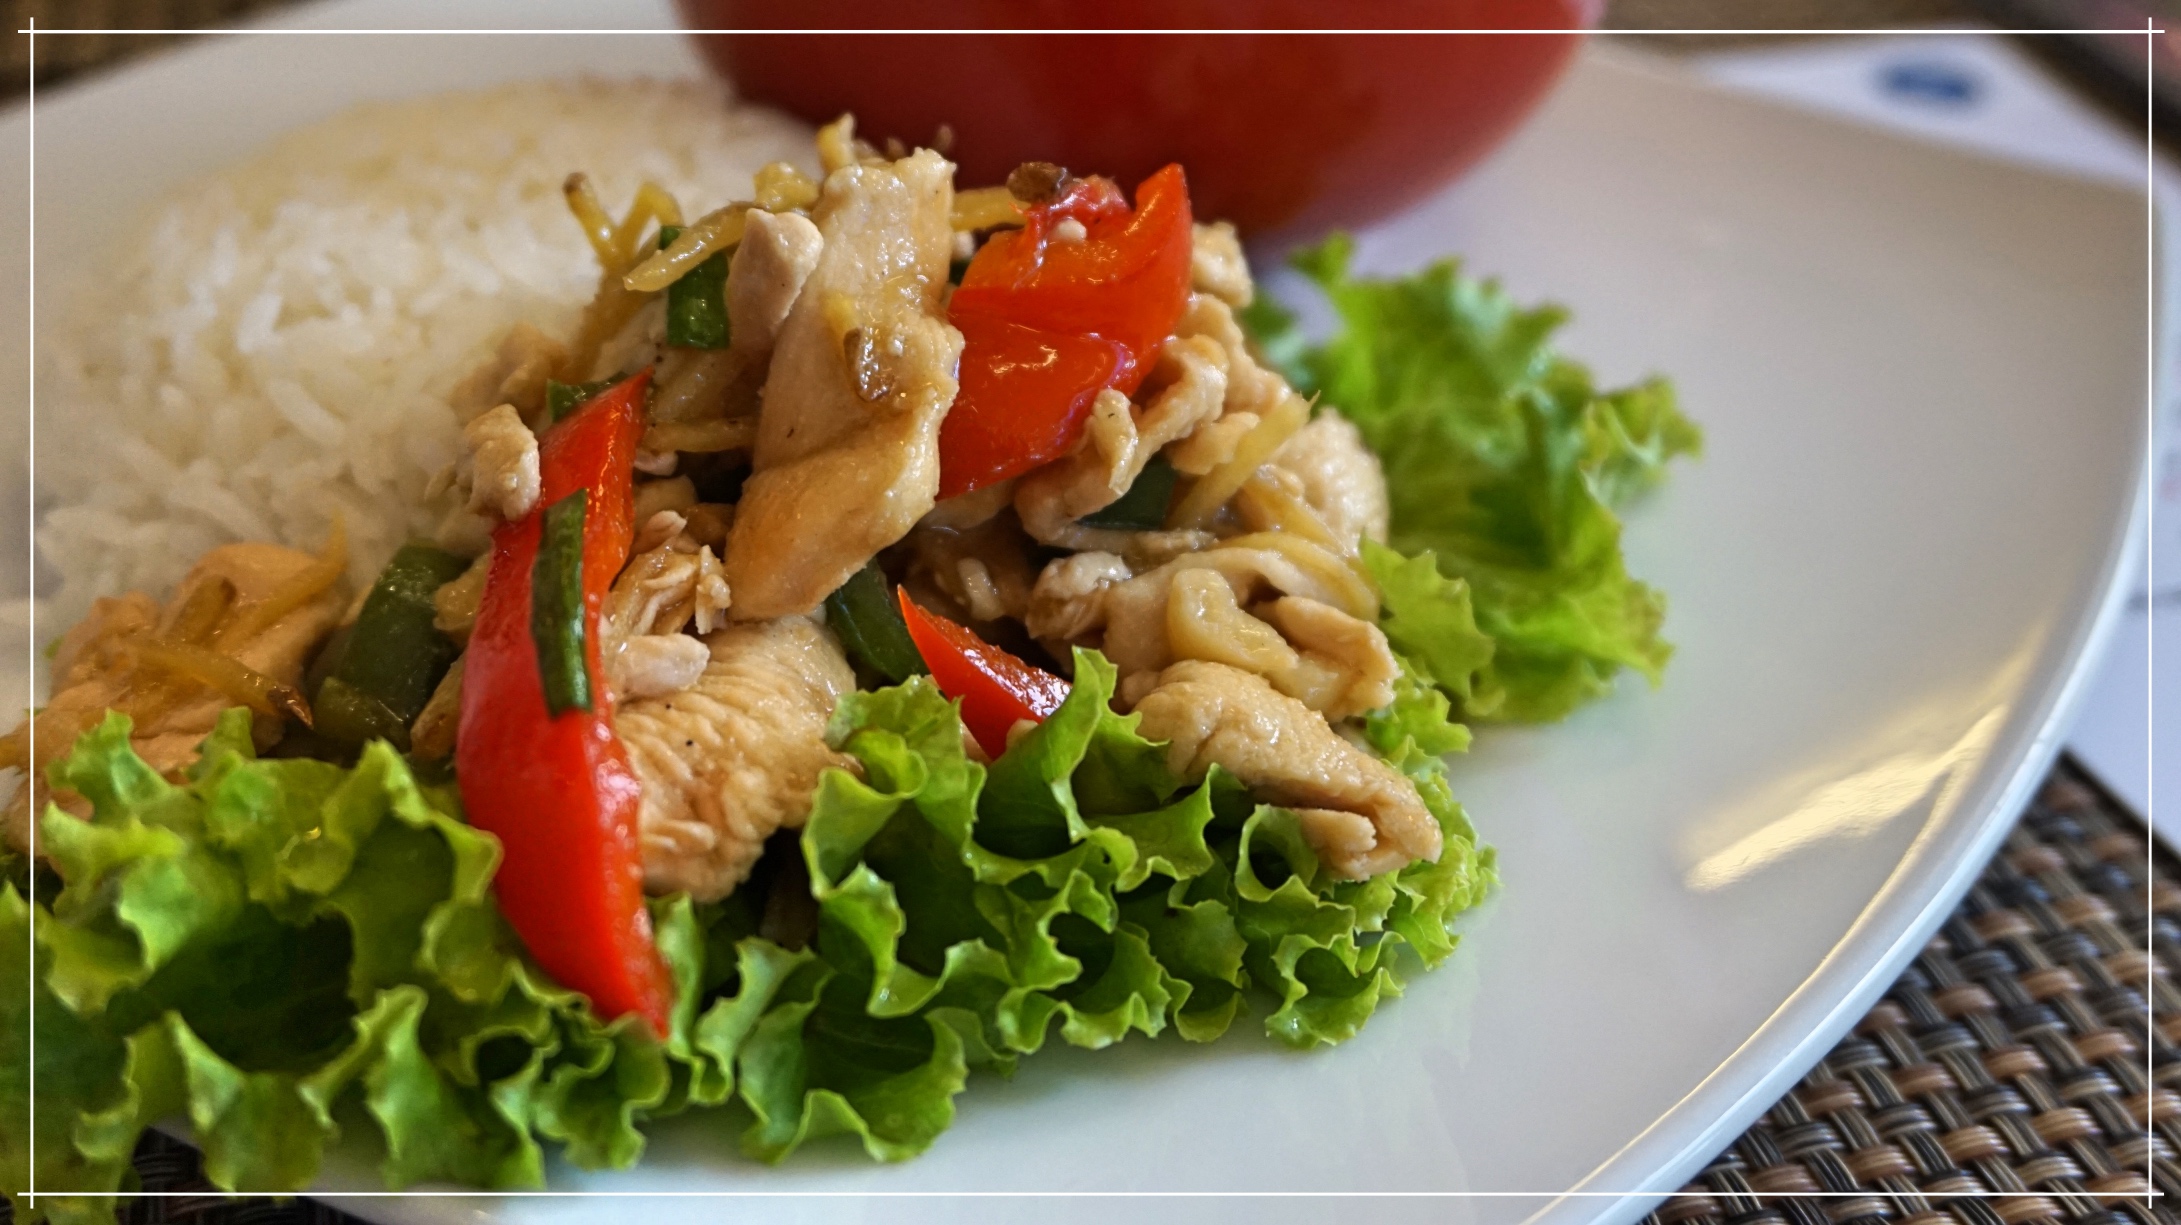
As a coastal town, Lahad Datu is abundant on fish and seafood. It was a delightful experience seeing fresh catch at Pasar Ikan Fish Market. Some catches there are actually not available in my country. I enjoyed the freshest grilled fish dinner at Jalan Mawar, which is located just at the opposite of the fish Market.

Check out my Tawau and Lahad Datu video blog preview below. 


Day 05 – Kuala Lumpur Night Tour

Photo by Ian Ray Garcia of Wander Lust

On day 05, I flew back to Kuala Lumpur to reunite with the group. We also scheduled a quick late afternoon tour to KL Tower. Highlight was seeing Kuala Lumpur cityscape while inside a glass box, that is 420 meters above the ground level. Such a memorable experience it is. By night time, we headed to the Petronas Twin Towers for dinner and leisure.

Day 06 – Hari Merdeka, Malaysia’s Independence Day

Day 06 was an early call, as we were invited to attend Malaysia’s 62nd National (Independence) Day. The event, which was held in Putra Jaya, was packed with locals taking pride on the nation’s celebration of freedom.

Photo by Glen Santillan of Escape Manila

Day 06 was also the last day of the programme. All participants, organisers and sponsors enjoyed a night of fun and sharing over a sumptuous Malay-themed buffet. The programme was concluded by the announcement of the creative contest winners. The most creative photo was awarded to Abigail Javellana of Our Awesome Planet, Philippines, and the most creative video was awarded to PK of Cambodia.

MAIKOL 2019 was indeed a remarkable experience for my blogging career. During the 6 days activity, I was able to find a deeper appreciation of Malaysia, its people, its land, its unique flavours and valued culture. The activity also earned me cultural exchanges, friendship and bonds with the other participant, as well as with the ever hospitable Tourism Malaysia hosts. ASEAN brotherhood and camaraderie lives on.

—–0—–

Airasia flies Manila to Kuala Lumpur daily. click here for schedules and costing.

For Sunway City Kuala Lumpur bookings, click here.

The participants from the Philippines. Ian Ray Garcia, Tia Lacson, Abigail Javellana, Glen Santillan and Joseph Lim


Revisiting Malaysia with Sunway City Kuala Lumpur

ASEAN brotherhood and camaraderie was celebrated once again during the MAIKOL 2019, held August 26 to 31, in Kuala Lumpur, Malaysia.  The event gathered 25 influencers and bloggers from Brunei, Cambodia, Indonesia, Myanmar, Laos, Philippines, Singapore, Vietnam and Thailand, to take part on a 6-days Experience Malaysia programme. The programme was sponsored by Sunway City Kuala Lumpur and airline partner AIRASIA. MAIKOL stands for Malaysia ASEAN Influencers Key Opinion Leaders programme, aiming to promote Visit Malaysia 2020 tourism campaign. 

Facts and Highlights of Sunway City Kuala Lumpur Experience

Sunway City is the first fully integrated township of Malaysia. It was said that the location of Sunway City used to be a mining land. After the termination of operations and being unused for a span of time, the property was cleverly converted and developed to a township-complex comprised of condominiums, office towers, educational facilities, commercial centre and hotels. A  lagoon-style resort/theme park with a man-made body of water was built at the centre, being the deepest part. This is the Sunway Lagoon Malaysia that we are enjoying today.


Aerial Photo credits to Sunway City Website

Sunway Resort Hotel and Spa

Sunway Resort Hotel & Spa is the 5-star flagship hotel of Sunway City. The hotel also operates the Sunway Pyramid Convention Centre, one of the largest convention centres in Malaysia.

Sunway Hotel’s entrance is impossible not to admire. The boldly detailed facade radiates a strong vibe of grandeur. The multi-levelled lotus-style canopy adds up to the rich vibe. Malay masonry craftsmanship at its best. The classic-mixed European style lobby interiors is instagrammable at every angle.

Sunway Pyramid Hotel

Sunway Pyramid is the 4-star property of Sunway City offering 564 Guestrooms & Suites. Sunway Pyramid was our host hotel for four nights during the recent MAIKOL 2019 programme. The hotel is directly connected to Sunway Pyramid Mall and Sunway Lagoon theme park.

Sunway Pyramid interiors is a fresh blend of contemporary design elements, textures and play of light.

Sunway Pyramid Mall is Malaysia’s First and only Egyptian-themed lifestyle and entertainment mall. The multi-storey commercial centre houses varied restaurant brands, indoor recreational facilities and lifestyle shops of the latest trends from local and international brands. It has direct access to Kuala Lumpur metro train and bus networks.

Sunway Pyramid Facade Photo credits to Sunway City Website

Sunway Lagoon Theme Park Complex

The complex consists of a Water Park, Amusement Park, Wildlife Park, Extreme Park, Scream Park and Nickelodeon Lost Lagoon. Among the most popular rides are the Gold Scream Roller Coaster, Colorado Splash and the 360-degree rotating pirate ship in the shape of a galleon. Also located in the amusement park is the longest pedestrian suspension bridge in the world(as per sunwaylagoon.com) at 428m length. The bridge offers a bird-eye view of the entire park 60 feet above the lagoon.


Sunway Lagoon Water Park is famous for its water rides and largest man made sand surf beach. The water park can be accessed from the amusement park thru the pedestrian suspension bridge.

Photo by Ian Ray Garcia

Here’s a quick video-blog taken during our highlighting the best moments with our accommodation host and sponsor Sunway City Kuala Lumpur.

Learn more and book your Sunway experience by clicking here.

——-0000——-

Airline Partner : AIRASIA. Airasia Flies Manila to Kuala Lumpur Daily. Check schedules here.

Advanced Selfie:How To Take Creative Self Portraits During Solo Travel

When traveling solo, taking good photos with yourself in it is probably one of the biggest challenges to deal with. Excluding those naturally photogenic people without any bad angle,taking selfies with a cam phone often produce awkward compositions. Your face may be too near the camera, which is not flattering at all. Using a selfie stick may solve this, but it does limit your creative poses and movement. Timers on the other hand, take a lot of effort. I myself have been struggling with these, until I was introduced to the Advanced Selfie Technique.

Handheld selfie. Oh di ba am’pangit? mukhang undin.

What is Advanced Selfie?

Advanced Selfie is coined by Sorelle Amore, a popular British social media influencer. The technique is shooting creative selfies from a digital camera that is remotely connected and fully controllable with your handheld mobile phone. No help, no production team—completely solo.

I was introduced to the art of taking better self portraits by my friend Kareen Lucero, who is also a travel enthusiast. Then on, selfies from my recent solo travel have improved greatly.

With a camera that is remotely controlled by your mobile phone, you get to see your background and angles, thus make corrections and improvements on the spot. It’s something that a timed camera cannot provide easily.

The Tools Needed to do it:

1.) Digital Camera – Wifi Connect-Capable. I use a Sony Mirrorless Camera that I can remotely control with my smartphone.  Most recent cameras of any brand that bought 5 years ago (or maybe earlier) have this feature already. Ask your camera seller to verify.

2.) A Smartphone. I’m using an Android operated – Oppo Phone.

3.) Imaging Edge Mobile App installed on my android mobile phone. Imaging Edge is provided by Sony,which is  downloadable via Play store.There are other respective ‘Cam to Phone’ connectivity app for Canon and etc. Just ask your camera seller or google it.  After installing the app on the phone, you must remotely connect the phone and the camera via its wifi feature. The phone gives instructions on this. For further assistance on the app, click here. Installation videos are also available on youtube. Just search Image Edge to Sony Camera.

4.) A Handy Tripod for the camera. I use a flexible octopus tripod bought from lazada.

5.) Practice,practice,practice!

The Image Edge App as shown. This app is for Sony “Cam to Android Phone” connection. There are also apps for other cam brands that can be downloaded from Google Play Store. Apple Phones, I did not research. Probably meron din.
The Phone, via the Image Edge App, lets you view whatever the camera sees.
My Octopus Tripod. This beauty was first introduced to me by my friend Ian Garcia. The tripod is flexible. You can actually tie it on railings or wherever safe.

Sample photos and the advantages explained:

  • Find Better timing. Crowd and passerby are always a struggle. With a remotely controlled camera, you can easily take a shot when the background is clear, as seen from your mobile phone. This is probably the best advantage that a timed camera alone cannot provide.

  • Find better facial angle. Oh di ba, nagmamaganda?

  • Create Dynamic Poses. You can play different movements and framings to level up your composition. This is definitely impossible to do when using a selfie stick. Another advantageous feature of the Image Edge App is that also has a timer option that can delay the shot on your camera.


  • Play on Distance. Wide frame or close ups, pwede! This feature is camera dependent though. My Sony allows 10-15 meters distance. But I believe most cameras do. baka nga better pa.

No help, no production team—completely solo.

Possible Cons:

  • Since you’ll be placing your camera at a distance, always keep an eye on it for snatchers and kawatans.
  • Hiding your handheld mobile phone is a challenge for beginners. But this can easily be solved. You’ll probably develop your own technique din.

So basically, that’s it! Easy-breezy, right? Kaya nyo din yan. Practice lang. I myself, beginner’s level pa din in terms of creativity. There will always be room for improvements and more inspirations to absorb.

For more Advanced Selfie techniques, follow Sorelle Amore (@Sorelleamore) on IG. She also handles the @advanced.selfie IG page, which I also follow.

For more photo samples, click on—> Bagan Itinerary Blog.

Day Tour Around Yangon and the Shwedagon Pagoda

The Shwedagon Pagoda is one of the most famous Buddhist pagodas in the world and it is certainly the main attraction of Yangon,Myanmar. No visit to Myanmar is complete without a visit to this gold leaf-covered, centuries-old Pagoda, which is said to enshrine strands of Buddha’s hair and other holy relics.

The Shwedagon Pagoda in Myanmar is decorated with almost 10,000 treasures. Over half a ton of gold can be found under Shwedagon’s umbrella. It’s also set with over 5500 diamonds. Its main spire boasts 2300 rubies, sapphires, and other gems, and 4000 golden bells (Source: MMTimes).

When visiting, modest attire should be observed. Shoulders and knees should be covered. Upon entering, I was asked to borrow a Longyi—a traditional, sarong-style wrap around. A deposit of 3,000 Kyat (or around 150 Pesos) is required; which is also fully refundable. Footwear and socks are not allowed within the temple premises. Best to bring your own string bag to carry your shoes.

Best time to visit Shwegadon is early in the morning. Temperatures can climb to almost 40’C by noon, making the flooring hot on bare feet. Most of the paths and corridor flooring is made of marble slabs. There are also patches that are made of rare green marble, which is worth noticing.

The Pagoda is open seven days a week,4 a.m. to 10 p.m. Last admission is 9:45 p.m.
Entrance fee is 10,000 Burmese kyat (around 400 Pesos)
There are 4 entrances to the Pagoda (North,South,East,West). Elevators and wheelchairs are available at the North and South entrance.
There are drinking water dispensers at certain stations within the temple grounds. Water is safe to drink, but it’s best to bring your own mineral water.

Getting there is easier by taxi;though many north bound public buses from Sule pass by the area. When staying near Sule, it is best to ask the tourist assistance kiosk for proper bus route.

—–0——

Other Places to See Around Yangon in a Day

Random snapshots of Yangon city center, with the Sule Golden Pagoda as the main landmark. The white building on the left side is the city hall. Most of the public transportations terminate here, including airport buses.

Yangon is generally Buddhist, but there are also catholic communities within the city. 

random samosa. strong indian influence
Shan Noodles. Yangon’s specialty. mildly spiced. slightly sweet. with a hint of fish sauce.

Where I stayed in Yangon:

Wizaya Hostel, located just at the back of the city hall near Sule Pagoda. I actually didn’t stay there overnight, as I only had less than 24 hours in Yangon. Arriving at 6AM from Bagan by bus, I only needed a place to freshen up and safely leave my bags while I go around the city. Hostel costs around 5000 kyat (250 Pesos).  Place is ok for “Check-in Anytime”. I didn’t have to wait for 12 nn to settle.  Location is very convenient to public transportation. Almost all routes terminate at Sule Pagoda/city hall, including the red airport buses.

Related Links:

Complete Myanmar 6 Days Itinerary with Costing

Things to Know Before Flying to Myanmar 

Bagan Itinerary

Mandalay City Photoblog

One Day in Mandalay:A Photoblog

Mandalay is home to several of Myanmar’s Architectural Treasures. The airport arrival gives a clear hint of what awaits at the city centre.

Kuthodaw Pagoda – A Unesco World Heritage site known for its intricate architecture and hundreds of brilliant white pagodas.

Myanmar’s traditional architecture is primarily used for worship, pilgrimage, storage of Buddhist relics and tourism. Buddhism plays a strong influence in architectural character.

Maha Atulawaiyan Kyaungdawgyi (Atumashi Monastery)

Random shots around temple vicinity

Mandalay City Centre as seen from the 7th floor of Ostello Bello Hostel, where  I stayed.

For complete travel details,accommodation and costing, click the following links:

6 Days Myanmar Sample Backpacking Itinerary

BACKPACKING MYANMAR:PRACTICAL TIPS FOR FIRST TIMERS

EIGHT Best Spots in Bagan for Photo Opportunity

This blog features 8 best spots in Bagan for Architecture appreciation, sunset experience or for an advanced selfie session with less crowd. Hope this helps.

Bagan is an ancient city and a UNESCO World Heritage Site located in the land-locked Central Myanmar Region. As revered believers of Theravada Buddhism, the Bagan kings built over 10,000 Pagodas throughout 104 square kilometer area. Over 2,200 still survive to the present day.

Bagan is heaven for architecture junkies and photo enthusiasts.However, it is not necessary to visit all the 2,200 pagodas. Here is a shortlist of the must sees that I was able to visit, which I also find good for photo opportunities; advanced selfie man or with the whole Mark Nicdao entourage, Chos!

  1. Shwezigon Pagoda was among the first sites that I’ve visited, as this was only a 20 minutes walk from my hotel in Nyaung U. Shwezigon is one of the oldest and most impressive monuments of Bagan, and is still used as a main place of worship for Buddhist locals. Most noticeable is the huge gold plated pagoda glimmering in the sun. Architecture detailing is superb!
Construction is believed to have started in the 6th century. … By the 16th century, the Shwedagon Pagoda was already an important Buddhist monument for pilgrimage in Burma (Myanmar).

2. ANANDA PHAYA . The Ananda Temple is a cathedral-like temple popular for its grandeur and proportion. The floor plan of Ananda resembles a Greek cross. The center hall bears four Buddhas, standing about nine feet tall and made from gilded wood.

3.Thatbyinnyu temple – The tallest in Bagan. The view from the back side is great for photo op. Not much people go there. Aside from Thatbyinnyu, there are several lesser pagodas on this area.

Me trying to look pretty despite the + 40 Degrees Celcius heat

4. Dhammayangyi Temple. The largest temple in Bagan. However, only part of it is accessible. For an unknown reason, much of the interior has been sealed behind brick walls. This structure was built by a very controversial Bagan King, who was said to have assassinated his own father to take the thrown. Sad legends are linked to this building.

5. Sulamani Temple . known as the “crowing jewel” of Old Bagan with well preserved frescos and murals. Sadly, the center tower was toppled down during the recent earthquake. Just outside Sulamani is a small hill where tourists position for a good sunset viewing.

6. Bu Paya Waterfront Temple. Best sunset views over the Irrawaddy River. 7. Lawkananda Pagoda. The popular temple in New Bagan, rarely reached by tourists. A bit distant from the popular clusters in Old Bagan. This Pagoda is packed with locals during worship days.

8. Cluster of Pagodas near Nan Myint Tower. Not much tourists explore this area as it is also off path from the Old Bagan Cluster. Photo Op is very good! Best to visit this cluster in the afternoon, and proceed to the Tower for sunset viewing and dinner.

Things to know:

A fee of 25,000 Kyat or 20 USD is mandatory to all foreign visitors. Ticket covers all sites within Bagan Archeological Zone (except for the tower) and is good for 5 days. Payment is settled before entering major temples (Ananda, Dyammayanggi etc.)

Myanmar is strict  with dress code and “no shoes” policy before entering. Modest outfit is a must. You’ll be asked to rent a sarong if you are wearing shorts. It is also best to wear slip ons or prepare a pouch for your footwear, which you shall be taking off several times; including socks. The concrete foot path gets scorchingly hot. Sometimes, you have to step on bare ground with sharp pebbles.

Bagan is divided into 3 areas.

  • Old Bagan – most of the temples and pagodas are located here.
  • New Bagan – where most of the local communities settle. The lively side of Bagan for backpackers.
  • Nyaung U – commercial district of Bagan where the bus and train station, government offices and banks are located. I opted to stay here for easy access to the market and other facilities.

More preparation tips and hostel recommendations on this link  —>>>

BACKPACKING MYANMAR:PRACTICAL TIPS FOR FIRST TIMERS

6 DAYS IN MYANMAR:SAMPLE ITINERARY

6 Days in Myanmar:Sample Itinerary for First Timers

I spent P 35,000.00 for 6 days in Myanmar, including taxes and plane tickets. I am sharing with this blog my costing and day to day itinerary for future reference. Hope this helps.

I did the tri-city Mandalay-Bagan-Yangon route with modest choice of backpacker’s accommodation, comfortable transportation and an appetite that is always full. Real talk, pwede pa babaan ang budget na ito. Medyo mahal kasi yung ticket na nakuha ko pauwi, like i booked late. Also, I went during Thingyan Festival. My choice of public transportation were limited.

For preparations and planning tips, read more on  —>>>https://iamjosemanuel.com/2019/07/21/backpacking-myanmarpractical-tips-for-first-timers/

Day to day itinerary (Detailed costing is given at the end):

Day 1 – Travel time. Manila – Bangkok – Mandalay via low cost airline. Arrived late afternoon

Arrival Area – Mandalay Airport. Blue bus leaves every other hour to downtown, which is 40 minutes away.

Bus Ticket 5 USD with hotel drop off.

View of Mandalay city center

Where I stayed in Mandalay — Ostello Bello Hostel Mandalay. Located just two blocks from the Royal Palace. Hostel has good reviews at Agoda. Ostello Bello is actually an international brand which also operates in Italy. Hostel has an elevator.


Day 2 – Explore Mandalay City Center.

Kuthodaw Pagoda – A Unesco World Heritage site known for its intricate architecture and hundreds of brilliant white pagodas.

Shwenandaw Monastery – Interior and exterior is made entirely of hand-carved teakwood.

I was not able to visit Mandalay hill as the roads were closed for the Thingyan Festival.

Day 3 – Travel time. Mandalay – Bagan. 5 Hours by Tourist Bus (including hotel drop off). Arrived after lunch. Visited Shwezigon Pagoda – a 25 minutes walk from my Hotel. Explored Nyaung U district on foot.  Checked out the market and the Lacquerware factory,which Bagan is popular of.


Where I stayed in Bagan —> Royal Bagan Hotel, located in Nyaung U, the commercial district of Bagan. I’m giving high reviews to this hotel/hostel, for their buffet breakfast (like real food, rice, local dish, noodles fruits and pastries). They also have a swimming pool. I paid P 415.00 Pesos only per night (Dorm Type-Shared room).

Day 4 – Whole day tour around the archeological site of Old Bagan. Hired a motorbike with driver because I don’t know how to drive. hehe. The rent agency is just outside of Royal Bagan Hotel. Prepare for a very dusty ride.

I will upload a separate blog for the must sees in Bagan. Wait lang, mga teh!

STRICT DRESS CODE. Bagan has more than 2000 Pagodas. It is quite expected that visitors will do multiple temple hopping in a day. Myanmar is strict with dress code and “no shoes” policy before entering. Modest outfit is a must. You’ll be asked to rent a sarong if you are wearing shorts. It is also best to wear slip ons or prepare a pouch for your footwear, which you shall be taking off several times; including socks. The concrete foot path gets scorchingly hot. Sometimes, you have to step on bare ground with sharp pebbles. Bringing of wet wipes and alcohol is highly suggested. Climbing to the top of the pagoda is strictly prohibited.

Day 5 –  AM – Mount Popa Shared Tour c/o a travel agency outside the hotel.

Mount Popa is the most important site in Burma for Nat pilgrimage. The Nats are spirits who have been worshipped all over Burma for many centuries. They were probably worshipped before the arrival of Buddhism. Since then Buddhism and Nat worshipping have gradually merged over the centuries.

Met fellow Filipino travelers on this tour.

PM – Bagan Nan Myint Tower. Enjoy the sunset. Not much people visit the nearby cluster of lesser pagodas. Bigger chance to take good snap shots without the crowd.

I already brought with me my Bag as I went straight to the bus station after dinner. Took the 7/8PM Min Thar Bus to Yangon. Overnight bus ride was pleasing, with international standard seat sizes and is reclinable. Comes with a blanket, pillow, bottled water and a vanity kit. Intercity overnight train is a cheaper option bit will take 18 hours or more. It was also unavailable during my visit because of Thinyan Festival.

Day 6 – Arrive in Yangon at 6 AM.  From the bus terminal, i hopped on Bus 31 to Yangon city centre, which is around an hour away. Bus stops at the city hall in front of Sule Pagoda, which is considered the center of Yangon.

Where I stayed in Yangon —> Wizaya Backpackers, located just at the back of City Hall. Walk in lang. and  they do not have a fixed check in/check out time, which was good, since I arrived 7 AM. I actually paid a bed just so I could leave my things and take a bath. I did not sleep there na as I am already flying back to Manila that night. It would have been nice though to have more time to see Yangon. I see a lot of quaint restaurants near the hostel. I might go back to Yangon mainly for the food.

I had the whole day to see Sule Pagoda, Shwedagon Pagoda and the local Market. There are several markets at Bogyoke where prices of Jade and other semi precious stones and accessories are cheaper compared to Bagan.

The Sule Pagoda. prominent landmark of Yangon. most city buses usually terminate here or nearby. From Sule Pagoda, you can also ride the RED Public bus that connects the City center to the Airport. Bus runs every 30 minutes. Red Bus is easy to spot, or just ask the police at the stop over.

Shwedagon towers up close

The main pagoda is under refurbishment when I went. It is said that the topmost part of this structure keeps gold and other treasures of Myanmar. A museum beside this displays photos of the treasures.

Most of the footpaths in Shwedagon are made of Marble, which absorbs less heat of the sun compared to concrete. Some footpaths are made of solid semi precious Jade.

One of the markets in Bogyoke. 

Evening – Travel back to Philippines via Singapore.

— End of Trip —

Cost Breakdown:

Related blog posts on Myanmar:

BACKPACKING MYANMAR:PRACTICAL TIPS FOR FIRST TIMERS Days in Myanmar: Sample Itinerary for First Timers

uploading soon :

Focus Bagan : Unesco World Heritage Site

Focus Mandalay : The Burmese Old Ways

Yangon Tour in Less Than 24 Hours

Burmese Street Food

Backpacking Myanmar:Practical Tips for First Timers

Myanmar today is quickly becoming a popular travel destination amongst Pinoy Travelers. Myanmar is VISA Free for Filipino tourists. And just recently, the City of Bagan, Myanmar’ cradle of civilization and one of the world’s richest archeological treasures, has been named as a UNESCO World Heritage Site.

General things to know for Myanmar first timers (plus other practical tips based on personal experience),

  1. FLIGHT. We do not have direct flights yet from Ph to Myanmar. I took a flight from Manila to Bangkok (3.5 Hrs.) and another flight to Mandalay City,Myanmar (2 Hrs.). Metro Manila is 1 hour and 30 minutes ahead of Myanmar.  My flight details are given on the next article.
  2. IMPRESSION. The country was under five decades of army-imposed hibernation during the later half of the 20th century. As it recently opened its doors to the world, Myanmar is relatively new to the tourism industry; though international standards naman ang facilities nila. Hotels are very good. Intercity transportation is established. Airport to City public transportation is well arranged. Myanmar is a mass of land that sits between India, China and Thailand. The Country is divided into 17 provinces. Mandalay, Bagan and Yangon are key cities, with the later as the biggest and most developed. Yangon, I say, is comparable to Ho Chi Minh, or Cebu. Cebu is actually a bit more advanced, I think, in terms of business and mercantile.

    Downtown Mandalay

    Downtown Yangon with the Sule Pagoda as the prominent landmark.
  3. UNIQUE EXPERIENCE. As dominantly Buddhist, Myanmar offers sacred temple experiences, historic cities and traditional ways of life that is totally different from ours. And unlike SG or Hongkong, konte lang Pinoy overseas workers in Myanmar. Relatively rare chance to hear tagalog during your stay. Spending days in Myanmar, you can safely say “Ayyy! Nasa foreign country talaga me! “.
  4. COMMUNICATION. Not everyone speaks english. Though personally, I did not encounter any communication problem. Most signs have a translation in english. Sim card for open line phones are also available upon arrival. Ph-booked pocket wifi’s also work well in city centre but expect to have little to no signal beyond the metro. Internet connection (Data Sim) is OK. Ph levels lang the speed. or slightly better.
  5. BEST TIME TO GO. Myanmar is hot all year round. Best time to go is during the cooler months from October to February. March and April are the hottest months and that is when I went. Awow! Brayt! Kung alam ko lang. lol. Yun kasi mura na ticket, that I bought on promo months before. My travel days, particularly in Bagan, scorched over 40°C.
  6. VISIT DURING A FESTIVAL? Myanmar reveres to its religious roots quite strongly as they celebrate Buddhist new year (Thingyan Water Festival) in the middle of April. During this time, locals flock Bagan pilgrimage sites to worship. As in, daming tao! Intercity public buses and trains, government offices cease operation for 3 to 5 days. Most tour agencies even take a break. Wala rin Hot Air Balloon Tours, which Bagan is popular of. Sakto, my booked dates fell on this, which greatly affected my Itinerary. Haha! Brayt again! So if you plan do an intercity travel with limited days, it is best not to go during the festival; or at least spend the whole 4 days in a single city. Hotels and most restaurants however, stay open to serve.
  7. STRICT DRESS CODE. Myanmar is a land of temples and pagodas. Bagan alone has more than 2000 in one cluster. It is quite expected that visitors will do temple hopping in a day. Myanmar is strict  with dress code and “no shoes” policy before entering. Modest outfit is a must. You’ll be asked to rent a sarong if you are wearing shorts. It is also best to wear slip ons or prepare a pouch for your footwear, which you shall be taking off several times; including socks. The concrete foot path gets scorchingly hot. Sometimes, you have to step on bare ground with sharp pebbles. In Mount Popa, I climbed 777 steps on foot. Hassle, but it is part of the overall travel experience for the books. Bringing wet wipes and alcohol is highly suggested. Climbing to the top of the pagoda is strictly prohibited.

    At Shwedagon Pagoda. Its good that most foot paths here are made of Marble, which does not absorb much heat compared to concrete.
  8. FOOD. Food in Myanmar is relatively affordable. Standard restaurant prices are comparable to Manila or probably a bit cheaper. Cheap food/street food options are also available. Local dishes are not complicated. Mostly rice meals, noodles  and lots of vegetarian options (because Buddhism) with practical influences from neighboring India, China and Thailand. Myanmar food is not as spicy as I expected. Their meat curry is not the usual-very fragrant meat dish that I am used to. Will be discussing more on food on the next articles.
  9. International food choices are available. But they do not have a single branch of Mcdonald’s today. I don’t know why. They do however have KFC in the big city of Yangon, but it is not popular to locals.
  10. Water however, isn’t cheap and free. Most restaurants do not offer service water. Sold by bottle talaga. The hostel where I stayed in Bagan do not have water dispenser. I bought pa from the market. 
  11. TRAVEL ROUTE. Most travelers start at Yangon and up. I, however, entered Myanmar via the Northern City of Mandalay. Bagan is 5 hours away by tourist bus. After Bagan, I took the overnight public bus to the Southern City of Yangon. It took me +10 hours. Overnight bus was pleasing, with international standard seat sizes and is reclinable. Intercity train is available and is actually cheaper, but is expected to take longer time. It was unavailable during my visit because of Thinyan Festival.
  12. TRANSPORTATION AROUND BAGAN. As the most popular site, I spend most of my days in Bagan. Getting around the city is mainly by tuktuk or Motorbike. Public Taxis are scarce.  Tourists can rent electric-charged motor bikes at at low price (around 250-400 Pesos only per day).  Will be discussing more of this on the itinerary blog post.

    me trying to be pretty despite the scorching heat

Follow up blog posts on Myanmar on these links.

6 Days in Myanmar: Sample Itinerary for First Timers 

Focus Bagan : Unesco World Heritage Site – uploading soon

Focus Mandalay : The Burmese Old Ways – uploading soon

Yangon Tour in Less Than 24 Hours – uploading soon

One Day Siem Reap City Centre

How millennials do “Last day in Siem Reap”:
See the town on foot
Check out the Art scene
Starbucks Afternoon
Visit local markets (bargain!bargain!)
Local Cuisine
Angkor beer
Pub Street the night away

Note: Millennial years start at 1981. DBS blogger @iamjosemanuel qualifies as one.
😋😬

Cebu Pacific Air flies Manila to Siem Reap 3x weekly. check schedule and ticket cost here http://bit.ly/CEB_SiemReap8


One Full Day Angkor Wat Sample Itinerary

Without doubt, Angkor Wat of Siem Reap is one of the most celebrated heritage sites of our time. For more than 700 years, it was the centre of the Khmer empire. And still today, it remains as the spiritual heart of Cambodia.

Built between roughly A.D. 1113 and 1150, and encompassing an area of about 200 hectares, Angkor Wat is one of the largest religious monuments ever constructed. For the adventure junkies and photo enthusiasts, the best way to experience the complex is to rent a scooter and explore the temples for two to three days at your own pace. However, with proper planning, tourists with time constraints can still enjoy the best of Angkor in one full day.  Tour starts at,

4:40AM – Buy Ticket 37 USD for 1 day . Should be bought personally because officers will take a photo of you. Ticket office is located 4 KM before reaching Angkor Complex. Ask police or tuk-tuk drivers if lost.
5:00AM – Sunrise Viewing
6:30AM – Coffee/Breakfast at local stalls nearby. People watch.
7:30AM – Angkor Wat Main Temple . Visit the four galleries showcasing well preserved stone carvings that tell stories of the Khmer royals and their religious beliefs (appreciate better with a tour guide)
10:30AM – Early Lunch at Blue Pumpkin just outside the gate (The Chicken Ginger si a must try)
12:00NN – Bayon Temple – Towers of the four faces of Buddha. (This place gets crowded and with tight passages. Better visit when everyone’s mostly having lunch)
2:00PM – Elephant Terrace and other lesser pagodas near Bayon.
3:00PM – Ta Prohm – the temple swallowed by the rainforest. made more famous by Lara Croft/Angelina Jolie Movie. (Do some shopping here at random vendors. bargaining here is really cheap!)
5:30PM – end of tour.

Expected Expenses for a day tour:
1) 37 USD Entrance ticket 1 day
2) 25++ USD Tuktuk/Tricycle rental
3) 20 USD Meals and coffee
4) Memories and stories to tell – PRICELESS!

optional expenses
1) 30+ USD – Guide -(PM me on facebook Biyahe ni Josemanuel for reco)
2) 40+ USD – car rental (in lieu of tuktuk)
3) 10+ USD – electric motorbike (limited use)

Tip: Visit Angkor National museum a day before the actual site tour to better understand the Ancient Cambodian (Khmer) history. only 12 USD.

Cebu Pacific Air flies Manila to Siem Reap, Cambodia 3x weekly.
check schedule and ticket cost at http://bit.ly/CEB_SiemReap8

Have more time in Siem Reap to spend? Check out the THREE DAY ITINERARY by clicking here.

Relaxed Three Days Itinerary:Siem Reap,Cambodia 2019

With all these promo airfares popping almost every weekend, it is now easier for us Filipinos to plan weekend getaways overseas without spending so much. Vietnam, Hongkong, Thailand and Singapore are nearby destinations we usually visit, as these countries are just around 3 hours away by plane, and are Visa-free for Filipinos.

Aiming to encourage people to see beyond the usual, I am uploading a series of blogs shedding more light to a humble Buddhist nation seated between Thailand and Vietnam, which is the Kingdom of Cambodia (…also Visa-free up to 21 days for Filipinos and we have direct flights as well).

Angkor Wat, 2013. Taken during my first visit.

Two weeks ago, I had a chance to revisit Siem Reap,Cambodia. It was my second time to see the city. Still enchanting and deep-rooted as it has always been. Among our neighbouring Southeast Asian nations, Cambodia probably boasts the most intriguing records of ancient times. The Khmer (ancient Cambodian) civilization dates back 802 CE. The preserved ruins and temples tell a lot of stories. Written words will never be enough to describe a Cambodian experience. As such, I am sharing a sample itinerary, expenses and places to see in Siem Reap, with hopes on encouraging readers to include Cambodia up their travel bucket list.

Here’s a sample three-day Itinerary that may help you plan your weekend stay in Siem Reap. I made this itinerary as relaxed as possible.

Take the weekend flight. Cebu Pacific flies Manila to Siem Reap every Tuesdays, Thursdays and Sundays. Take the Thursday flight out, and return on Sunday. Three days in Siem Reap is good enough. For proper schedule and ticket cost, click here.

Day 0 (Thursday): Cebu Pacific flies to Siem Reap in the evening. With this, pwede ka pa mag half day sa work and file a scheduled leave in the afternoon. File mo na din Friday. Don’t forget.

There’s an hour time difference between Siem Reap and Manila. You’ll probably arrive there at 10 PM.

Day 1 (Friday): Siem Reap is most known for its centuries-old Buddhist Temples,made more famous by Angelina Jolie in her movie “Tomb Raider”. Most tourists visit the temple complex immediately on the first day. However, I highly suggest that we visit the “Angkor National Museum” before entering the temple proper.  The museum’s presentation of Cambodia’s historical timeline is impressive. A visit to the museum will give a better perspective and understanding on the history of Cambodia, and on how and why these sacred temples were built. This is highly suggested for history and Architecture enthusiasts. Ticket is only 12 USD. Optional 5 dollars to rent a walk-thru audio guide in English, to further explain each exhibit you are viewing.

Angkor National Museum, 968 Vithei, Charles De Gaulle St.. This is located near the City Center and is not part of the Angkor Complex. Hire a tuktuk to get here. 1 USD-5 USD, depending on distance.

Late afternoon is a good time to visit the temple. Spend your hours at the Angkor Main Temple ’til sunset.

Three Days Temple Pass costs 62 USD per person (One day Pass is also available at 37 USD, and Seven days pass at 72 USD. Kids 12 and below are free, with passport as proof).

In the evening, you may opt to avail traditional Thai massage for relaxation. Casual street massage cost 6 to 8 USD. Spa setting or hotel service at 12 to 20 USD. Your hotels can help you book this if desired.

Glorious sunrise view of the Angkor.

Day 2 – Sunrise at Angkor Wat. Be on site at 5:00 AM to experience the breathtaking moment, as the sun shines striking colours and atmospheric effects against the spiring towers of the Angkor. Spend the rest of the day touring nearby cluster of temples built between 9th to 12th Century

Expect a bunch of spectators with you, as everyone wants a good shot with the reflection of the towers on the moat. Alternatively, you can just sit at a random nearby cafe and wait for sunrise with a cup of coffee. That is a better idea. =)

Bayon Temple. The most intricate temple with 54 towers, decorated with 216 smiling faces of Buddha.

Ta Prohm . The Tomb Raider Temple. (Sidewalk bargains here are the cheapest. Just haggle.)

Banteay Srei. renowned for its intricate decoration of carved sandstone that covers the walls like tapestry. Portrait photo by @Detourista

Tuktuk drivers normally charge 25 USD for a whole day service (Driver and car included). However, a trip to Banteay may require an additional 5 USD, as this cluster is around 30 minutes away from the rest of the temples.

After whole day temple hopping, spend the Saturday night at Siem Reap’s city centre Pub street.

Day 3 (Sunday): Shopping day.  Siem Reap local products are cheap. The main old market is the best place to haggle and shop in the morning. The Art Centre Market in front is also worth visiting.  For the rest of the day, you may just laze around the artsy cafes and restaurants while waiting for your flight. Cebu pacific has a Sunday evening flight back to Manila. Back to work on Monday. =)

Kandal Village – Artsy district of Siem Reap. Burst of color everywhere.

Chitchat with a local artist from the Art Centre Night Market

European Architecture influence is very still evident in modern day Siem Reap, as they were once a colony of France.

Rough Budget :

Where we stayed:

Crown Angkor Hotel (link here). Hotel pool area photo grabbed from hotel’s official Facebook page with permission.


Related links:

One Day Angkor Wat Sample Itinerary

Siem Reap Commercial District

Foodtripping Around Siem Reap

One Day Payday Sale for Davao City Hub #CebuPacific

This payday, Cebu Pacific is holding a seat sale today (January 30) for flights from its hub in Davao City. Fly to Bacolod, Iloilo, Bohol, Tacloban or Zamboanga for as low as PHP99 (base fare).

Go on a food trip to experience Chicken Inasal in Bacolod; or the famous Iloilo Batchoy; or party the night away at the famous TawHai–Asia’s largest floating bar. Visit heritage churches and the world’s smallest primate in Bohol, or discover the wonders of Kalanggaman Island in Leyte.

Travel period from March 6 to July 31, 2019.

cymera_20181126_160945

Cebu Pacific mounts over 148 flights per week to and from the Davao City International Airport, with direct connections to Bohol, Bacolod, Cagayan de Oro, Cebu, Dumaguete, Iloilo, Manila, Tacloban and Zamboanga; as well as to Singapore.

The latest seat sales can be found on the Cebu Pacific official Twitter (@CebuPacificAir) and Facebook pages. To book flights, visit www.cebupacificair.com or use the official Cebu Pacific App, downloadable from the App Store or Google Play.

Japan MULTIPLE Entry Visa Approved! (An Application Guide)

Yes, bes! I just got my passport back from the agent, with an approved Multiple Entry Visa to Japan, valid for 5 years. And I am sharing with you guys how I was able to complete the process.

PAANO at SINO BA ANG QUALIFIED FOR MULTIPLE ENTRY?

As per Japan Embassy website, here are the terms and conditions for issuance,

(1) Applicant with history of travel as temporary visitor to Japan in the last three (3) years ; has no known violation of domestic laws of Japan nor had problem with immigration regarding entry and status during the period of stay ; and has sufficient financial capacity to support expenses for travel and stay. This is where I qualified. Kailangan makapunta muna ng Japan within the recent 3 years. I’ve been to Japan once lang last Nov 2018.

(2) Applicant with history of travel as temporary visitor to Japan in the last three (3) years; has no known violation of domestic laws of Japan nor had problem with immigration regarding entry and status during the period of stay; and, has several history of travel as temporary visitor to G7 countries (excluding Japan) in the last (3) years.

Screen Shot 2019-01-21 at 10.41.29 PM.png

(3) Applicant with abundant financial capacity, kahit di pa nakapag-Japan. This is very vague because it doesn’t say how much funding should be shown as proof. baka 1 Mn.

(4) Spouse or Child of (3) above thru affidavit of support. Ask your lawyer about this.

—-0—-

Now moving forward, here are the steps I did.

(Step 1) I tapped with a recognised travel agency for this application, since DIY/Personal application is NOT accepted by Japan Embassy.  The visa application fee costs P 1,700.00. I made it clear that this is not my first, and I am applying for multiple this time.  The agency provided my with blank forms to fill, though downloadable naman din from the embassy website. I spent P 1,700.00 because I am based here in Davao City. I’ve read that fees in Manila could go for as low as P 950.00 only.

(Step 2) Here are the requirements I’ve submitted. Basically, similar lang din as what I’ve submitted for my first application.

  1. Valid Passport
  2. Completed Visa Application Form  but check the (✔)Multiple option. The agency gave me a set of this. They also check/correct.
  3. 2 copies Colored Photo, 4.5cm x 4.5cm , white background with name,birthdate and signature at the back. most recent lang po pwede (do not repeat what you submitted for other visas)
  4. Daily Schedule in Japan or the Tazai Yoteihyo (to be discussed below)
  5. Bank Certificate (latest)
  6. Income Tax Return 1701 clear Photocopy for the self employed (latest)
  7. DTI Registration for the self employed
  8. Request for Multiple Entry Form. The agency gave me a sheet of this, which looks like this. download.jpg
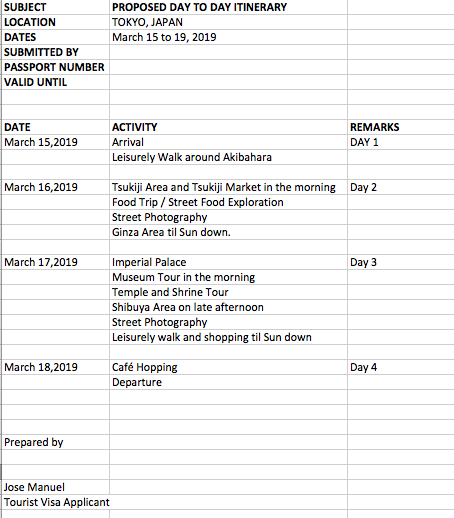
On the bottom box, you make a statement on why you are requesting for Multiple. I stated there that I am going on March, and again on September with the family, and also hoping for the Olympics 2020. Your statement should make them accept that you have valid reasons to revisit. Make or break this part.

(Step 3) Submit documents to the Agency . Pay the fee ( P1,700 yung akin sa Davao). 

(Step 4) Magpa Novena ka na walang palpak sa mga papeles mo. lol. Sit back and wait lang. The agency naman  will most likely check your documents if they comply.

I submitted my documents December 15,2018 and got the result January 3,2019.

thumbnail

—0—-

Other Tips and Tricks:

(1) Ito ang Itinerary format na sinumbit ko for my supposed March 2019 trip.  Mock up IT lang po,no need to strictly follow. screen shot 2019-01-21 at 10.32.06 pm

(2) For employed, provide ITR 2316 photocopy, plus valid employment certificate with salary detail and approved dates of leave for the upcoming trip. Photocopy company ID also.

(3) Kung government employee ka, kailangan mo mag secure ng Authority to travel from your head (plus bring your ID) kasi yung Immigration Officer naman ng NAIA ang sisita sayo without the approved document.

(4) Airline Ticket and Hotel Bookings are NOT required. However, on the form, you will be asked for an address and contact No. in Japan.  I just gave them the address of the hotel from my first visit.

(5) When to apply? The earliest is 90 days before the intended trip. as per blogs.

(6) How much bank funds I showed for this? Around a 120k.

(7) I did not submit na PSA Birth certificate since I am a returning tourist. B.Cert is only required for first timers.

(8) The beauty of applying thru an agency is that they will check your documents and forms for errors and they text you for update so sulit na din ang fee.

(9) First time applicant? click HERE.

(10) For application assistance, you may get in touch with Traveloft Travel and Tours,Inc.

(11) Cebu Pacific flies from Mactan Cebu to Tokyo (Narita) DAILY. Click here to search for your best dates.

GOODLUCK =)

Japan Multi-City Tour using JR PASS. Sulit buhh?!

I mentioned a lot of times on my recent Japan-trip blogs re the JR Pass I purchased, that gave me access to unlimited train rides between major cities in Japan. During my trip, I was able to visit Kyoto, Himeji, Hiroshima and Sapporo, with Tokyo as my port of entry (via Cebu Pacific direct flight from Cebu City). Yes, medyo mahal ang pass, but I think I was able to maximise my purchase to the fullest. To give a better picture, here are some points to know.

Ano vah itong JR Pass?

  • The Japan Rail Pass is an unlimited transpo-pass for overseas visitors, valid for travel on all major forms of transportation provided by the JR Group in Japan (with very few exceptions).
  • JR Pass is mainly used for Inter-city train travel, but is also accepted on certain local (city) train, some buses and ferry transfer. Basta JR Group na company, game na!
  • Train transfer from Tokyo city center to Narita Airport is also included with the pass.
  • The popular and highly expensive high speed 320km/h Inter-city bullet trains of Japan is also included with the pass, except for “Nozomi” and “Mizuho” bullet trains.
  • Pass is available in 7 days, 14 days, and 21 days (of course, iba-iba din presyo nyan).
  • There are two types of JR Pass: ordinary and green car (first class). Kaya umasta nang naaayon sa biniling pass. lol, joke! The difference? di ko alam bes! di ako pumasok sa first class.
  • JR Pass is available for foreign tourists only and is not available for Japan residents. As such, you have to purchase the JR Pass ONLINE, Days prior to your trip to Japan.
  • The Rail Pass is designed to stimulate travel and tourism throughout the country.
  • For Reference, here are the places I visited, using my pass. Saya, diba?

Where to Buy? 

  • As mentioned earlier, JR Pass should be purchased online prior to the trip. Most blogs usually recommend purchasing online through Klook, as they are the cheapest daw, at around 13,500 Php (ordinary pass) + Shipment fee. I tried to contact Klook but found out that you have to buy at least 10 days prior to the trip. That did not work for me.
  • Discovery Tours, the most popular Japan Visa processing agency in the Ph, also offers JR Pass. However, they require you to secure a visa first before buying.
  • I purchased mine via the main JR Pass website (click here to check) for around 14,500 Php (ordinary pass) with shipment na yan Fed Express from London,UK. I purchased this 5 days prior to my flight.
  • I purchased the pass that is valid nationwide. But there are other “Region-specific pass” available, say Kansai-Only Pass, at a lower cost. Contact the agency nalang for recommendations.

This is the Actual JR Pass that you should carry and show everytime you ride a train.

Inside the booklet. Lol, those stamps, I just collected from the tourist centres I visited around Japan. No relevance sa pass.

Points to Remember after buying:

  • Better purchase JR Pass earlier nalang, if sure ka na din naman with your visa approval. Na stress ako dun sa 5 days prior.
  • Note that these agencies won’t be shipping you the actual JR Pass Booklet. Instead, they will be sending you a certificate/voucher, which you will have to exchange for the actual booklet by the time you arrive in Japan (sa airport or any major train station).
  • Upon exchange, the pass does not immediately take effect. You can choose a later date that is more favourable with your travel program, like what I did. I arrived in Tokyo via Cebu Pacific and spent 3 days there. On my fourth day, I travelled to Kyoto, and that is when I activated my 7 days pass.
  • Mag install kayo ng Hyperdia – Japan’s Official Travel App. I was very dependent on this for the train schedules and specific stops.
  • Despite having the JR Pass, it is recommended that you still have to pass by the ticketing booth to get a reservation for inter-city travel. Meaning, may privilege ka to secure a designated seat, parang airplane. Reservation is very quick to do. And as per my experience, nakakapag-english yung mga staff assigned for this. For local trains within the city, no need to reserve.

This is the actual RESERVED SEAT ticket after you made a reservation using your JR Pass.

Do I really need the JR Pass in my life?

Case to case. If you are going to Japan to just visit 1 or 2 major cities that are close to each other, say Tokyo and Nagoya, then No! It will not be sulit. JR Pass would be perfect only if you intend to visit multiple cities within 7 days (or 14 or 21, depending on which pass you availed).

I arrived in Tokyo and spent 3 days there. On my fourth day, I travelled to Kyoto, which was Day 1 of my pass. and within 7 days, I was able to visit Kyoto, Himeji and Hiroshima in the south, then gave one day to travel up north to Sapporo,Hokkaido. I spent 10 days total in Japan and I was able to maximise my JR Pass to the fullest. Here is a chart showing my usage with equivalent fares if I did not have the pass.Bes as you can see, my travels in total was worth 56,966.40 Php. Compared to the price of my 7 days pass at 14,500 Php. Sulit diba?

Here is my Route map for reference:

Though again, this backpacking style is not for everybody. I did a lot of train rides within seven days. It could be tiring for some, but that is how I intended my travel to be. I wanted to really exhaust my pass and see more. Train rides are fun anyways, especially travelling across the countryside of Japan and see red autumn landscape of Tokyo transform into the snow white covered mountains and flatlands of Hokkaido.

Madami din naman airplanes between cities which are definitely faster and are fairly priced. But airports are quite malayo tologoh and katamad to go through airport check ins. I find the train transfers more convenient and flexible. City center to city center na eh.

So there you go mga mumsh, I hope i was able to explain the core essence and value of JR pass in our lives as travel enthusiasts. Travelling across Japan countryside by high speed bullet train has always been a dream of mine,and  I am glad I was able to tick it off my list this year. =)

For “places to see” reference, check out these links:

TOKYO THREE DAYS ITINERARY FOR THE WEEKENDERS

ONE DAY TOUR AROUND THE HERITAGE SITES OF KYOTO

HIMEJI AND HIROSHIMA EASY SIDE TRIP

JOSEMANUEL GOES TO SAPPORO

For Visa Application Guideline, click HERE.

Josemanuel Goes To Sapporo

Japan never runs out of sights and experiences for any eager tourists to enjoy. I had several best times in Tokyo and Kyoto, but the days spent in Hokkaido were no doubt the highlight of my recent 10 days trip to Japan.

Hokkaido is Japan’s northernmost prefecture, with Sapporo as its most popular City. I went there mainly to see the city’s annual White Illumination Festival. However, the stars have favourably aligned, as I was just right in time for the first snowfall in Sapporo City. And here are the highlights of my 2 days stay to this snow covered wonderland.

My port of entry was Tokyo-Narita via Cebu Pacific direct flight from Cebu City (Click here for ticket bookings). Sapporo is 8 hours total by bullet train from Tokyo, with an easy one stop/transfer at Hakodate. A bit time consuming, but I kinda liked the experience of travelling across the countryside of Japan, and see the landscape turn from Tokyo’s red Autumn to snow covered mountains and flatlands of Hokkaido. The cost of bullet train ride was around 26,000 Yen (12,000 Php) per way. But it is included with the JR Pass so basically, sobrang nakamura ako for this leg of the trip. I will discuss more of the JR pass on the next post.

Here are some of the highlights on my DIY Day tour around Sapporo.

Day 1: Odori Park. Odori Park is located in the heart of Sapporo where the city’s main events take place. This park is popular for the christmas market and ice sculptures-snow festival that runs in February, during the peak of winter. During my visit,however, the White Illumination festival opened, and the most beautiful light installations were free for all tourists to enjoy. The park also has a very pretty night market. A bit gloomy when I visited, as the first snowfall is already expected to appear that day.

How to get there: A vast underground mall,around 6-8 blocks long,connects Sapporo Main Station to Odori Park. It also connects several landmarks and train stops within the vicinity. Quite a long and interesting walk. I swear! Entrance to the park is free for all. The Sapporo TV Tower is also located in Odori Park.

Sapporo Clock Tower is a landmark wooden structure, located at North 1 West 2, Chūō-ku. The bell rings every hour to announce the time to the city. The clock tower was built in 1878 as a theatrical hall of the Sapporo. This landmark can also be reached via the underground walkway/mall mentioned earlier.

Entrance: 200 Yen. But a photo op outside would be good enough.

HOKKAIDOCAM4

The Sapporo Beer Museum. A registered heritage site, which was previously the main factory of Sapporo Quality Beer, a popular beer brand since 1877.

How to get there : The best way to get to the beer museum is to catch the Loop 88 Factory Line bus from Odori subway station or from in front of the Seibu department store.

Entrance fee – FREE for the Museum. The tour ends at the beer garden where you can sample different types of produces for only 600 Yen ( Hokkaido-only “Classic” beer, “Sapporo Draft Beer Black Label”, “Kaitakushi Beer” )

Sapporo Government Building. Quite a charming neo-classical themed architecture with an imposing dominant red facade. The Government building is connected to the park with a mini lake where wild ducks take shelter. This place is quite a good spot to take some photos of them.

HOKKAIDOCAM13

HOKKAIDOCAM15

The White Illumination Festival at Odori Park. No entrance Fee. And as you can see, the snow is already starting to cover the ground the time I got there.

HOKKAIDOCAM32

Other random shots during the snowy evening in Sapporo.

The cold evening is definitely a good time for some warm Noodles.

Day 2: Snowy Sapporo in the Morning. Will post a vlog about this next week. =)

Furano and Biei. Having the JR Pass privilege, I went further up northeast of Sapporo to see the town of Furano and Biei. Stayed for one night there. Temperature in Furano goes down to -7 degrees in the evening. Awow!!!

HOKKAIDOCAM35

The Black Ramen in Furano is an unforgettable one. Actually lahat ng food, masarap! Meals in Sapporo, Furano and Biei ranges from 350 to 1500 Yen (200 to 750 Php). A bowl of Ramen starts at 700 Yen (350 Php)

HOKKAIDOCAM40

Where I Stayed:

In Sapporo : Guesthouse Wagayado -HaLe- . Booked via Agoda. Php 1,500 per night.

In Furano : Hotel Tomar. Booked via Agoda. Php 2,100 per night.

I wasn’t able to do Mountain Skiing, as the resorts were still closed. Ka-uumpisa pa lang kasi ng winter. More reason to go back. =)

Himeji and Hiroshima Easy Side Trip

So during my recent Japan trip, I had one extra day in Kyoto. To take advantage of my JR Pass (Unlimited inter-city JR Train pass), I decided to see Hiroshima City, which is around 2 hours away from my location.
Initially, I planned to spend the whole day in nearby Nara, a Unesco heritage site, which is just 30 minutes from Kyoto. But just when I got inside the train station, the fickle-minded me randomly decided to go south instead to see the historic Hiroshima City, with a side trip to Himeji along the way, at no extra cost. That’s the beauty of possessing a 7 days JR Pass. Wherever the accredited “JR” trains go, you can go. I definitely felt like an almighty traveler! Travel time was a bit time consuming though, but I got to see more Unesco Sites, which is what I really wanted to do. Anyways, here is how my day went. Easy to DIY if you happen to visit Kyoto or Osaka.  

First Stop : Himeji Castle . Himeji is a city in the Kansai region of Japan, less than an hour away by bullet train from Kyoto. It’s known for the sprawling, centuries-old, white Himeji Castle, one of the few original castles from Japan’s feudal period. The top floor of the 6-story main keep offers views over the extensive castle grounds.

josemanuelkyoto43

The castle complex as it survives today is over 400 years old and was completed in 1609. A UNESCO inscribed heritage site, Himeji Castle is considered one of Japan’s three premier castles.

Getting There: 47 Minutes from Kyoto or Osaka. 5480 Yen ( Php 2.630.00) one way bullet train (or free, if you have a JR Pass).

Entrance Fee: Free to enter the castle grounds. 1000 Yen (500 Php) to enter the Castle/Museum, which I did. Will post a vlog about it next week. Castle opens 9 AM.


josemanuelkyoto27
Once you go out of the train station, you will immediately see this view. Easy!
josemanuelkyoto37
View of Himeji from the top of the Castle

Second Stop: Hiroshima City. One hour from Himeji by bullet train. A-Bomb Dome and the Hiroshima Peace Memorial Park, a designated UNESCO World Heritage Site of 1996.

josemanuelkyoto49

More than seventy years have passed, yet visitors can still feel fear and the pain that has already sipped into the grounds of Hiroshima City. A great reminder that we should always uphold and protect the peace that our generation is currently enjoying. War should NEVER happen again.

Third Stop: Miyajima Island. 45 minutes from Hiroshima Train Station ( local train + 10 mins Ferry ride)  Miyajima is the home of Itsukushima Shrine . The main shrine is said to have been constructed in 593 by Saeki Kuramoto. The shrine has more than 1400 years of history, and is a registered World Heritage Site. 

DSC09020

Getting there: local train from Hiroshima Main Station to Miyagimaguchi station + 10 mins. ferry ride. 590 Yen(280 Php) One way , or included with the JR Pass.

Entrance Fee: None for the island and the temple grounds. 300 Yen for Itsukushima Shrine. I spent the rest of the afternoon here in Miyajima. The Island itself is very charming, with a lot of free roaming deers that you can pet and feed.

Just before sundown, at around 4, I returned to Hiroshima for some RnR and strolling around their commercial district and eat okinomiyaki.  Took the train back to Kyoto at around 7:30 PM. Arrived in Kyoto at pass 9.

Though JR Pass gives you access to any running and accredited train between cities, it is best that your route for the day must be plotted in the morning and have your tickets reserved for each intercity ride. An in-depth JR Pass article shall follow after this to better explain its advantages. 


One Day Tour Around the Heritage Sites of Kyoto

Kyoto is considered as the cradle of Japanese culture and religion. Being the former capital for many centuries, Kyoto houses 17 of the most well preserved UNESCO World Heritage Sites in Japan today. Kyoto is indeed a top place to visit for the culture junkies. In addition, the city is also offers the best views of autumn, as well as spring. Having so much to see, Kyoto ideally deserves 3 days of your vacation time in Japan. However, when the vacation leaves are numbered and you only have one day to see Kyoto(say a side-trip from Tokyo or Osaka), I arranged a easy sample tour covering four must visit heritage sites in and near Kyoto area. These places are easy to reach by train (and covered by JR Train pass, if you have).

—Arashiyama District—

Arashiyama is a district on the western side of Kyoto, Japan. It also refers to the mountain across the Ōi River, which forms a backdrop to the district. Arashiyama is a nationally designated Historic Site and Place of Scenic Beauty.

Getting there: From Kyoto Station,take JR Sagano Line to JR Saga-Arashiyama Station. Train ride takes around 30 mins. From the arrival station, everything is walkable. Fare: around 600 Yen (300 PHP) RT. No payment required if you have a JR (Train) Pass (See Pass details here). Entrance Fee: None! It is a small town/district that is open for all. Best time to visit: Morning at 7:30 AM.

A leisurely walk can take around 2 to 3 hours. Be sure to check out the shops along the main road. Daming free tastes! Lol Coffee is also great to pair with this view.

Arashiyama is a perfect spot to experience lush autumn landscaping. While some ancient temples with manicured gardens charge a little amount as entrance fee, there are several pocket gardens around the corners that are free for all.

The Bamboo Grove in Arashiyama is one of the 17 UNESCO World Heritage Sites found in Kyoto. No entrance fee as well to see this. Place is flooded by tourist at around 9 am onwards.It is best to be early.

—Fushimi Inari Shrine – Shrine of the Ten Thousand Red Torii—

Fushimi Inari Taisha is the head shrine of the god Inari, located in Fushimi Ward in Kyoto. The shrine sits at the base of a mountain, also named Inari. This Shinto shrine is dedicated to Inari, the god of rice, sake, and prosperity. Shinto is Japan’s ethnic religion.

The establishment of the sacred grounds date back to 711 A.D. Today, the shrine is said to hold over 10,000 Torii (gates). A Torii is a traditional Japanese gate found at the entrance of a Shinto shrine, symbolically marking the transition from the earthly to the sacred.

Getting there: From Kyoto Station,take JR Nara Line to JR Inari Station. Train ride takes around 5 to 10 mins. The Shrine is just outside of the station. Fare: around 300 Yen (150 PHP) RT. No payment required if you have a JR (Train) Pass (See Pass details here). Entrance Fee: None for the shrine,as this is a public ground for worship. However, if opted, the museum entrance fee is only 300 yen, which includes access to some lovely displays on sake brewing as well as complimentary sake for guests to take home. Best time to visit: Morning at 7:30 AM. In my case however, I opted to visit Arashiyama in the morning and gambled with the flock of afternoon tourists in Inari. As such, I have no decent photo of myself. dami bombers. lol.

Josemanuelphonekyoto68

Tip: If time allows, you may proceed to Nara from Fushimi Inari, which is another tourist spot 30 minutes away from Inari Station (Same line, JR Pass covered as well).

—Gion District—

Gion is Kyoto’s entertainment district where the thriving Geisha culture is still being practiced. To see a Geisha woman (if you are lucky), be at Gion at about 5:30 p.m., where these women are on their way to the scheduled evening engagements, all made up in their traditional kimono and make up. Also in Gion is the Starbucks branch located inside a traditional tatami house.

Josemanuelphonekyoto77

Getting there: From Kyoto Station,take bus 100 or 206. Bus ride takes around 15 mins. Get off at Gion Bus Stop. Then use Google Maps to navigate. Gion district is just at the opposite side of the bus stop.Fare: around 200 Yen (100 PHP) RT. Entrance Fee: None. Best time to visit: late noon, 4 pm onwards for a chance to see the Geisha women.

—Kiyomizu-dera Temple—

A short walk up the hill from Gion stands Kiyomizu-dera Buddhist Temple. The temple is part of the Historic Monuments of Ancient Kyoto UNESCO World Heritage site. The temple offers a great overlooking view of Kyoto.

Entrance Fee: 200 yen. Best time to visit: Sun down to evening.

josemanuelkyoto10

josemanuelkyoto7

Where to Stay in Kyoto:

K’s House Kyoto – Backpacker’s style accommodation. An overnight stay costs around 1400 to 1500 Pesos on weekdays (via agoda). Price differs for weekends.

Kyoto is a popular tourist destination, especially during autumn. As such, hostel prices are relatively high as compared to Osaka. When touring Kansai Area (Kyoto+Osaka+other nearby’s), it would probably be cheaper to stay in Osaka and just arrange a day visit to Kyoto, since these two cities are only 30-40 minutes apart by train (which is also included with the JR pass).

——000——-

I visited Kyoto together with Himeji and Hiroshima. Will post a complete costing on these 3 cities combined. Stay tuned. =)

For Japan Visa application guide, click here.

I flew to Narita(Tokyo) from Cebu City via Cebu Pacific Air daily direct flight. Kyoto is around 2.5 to 3 hours by train from Tokyo. For plane ticket bookings, click this.

XIAMEN AIR TO LAUNCH DIRECT FLIGHT FROM QUANZHOU,CHINA TO DAVAO CITY

The first non-stop route from mainland China to Davao.

On December 18, 2018, Xiamen Airlines will officially launch its inaugural flight from Quanzhou(Jinjiang) to Davao. This is also one of only three international routes operated from Davao’s Francisco Bangoy International Airport.

PHOTO BY XIAMEN AIR WEBSITE

Aside from Manila, Cebu, and Kalibo, Davao will be the fourth city that Xiamen Airlines flies to in the Philippines. As it is the airline with the largest market share of the China-Philippines market, Xiamen Airlines is devoted to boost exchanges between the two countries through network development.

As per Mr. Lin Huagun, General Manager of Xiamen Airlines, “Quanzhou- Davao route will be operated by Boeing 737, under flight number MF8679/80. Passengers will be able to depart from Quanzhou every Tuesday and Friday at 9 o’clock in the morning and arrive in Davao at 12:15. On the return journey from Davao, passengers can depart at 13:15 and arrive in Quanzhou at 16:30 in the afternoon. By now, this route is the only non-stop flight from mainland of China to Davao. The Quanzhou – Davao route will be operated by a Boeing 737-800, operating with the flight numbers MF 8679/8680. Passengers will be able to depart Quanzhou for Davao every Tuesday and Friday, leaving at 9:00 AM, and arriving at 12:15 PM. On the returning flight from Davao, passengers can depart at 1:15PM and arrive in Quanzhou at 4:30 PM. This is currently the only direct flight between Davao and Mainland China.”

Round trip ticket starts at ++ 15,000.00 Pesos as per Xiamen Air website. For bookings and ticket inquiries, click HERE.

China’s consular office in Davao starts visa services.

In line with the drive to establish a stronger tie between Quanzhou and our beloved city, the Chinese Consular office of Davao now accepts visa application.

“This will facilitate bilateral exchanges between China and the Philippines, especially in the southern part. It also shows the Chinese government’s confidence on the City of Davao,” Consul General Li Lin said.

Consular office address : Acacia Street Juna Subdivision, Davao City

China Tourist Visa Application guide-blog to follow.

Cebu Pacific Air 24-hour SNAP SALE

ONE DAY ONLY SNAP SALE. December 12,2018 ( TODAY! 12:01 A.M. – 23:59 P.M.)

Christmas bonuses are out and it’s that time of year to plan and make moments happen with a SNAP SALE today from the Philippines’ leading airline, Cebu Pacific!

Fly from Manila to Bacolod, Cebu, Cagayan de Oro, Dumaguete, General Santos, Iloilo, Pagadian, San Jose (Mindoro) and Zamboanga and vice-versa for as low as PHP299 base fare. Imagine going on a barkada trip to Lakawon Island, basking in the beauty of Kawasan Falls, white-water rafting in the Cagayan River or lazing in the pink sand beach of Sta Cruz Island.

Or, for as low as PHP499 base fare, fly between Manila and Bandar Seri Begawan (Brunei), Denpasar (Bali), Hanoi, Siem Reap, Fukuoka, Shanghai, Taipei. Some adventures to consider include experiencing Balinese art and culture, or exploring the ruins of Angkor Wat, nature parks in Fukuoka or taking a cruise along Halong Bay.

Pursue passions and fly from Manila to Singapore for as low as PHP594 base fare. Savor the famous Chili Crab or Peranakan cuisine, or let loose at Sentosa Island.

Travel period is from January 20 to April 30, 2019.

Snap up these seats via www.cebupacificair.com or via the official Cebu Pacific mobile app on the App Store and Google Play.

About Cebu Air Inc. (PSE: CEB)

Cebu Air Inc., operating as Cebu Pacific, is the largest carrier in the Philippine air transportation industry, offering its low-cost services to more destinations and routes with higher flight frequency within the Philippines than any other airline. Together with subsidiary Cebgo, Cebu Pacific flies to fly to 37 domestic and 26 international destinations, with over 107 routes spanning Asia, Australia, the Middle East, and USA. CEB operates flights out of seven other strategically placed hubs in the Philippines: Manila, Clark, Kalibo, Iloilo, Cebu, Davao and Cagayan de Oro.

CEB boasts of one of the youngest fleets in the world, with a total of 69 aircraft with an average age of 5.01 years. The CEB fleet is comprised of 36 Airbus A320, six Airbus A321CEO (Current Engine Option), and eight Airbus A330; while the Cebgo fleet is composed of eight ATR 72-500, and 11 ATR 72-600 aircraft. Between 2017 and 2022, CEB expects delivery of two more A321 CEO,six ATR 72-600, and 32 Airbus A321NEO (New Engine Option) aircraft.

Cebu Pacific has achieved full compliance with the International Air Transport Association (IATA) Operational Safety Audit (IOSA)—considered as the accreditation with the highest standards for safety in the airline industry, joining a roster of 429 airlines worldwide that have strictly complied with the most stringent of international standards governing aviation safety.

For bookings and inquiries, guests can visit http://www.cebupacificair.com or call the reservation hotlines +852-397-33800. The latest seat sales can be found on CEB’s official Twitter (@CebuPacificAir) and Facebook pages.

Guests may also download the Cebu Pacific official mobile app on the App Store and Google Play.

Tokyo Three Days Itinerary For The Weekenders

Mga beshies and readers of mine from VisMin, may good news ko! Cebu Pacific will now be flying DAILY from Cebu to Tokyo-Narita and back starting December 1,2018. Excited much? Yes, we are!tokyjosemanuel40
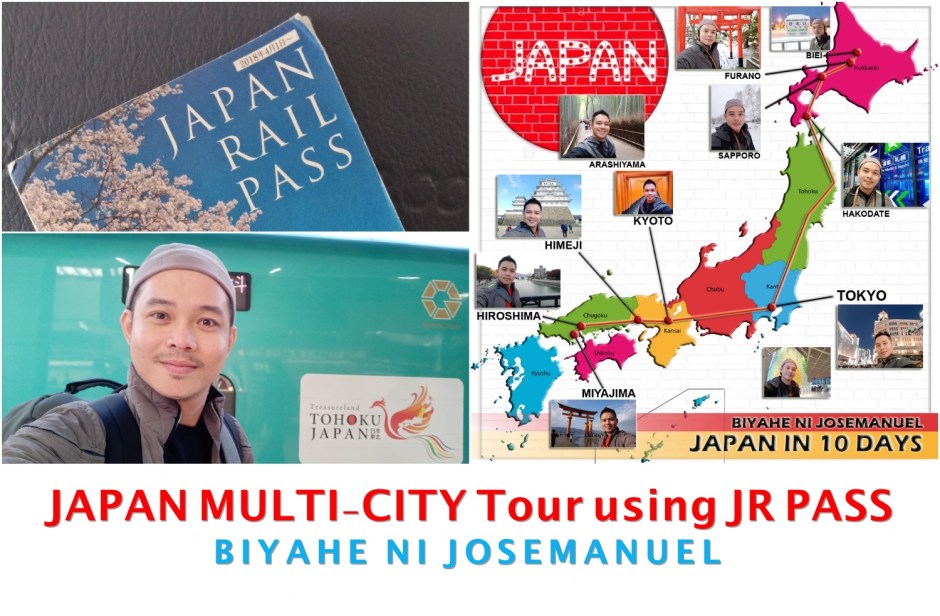
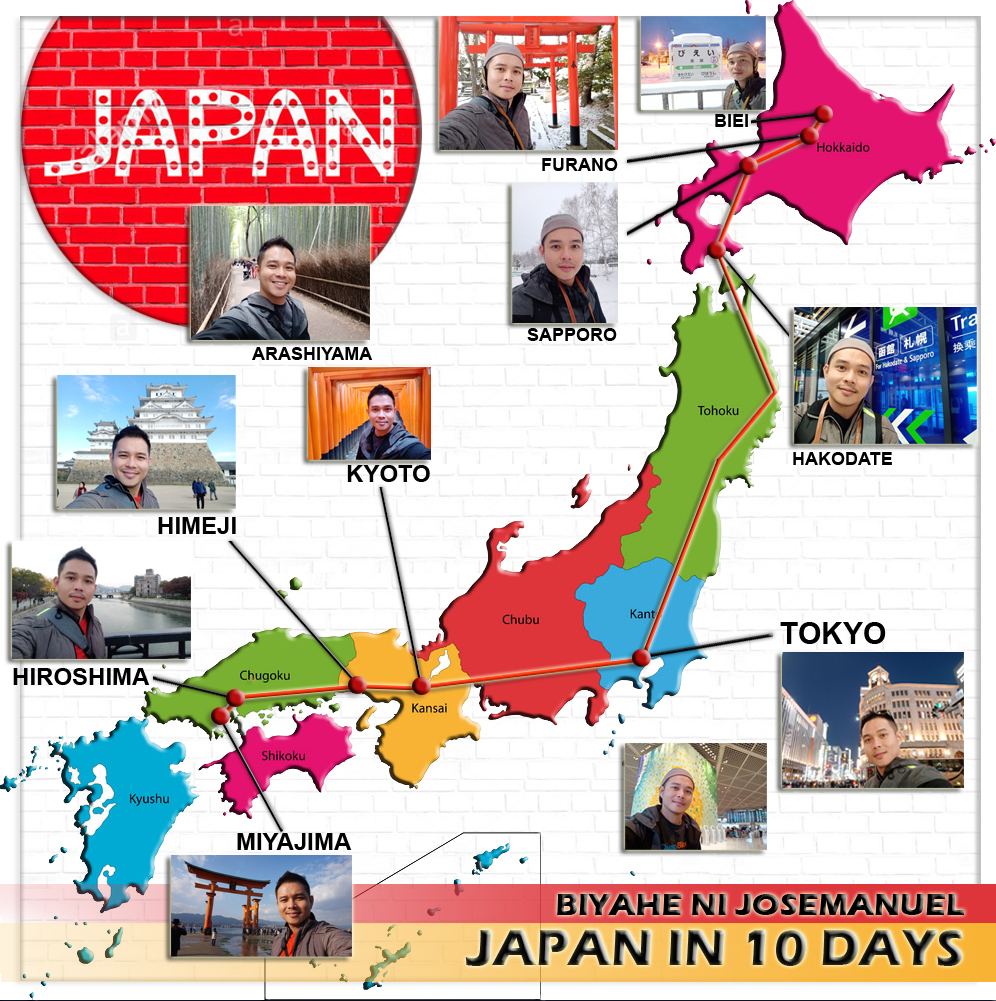
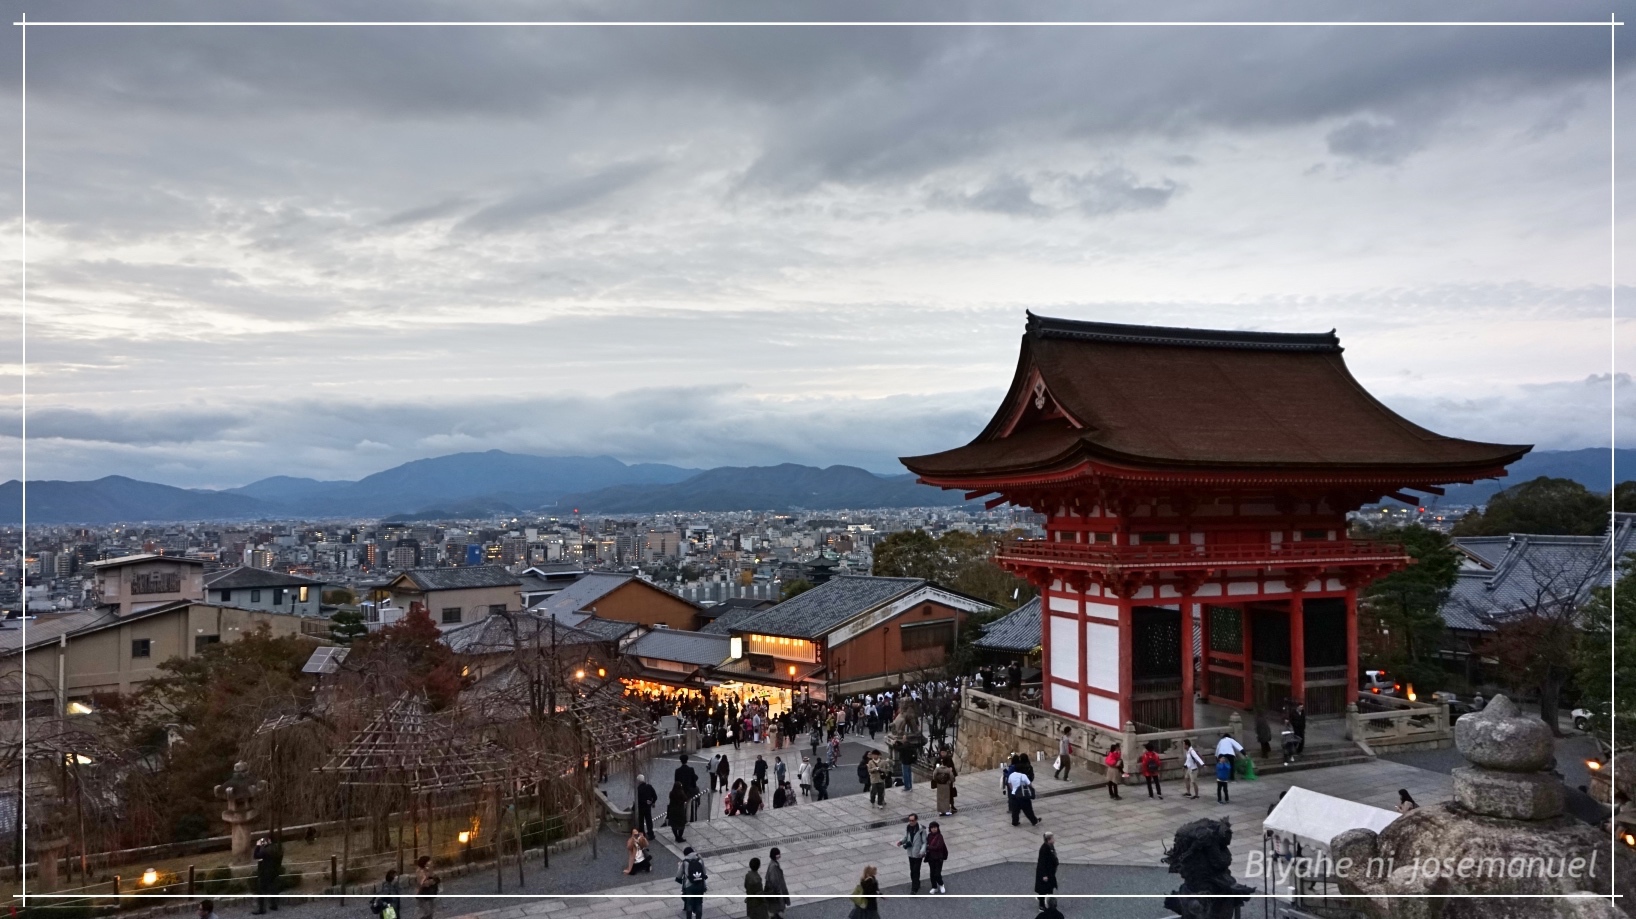
I once asked a travel-enthusiast friend why she keeps on coming back to Tokyo. She cheerfully gave me four reasons: the beautiful season-based cityscape,the ultra-modern facilities, the Ginza shopping district and the level up food trip experience. Tokyo,Japan is definitely among the top travel destinations of Filipinos for a lot of reasons. And with the CebPac daily flight from Mactan Airport, traveling to Tokyo shall now be more practical for us living in Visayas and Mindanao. Flying time only takes 4 to 4.5 hours.

Got a long weekend coming? Tara, lets go-Tokyo!

——-000——–

So, excited na mulaag? Wait lang, guys. Secure your Tourist Visa first. Wag kayong ano! Check the link below for guidelines.

Easy Japan Tourist Visa Guide for Filipinos

——-000——–

The Weekenders’ Itinerary:

Day Zero (Thursday): We left Cebu-Mactan Airport in the morning and arrived in Tokyo-Narita around 3:00pm. We went straight to Tokyo-Ginza shopping district because shopping is priority! Joke lang. I just window-shopped with my friends. The biggest Uniqlo  Flagship Store is located in Ginza. 12 Storeys lang naman, mga bes! All seasons Uniqlo products. bakanteha na imong credit card for this. 

Ginza district is lined with ultra-modern architecture and posh shop interiors to inspire every designer’s creative lobes.

Ginza district gets even more amazing with its bright lights at night.

Day One (Friday): Cultural Immersion Day.  We spent the day in Tokyo’s Old District-Asakusa for a temple visit and experience traditional Japanese hobbies.

  • Gold fish scooping activity at Asakusa Kingyo (Budget 1500 Yen/pax)

  • Sensō-ji -Asakusa Temple Visit (Free Entrance)

  • Traditional Candy Making at Ameshin-Asakusa (Budget 3000 Yen/Pax)
    • Address: Hanakawado Studio1F Hori bldg, 2-9-1 Hanakawado, Taito-kuHours: 10:30~18:00 Closed on Thursday.
    • (link: http://www.ame-shin.com/en/)

Day Two (Saturday): Modern Day Activities.  Here, we got to experience the latest ultra-modern entertainment facilities of Tokyo.

  • MORI Building Digital Art Museum by EPSON teamLab (Budget:3200 Yen/pax)
    • Interactive Visual Art Museum for all ages.
    • Location : Odaiba

  • Quick Photo Op at Gundam Statue in Diver City Mall, Odaiba

tokyjosemanuel93.jpg

  • Virtual Reality Amusement  Center at Sky Circus Sunshine 60 Observatory
    • (Budget : 1200 Yen/Pax + add fees on specific rides)
    • Business hours 10 AM to 10 PM

Sky Circus also offers one of the best overlooking views of Tokyo Metropolitan at sunset.

  • Night out at Shinjuku

Day Three (Sunday): Last minute shopping. Flight home is scheduled at around 2 PM. arrive in Cebu-Mactan Airport at around 6:30 pm

——-000——–

Where to Stay:

Option 1: Business Hotel

  • Hotel Villa Fontaine in Tamachi .
  • Top rated.
  • Budget : around 12,000 Yen/night.
  • High end toilet fixtures. Superb amenities. Breakfast Buffet included.
  • 10 mins, walking distance to Tamachi Station.

Option 2: Hostel Living-Capsule/Shared Room Type

  • Ryokan and Hostel Wasabi in Nippori, Tokyo.
  • Top rated.
  • Budget : 4000 to 5000 Yen/night
  • 2 minutes walk to Mikawashima Station (JR Jobar Line). 3 Stations away from Tokyo Station.

    ——–000000———

Rough Budgeting in Php (Sample expense breakdown using option 2, Hostel Stay)

  • Regular Airfare (4 months advance) with Cebu Pacific Direct 15,000 Pesos RT
  • Visa = 1,000 Pesos via travel agency
  • Data Sim = 800 Pesos via TravelSim PH
  • Hostel Wasabi = 2000 Pesos per Day x 3 days (Though there are cheaper options naman. google nyo nalang)
  • Food Allowance = 1500 Pesos per day x 3 days (I swear, Sapat na to if di ka nmn climber)
  • Transportation/Train rides = 700 per day x 3 days
  • IT Entrances/Souvenirs/other expenses = 10,000 Pesos
  • Total Estimated budget = 40,000 Pesos
  • Uniqlo Shopping = Swipe!
  • New Camera = Swipe! 12 months to pay.
  • Other Climber’s expenses= Swipe! Charot.

For ticket bookings, click here.

I purposely gave a realistic costing because it is better to fly prepared than maging dukha doon sa Japan. But kayang kaya naman to lower this costing; particularly on airfare. Alam ko, abangers tayo ng sale eh. hehe.

——–000000———

More Blog posts on Tokyo to Follow:

  1.  Tokyo Video-Blog
  2. Detailed Hostel Living in Tokyo Video-Blog
  3. Foodtrip Around Tokyo and Beyond
  4. Japanese 7-11. 1000 Yen Lunch Challenge Video-Blog
  5. Maximizing JR – Unlimited Bullet Train Pass . Is it worth the money?

Stay Tuned. =)