NUSTAR RESORT & CASINO CEBU UNVEILS RHYTHM FOR WELLNESS THIS SEPTEMBER 

NUSTAR Resort & Casino Cebu proudly sets “Rhythms of Wellness,” a month-long celebration throughout September 2025 dedicated to holistic well-being. With the vision to establish NUSTAR as a leading wellness and lifestyle destination and a key driver for sports tourism in Cebu, this campaign aims to unite Cebu’s diverse wellness, sports, and lifestyle communities through meaningful partnerships and experiences.

“The theme ‘Rhythms of Wellness’ reflects how wellness takes many forms,” said Mr. Sean Knights, Chief Operating Officer of NUSTAR Resort & Casino Cebu. “Some days call for stride and energy, others for stillness and reflection, and others for strength and perseverance. Each weekend in September highlights a different rhythm, giving guests the chance to explore activities that match their own pace and path to well-being.”

Rhythm of Stride: NUSTAR Run Club 

The wellness activities taking place over the month open on September 7, 2025, with the launch of the NUSTAR Run Club, the integrated resort’s running community set to create a new pace — and space for fitness and fun. The inaugural activity will be for the first two sign-ups. Runners will experience scenic coastal paths in and around the resort, with opportunities to connect over post-run coffee and enjoy an upbeat day-club atmosphere with music at the Lighthouse.  

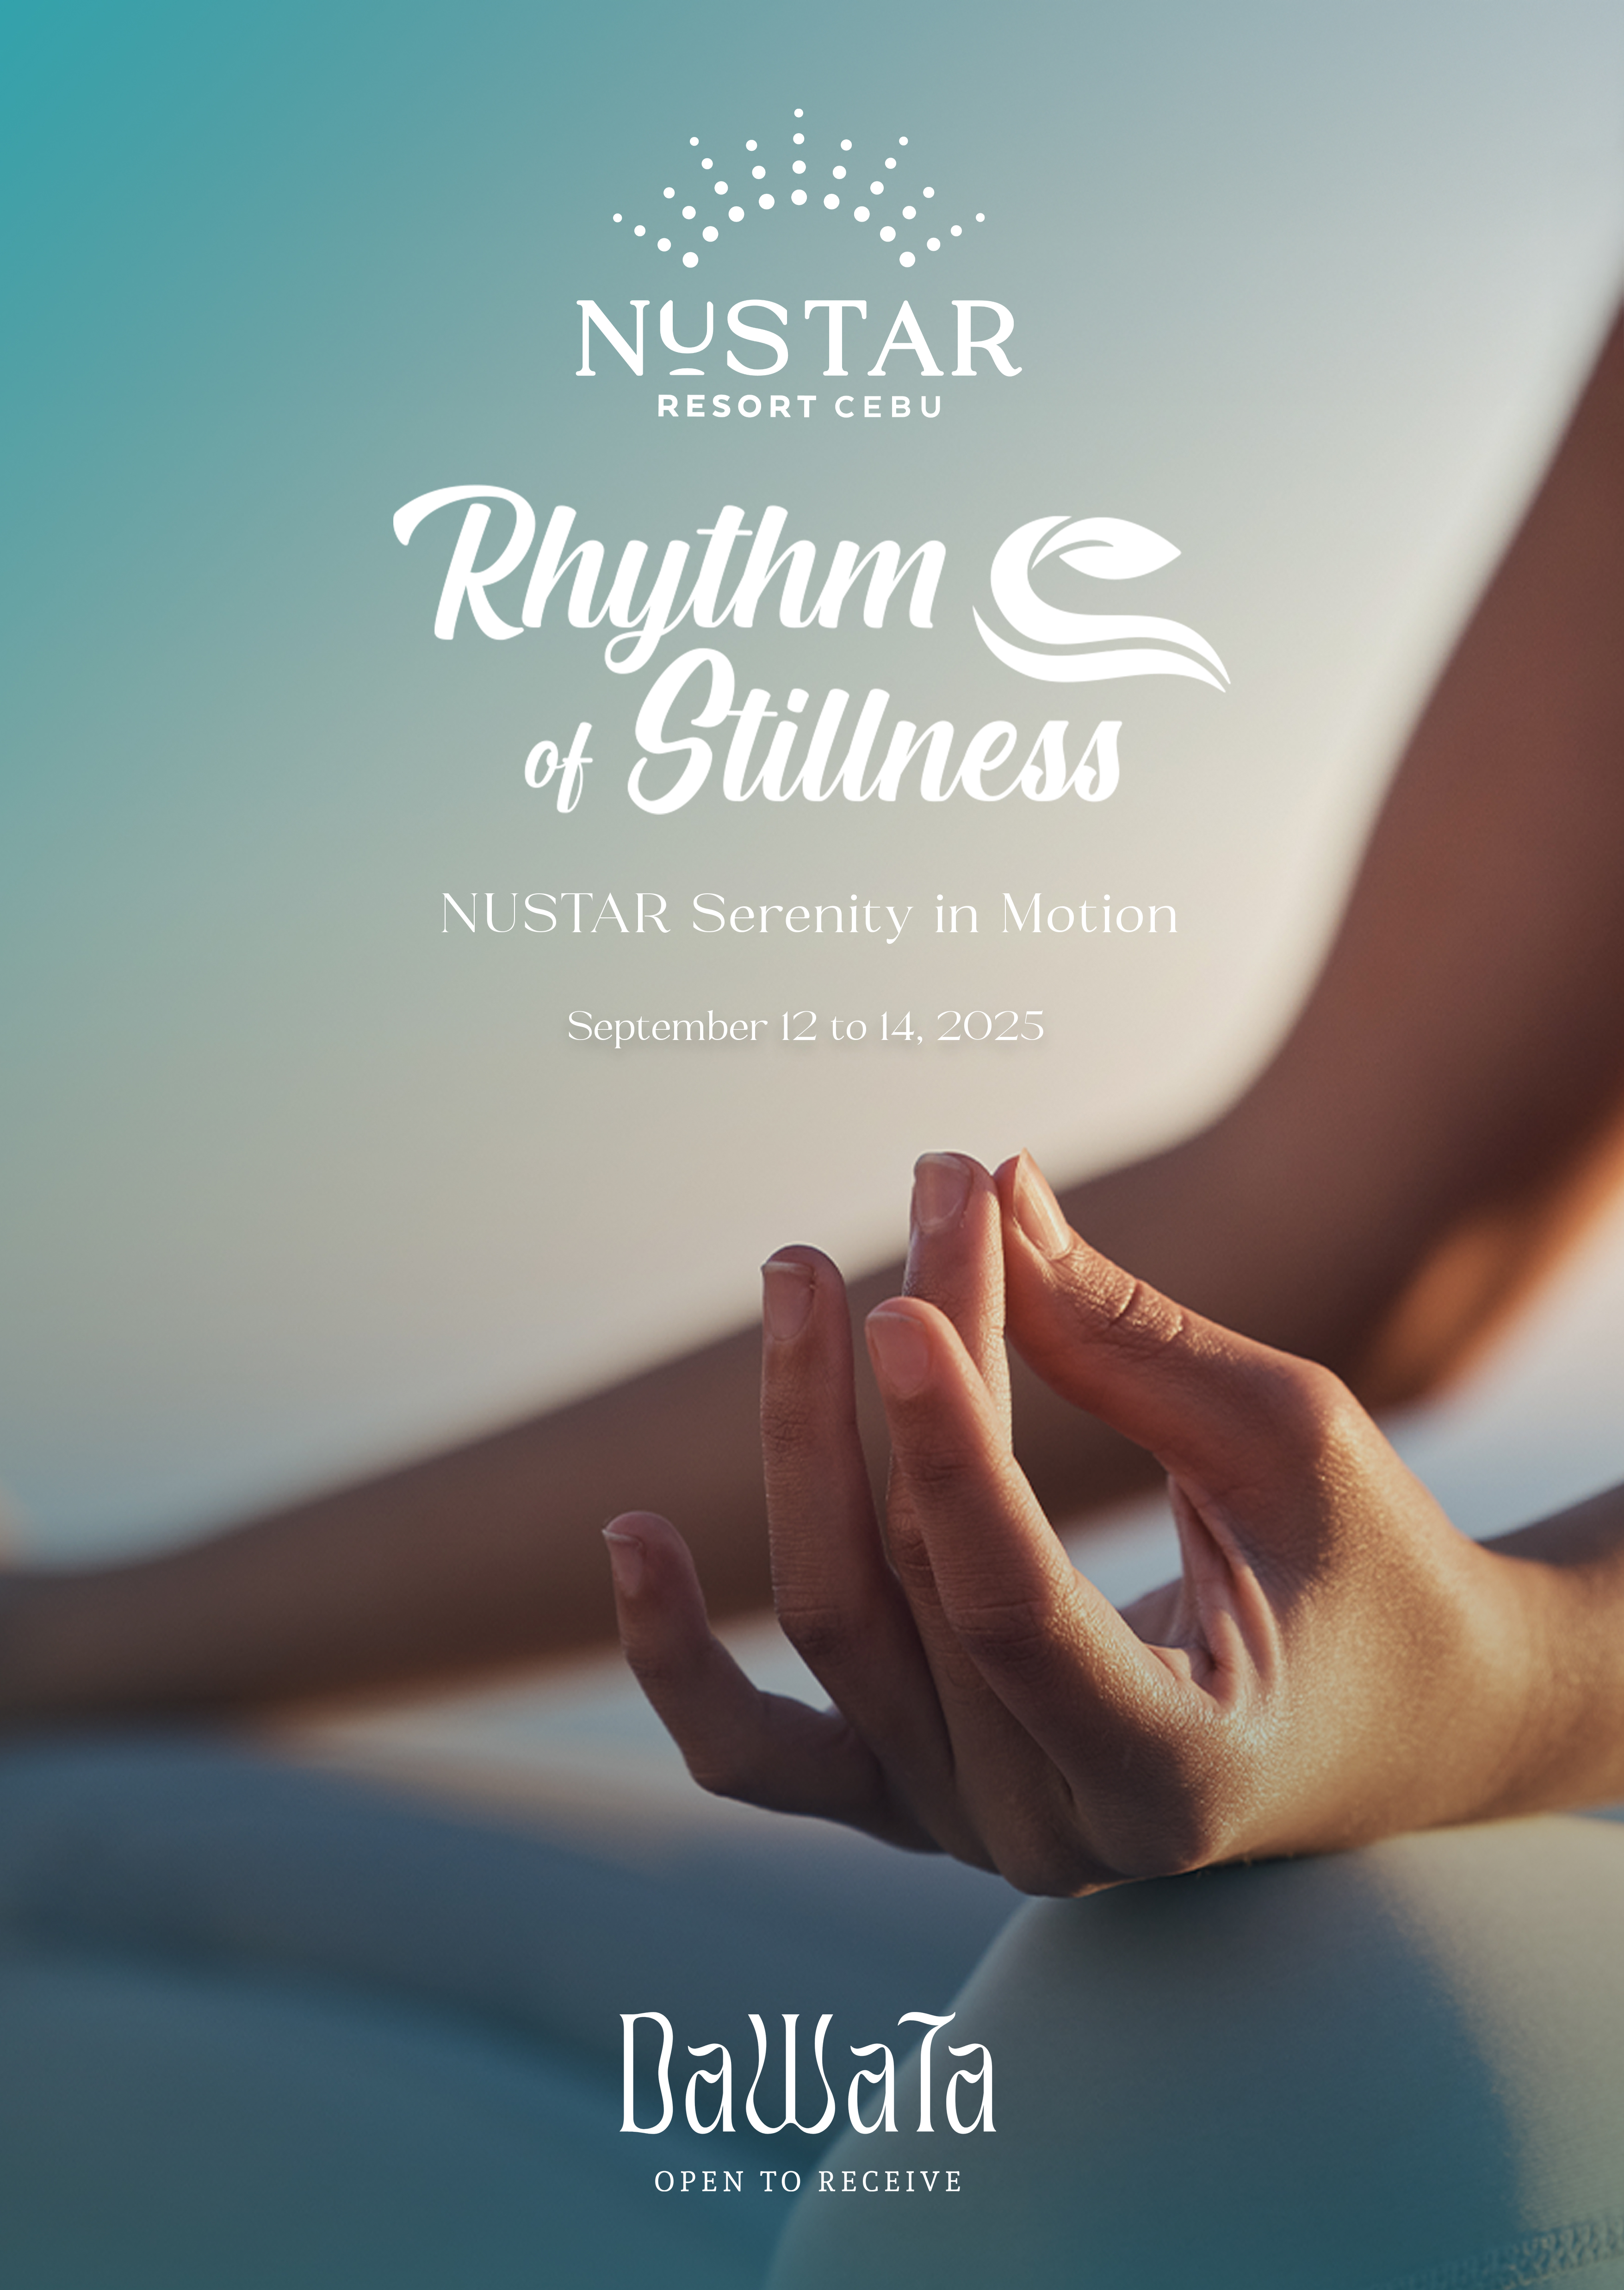
Rhythm of Stillness: NUSTAR Serenity in Motion

The second weekend shifts the focus inward with NUSTAR Serenity in Motion, happening September 12–14, 2025 in partnership with Dawata Wellness. Dawata is a highly regarded and widely popular yoga and wellness community, known for its expertise and commitment to holistic well-being. This three-day retreat is designed to promote mental wellness through guided activities. Guests can take part in tea rituals, meditation circles, sunrise yoga, sound baths, group healing workshops, and ocean breathwork paired with an ice bath experience and more. Participants who register on or before August 15, 2025, can take advantage of an Early Bird rate of ₱1,750 per day. Starting August 16, regular rates will apply: ₱2,000 for the first and third days, ₱2,500 for the second day, or a special bundled rate of ₱5,000 for full three-day access, per participant.

Rhythm of Strength: NUSTAR Dragon Boat Regatta

The month concludes with a show of teamwork and endurance at the NUSTAR Dragon Boat Regatta 2025 on September 20–21, 2025. In collaboration with Philippine Accessible Disability Services, Inc. (PADS) Foundation, the regatta will feature a 200-meter course set along the NUSTAR Boardwalk. Teams will compete in a range of categories, welcoming paddlers of all levels at a registration fee of Php2,500 per person. Another NUSTAR Signature, this event aims to support and promote Sports Tourism here in Cebu.

“Wellness means something different for everyone and that’s why we created Rhythms of Wellness,” said Ms. Katrina Mae de Jesus, Assistant Vice President for Business Development of NUSTAR Resort & Casino Cebu. “It’s about offering choices, from active pursuits to quiet retreats, so guests can engage in the way that suits them best. As a premier destination, we strive to innovate ethically, engage our communities meaningfully, and design events and activities that not only entertain, but endure.”
NUSTAR aims to set the tone for wellness-centered events in Cebu by combining world-class facilities with strong community partnerships. This September, NUSTAR invites everyone to discover their own rhythm of wellness.
For more details, visit http://www.nustar.ph or contact (032) 888 8282.

About NUSTAR Resort & Casino Cebu
NUSTAR Resort & Casino Cebu (stylized as NUSTAR), the Philippines’ first and only premier integrated resort in the Visayas and Mindanao regions, offers world-class entertainment, luxury accommodations, diverse dining, and curated retail. Owned and operated by Universal Hotels and Resorts, Inc. (UHRI), NUSTAR is home to the region’s largest gaming floor, The Mall – the first and only luxury shopping mall in the area, Fili Hotel, The Boardwalk, and the ultra-luxury NUSTAR Hotel. Explore our offerings at www.nustar.ph.

New Zealand Tourist Visa for Filipinos 2018 – DIY Online Application Guide with Photos

LRM_EXPORT_406399622555966_20181002_222339421_Fotor

WAIVED NA PO ANG TOURIST VISA FEE FOR NEW ZEALAND!

True! Hindi po ito fake news. Before, it was mandatory to pay NZ$ 165. As of June 2017, A resolution has already been approved, stating that the Citizens of the Philippines do not have to pay anymore the fee or immigration levy for TOURIST/VISITOR VISA application, when coming to New Zealand for fewer than 60 days (Reference: https://www.immigration.govt.nz/new-zealand-visas/apply-for-a-visa/).

However, point out ko lang po clearly, NZ is NOT VISA FREE. It is only the big amount of fee that was taken out. We still have to submit necessary requirements to the NZ Embassy for the issuance of visa prior to our trip.

Traditional method of submitting paper requirements is still being implemented today. However, NZ Immigration already formulated a “Passport Handling-Online Application” method, which has taken visa application to the next level of easiness. With this method, applicants are only required to completely fill up a form on their website and then submit online the scanned copies of usual visa requirements. For this convenience,however,applicants shall pay a fee of less than 1,000 Pesos for the “Passport Handling”, which shall be discussed later. This is relatively a small amount compared to the big chunk of levy that has already been relieved from us. Passport handling fees may also be bank transferred na. This has made the application process more convenient, especially for us living far away from Manila/Cebu where embassy offices are located.
This guide blog focuses solely on Visitors (Tourist) Visa via Online Application. For other types of Visa, refer to https://www.immigration.govt.nz.

So without further ado (Char), here is a step by step guide on how I completed my application.

STEP 1 : Gather the visa requirements,

  1. Photo – passport sized (900 x 1200 pixels minimum), light colored background(except white, ideally light gray), JPEG Format straight from file. Bilhin nyo yung file ng picture sa studio. scanned from printed photo is not allowed; file size between 500KB and 3MB
  2. Valid Passport – scan pages with personal information; PDF Format
  3. Government issued Identification Card – either driver’s license, PRC, SSS, GSIS, TIN, Philhealth; PDF Format
  4. Proof of Employment – letter of approved leave from employer ideally with salary and other details ; PDF Format
  5. Evidence of Fund – Bank Certificate with ADB; Bank Statements; Updated Passbook; PDF Format
  6. Evidence of Onward Travel – Airline confirmed booking(meaning, ticket reservation from a reputable travel agency); PDF Format ; pwede rin Airline ticket mismo if you already have one, but not advised.
  7. Cover Letter – letter of intention. You may also put here your proposed day to day itinerary ; PDF Format
  8. Other Financial Document – Credit card billing statement, ITR; ; PDF Format
  9. For Self Employed – business permit, SEC or DTI registration. Annual ITR for the employed; PDF Format
  10. Record of Previous Travels – Scanned copy of your past and current passport with all stamps
  11. Copy of other Valid First World Visas (If available) – USA, Schengen, Japan or others; PDF Format

Re bank funds, some successful applicants mentioned “100 USD per day x # days stay x 2” maintaining balance. I guess we should prepare the same na din (or more) to prove our capacity to visit their country.

Step 2 : Go to https://www.immigration.govt.nz/new-zealand-visas/apply-for-a-visa

Select appropriate visa options. it will look something like this.

Click on the RealMe Link at the bottom to start application

Step 3: Create a RealMe Account which serves as your application form. This is where you will be uploading all your infos and scanned documents.

Provide usual infos, username and password. This step will also ask for an email verification.

After Email verification, your RealMe account will now look something like this. Click the “Visitor Visa” Highlighted in RED.

Step 4: Fill up RealMe Form in order that is given.

Fill up all the “Identity and Contact” requirements. one after the other. Save infos from time to time.

This may be intimidating, but just say No to all these entries, unless you seriously have a condition to declare.

The interface still asks for this stage even if you declared “single” early on. Samok ha!

This is the part where you upload your JPEG and PDF files

The good thing about this interface is that it prompts you for detected errors such as this. Cool! Very first world!

Step 5: Submit online your completed RealMe Form. In 24 hours, you will receive an email confirmation and instructions on where to submit your passport. This is not yet your approval.

Step 6: Payment of Passport Handling Fee thru Bank.

While it is most common for applicants to submit their passports personally, NZ offers an option to pay through Banco de Oro, which is very favourable for people away from Manila. Passport handling will be catered by VFS Global, which is NZ embassy’s partner agency. Details can be found at http://www.vfsglobal.com/NewZealand/Philippines/how-to-apply.html

Instructions on Bank Transfer Payments are detailed on this website.

For my application, I paid the 570 Handling fee plus 380 Courier Fee for them to return my passport after assessment. I did not avail the SMS assistance anymore, since the updates on my application can be monitored on my RealMe Account

Print the bank form and show to the bank during payment.

Step 7: Submit Passport to VFS Office for Assessment and Verification

Photocopy Bank Deposit Slip/ Transfer Slip and submit this to VFS together with your valid passport, the printed and signed bank form, a printed copy of “thank you” page and the Email Confirmation. Applicants from the province may send their documents ti VFS via any preferred courier.

Step 8: Result

Once the result is released, VFS will send your passport back to your given address. Courier fee for the return is part of the prior payment.

NZ Visitor Visa issuance is indeed fast. I got my approval 4 days after submission of passport to VFS.

Points to remember:

As per website, results are released 20 days after the submission. However, most of the recent applicants got their results within 3 to 4 days!

Since this is an online application, no need to print and submit paper requirements. Unless your uploads are not clear, then they may ask for those.

You can apply as early as 6 months before the trip.

Grant on duration of stay varies. Wala talagang template for this. But definitely, your stay will not exceed 59 days at a time.

For online application, No more sticker on your passport. The approval certificate that will be emailed to you shall serve its purpose.

—0—-

So there, hopefully this blog will be of help by the time you apply for your own. Though I am fully aware that this guide will not guarantee approval for everybody. Kaya sabayan nyo nalang din ng Novena for 14 days with miryenda cream bread and mayonnaise.

This guide,however, is focused purely on tourism/holiday visit. For other types of application, see https://www.immigration.govt.nz for details.

Re Waived visa fee, there is no information on until when this waived fee will last. So while we are enjoying the current privilege, might as well consider visiting this green country very soon.

Lastly, if you are unsure of your documents, or if you find the D.I.Y. online application too complicated, please get in touch na lang with a reputable travel agency to process your papers.  Life is short, wag na pa stress!

Travelogue 2014

Exactly a year ago, I travelled to Central Asia all by myself for around 3 weeks, and indeed it was the bravest travel experience I’ve had so far. I will never forget how it felt on my first few hours in Kolkata, with a feeling of thrill being at my farthest from home, hopping in a wonky public bus, the noise, cows lounging at the middle of the road, the smell of rubbed flowers and spices, and the cool bengal morning wind pinching my face… finally made me say I am in India, the Real India I was told about.

Recalling my previous backpacking to other Asian countries, people and things felt relatively similar to home, but my visit to Central Asia was that one scenario when almost everything really felt …  foreign.  Despite that feeling, I came prepared, and had been fortunate to meet and found comfort from kind locals and fellow backpackers in India and Nepal. Backpacking almost always make you feel uncertain, but the moment you find truthful kindness from people you come across, that’s when things feel positive, and that you can finally say you’ll be OK, and that your day will be awesome! Indeed, the concept of smile and kindness is universal, regardless of culture.

As a tribute to my Backpacking Central Asia 2014, here are my travelogue postcards to share how great things were back there. All shots were taken by me with my basic digicam . Feel free to share. =)

JOSEMANUELtravelogue20144JOSEMANUELtravelogue20142JOSEMANUELtravelogue20146JOSEMANUELtravelogue20141JOSEMANUELtravelogue20140JOSEMANUELtravelogue20143JOSEMANUELtravelogue20145

Feel free to check out my related blog posts re this backpacking trip.

India Visa on Arrival for Pinoys (UPDATED Feb. 2015)

Backpacking Kathmandu Nepal with VISA on Arrival

Solo Backpacking Essentials

I always had this fondness for solo backpacking, and I am fully aware of the consequences and risks of traveling alone, especially on foreign land where everything is relatively unfamiliar. As such, I always make a point to prepare my thoughts and do a lot of readings and inquiries before I the trip. Here are my basic preparations. Hope this would help.

1. Research .
-Read blogs . I prefer inquiring on blogs and personal accounts of experienced backpackers who already traveled my eyed destination. rather than just reading wikipedia and travel websites.
– Know the route . Steps in Border crossing. Airport to city center transportation . know where the backpackers area is. download google map,, use walking direction tools just to have an idea.
– Research on country specific entry Visa , if applicable.
– know which tourist spots are worthy of a visit, because you don’t really have to see everything. Read a bit of history of the place. You will appreciate your visiting experience more when you know what made it happen.

2. Exchange currency ahead of time. especially when traveling by land, since border crossings and bus transportation require local bills . If u use dollars, you might not get any change.

3. A backpack of basic essentials.
– Pack lite . If you are traveling for a month, pack clothes that is good for 2 weeks. You can just have them washed at the middle of your trip . Some backpackers Ive met only brings very few clothes, and prefer to buy cheap ones at their destination.
– cargo pants and Cargo shorts . preferably dark colors so it wont get dirty easily.
– Bring a small , quick dry towel. Bath Towels are usually available with the hostels . If not, then you just have to make full use of what you have.
– Bring a small pillow ,preferably a neck pillow, which is very helpful especially on bus trips.
– medicine pack. particularly for tummy upset and pain relievers.
– sun block and Anti mosquito lotion – small bottle or sachet (because 100 ml bottles and up , might be confiscated in the airport )

4. Comfortable footwear.
1 pair of rubber shoes , preferably the one you use often. New shoes might give you blisters which can be very hassle.
I don’t bring slippers anymore, I prefer to buy them on markets , if necessary .

5. A wifi enabled – smart phone . not only for communication ,, but more for researches and google mapping by the time you get there. Hotels usually have wifi for guests .

– end of list –

Can anyone make recommendations on how you prepare your trips ?