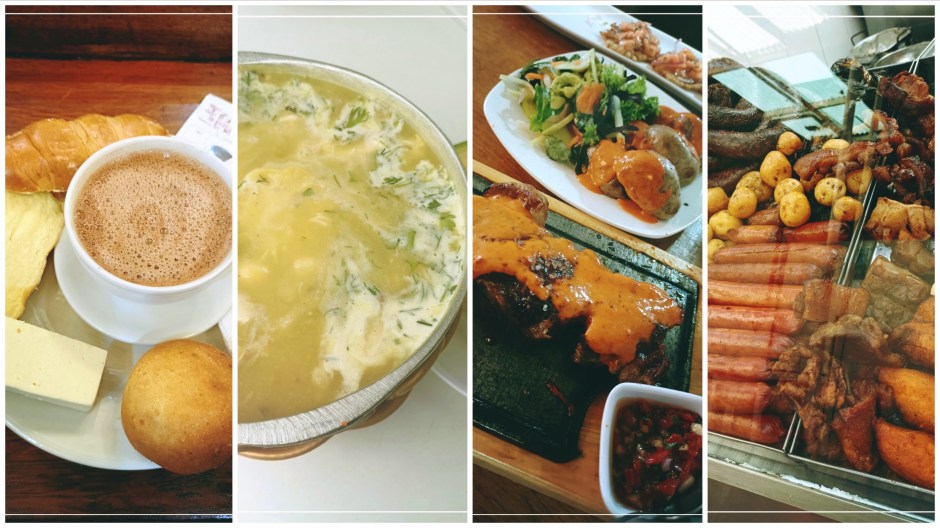
Free days are the best days during vacation. With no itinerary to follow, I just walked around La Candelaria district of Bogota, enjoyed coffee, ate the best rice tamale for breakfast, and had a hefty 1″ thick steak for lunch. As a tropical country with fertile land, food is more affordable in Bogota; probably the cheapest of all the places I’ve visited in South America. Here are some of the memorable meals I had during my 3 days visit.
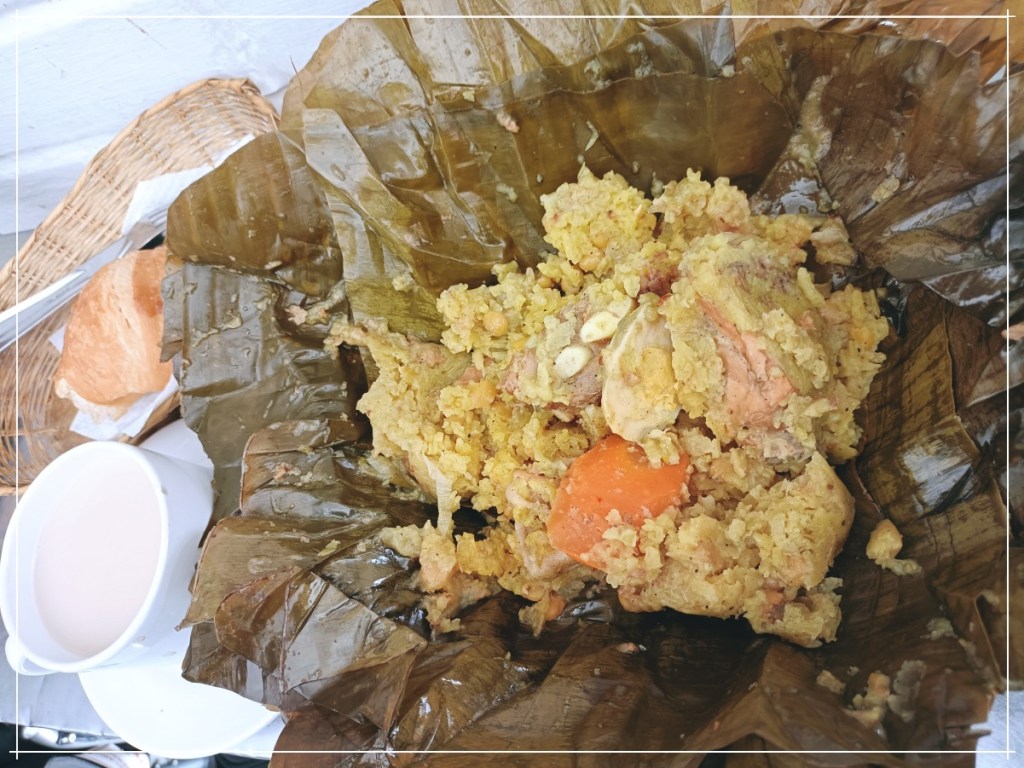
I’ve had different types of Tamale during my travel, but Bogota gave me the best one. It’s packed with fragrant yellow rice and corn combination, carrot slices and chunks of braised pork rib and chicken, plus complimentary bread and coffee. Mura lang ito, around 100 pesos if converted.
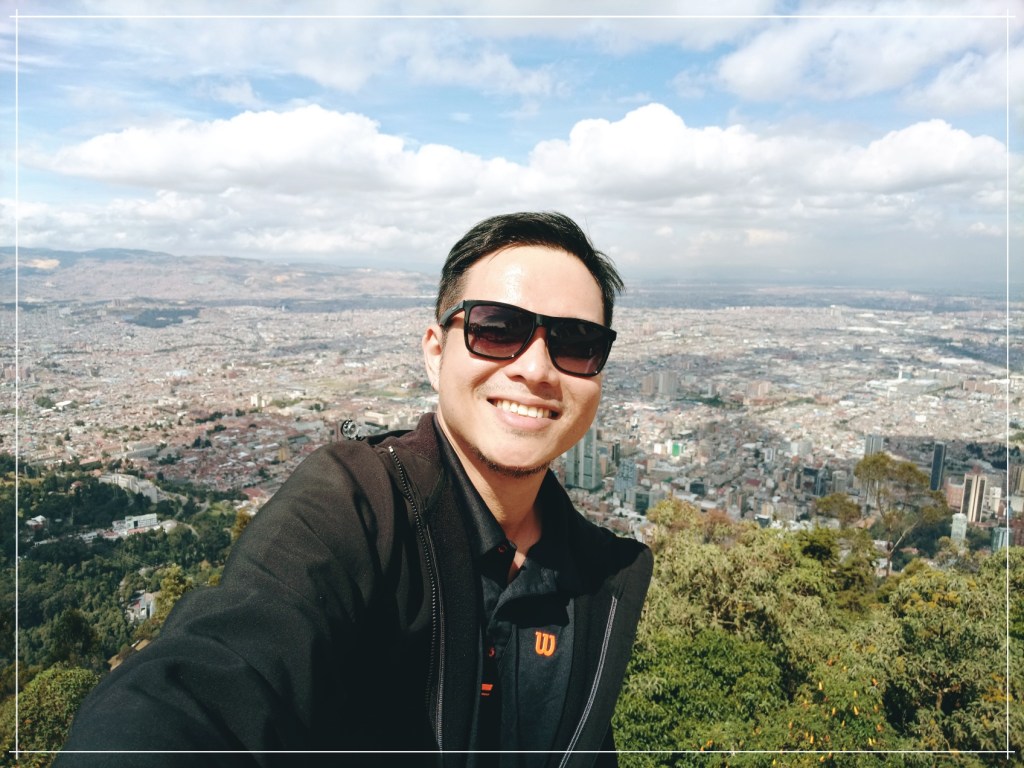
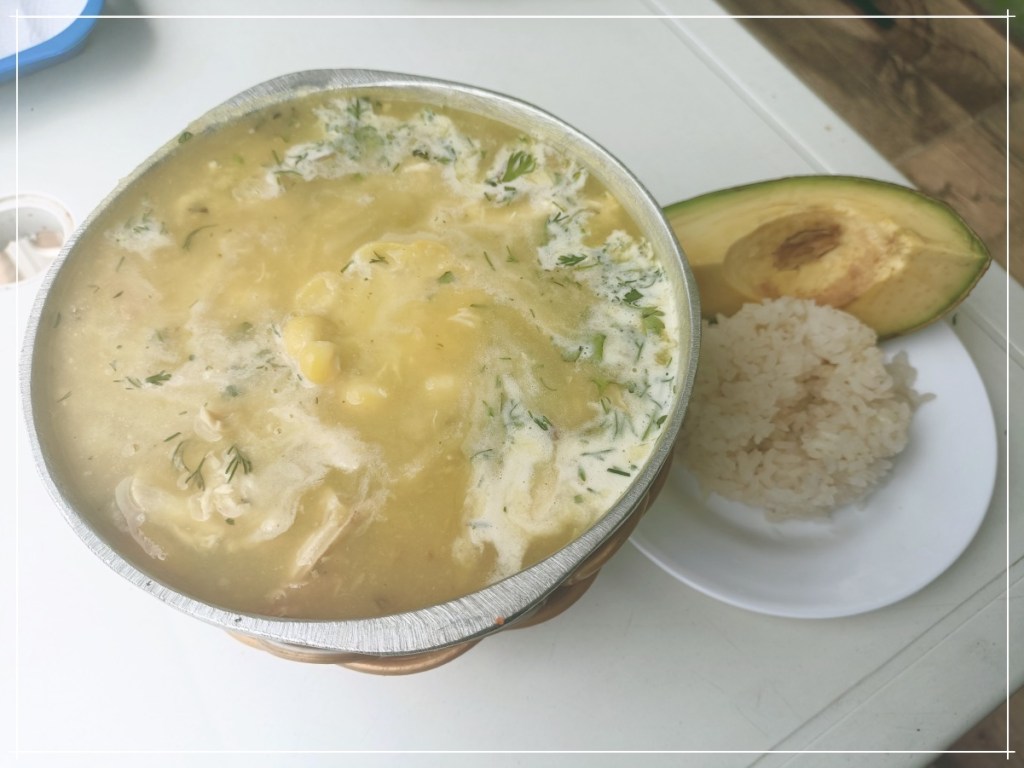
Ajiaco is one of the many regional Colombian dishes you can’t leave the country without trying. It’s a hearty soup made from three different kinds of potatoes, chicken, guasca leaves, with a half an ear of corn splashed in for good measure. Also served with a slice of avocado (locals mix them with the soup for added texture). I had this meal during my day tour at Monserrat Religious Shrine overlooking Bogota.
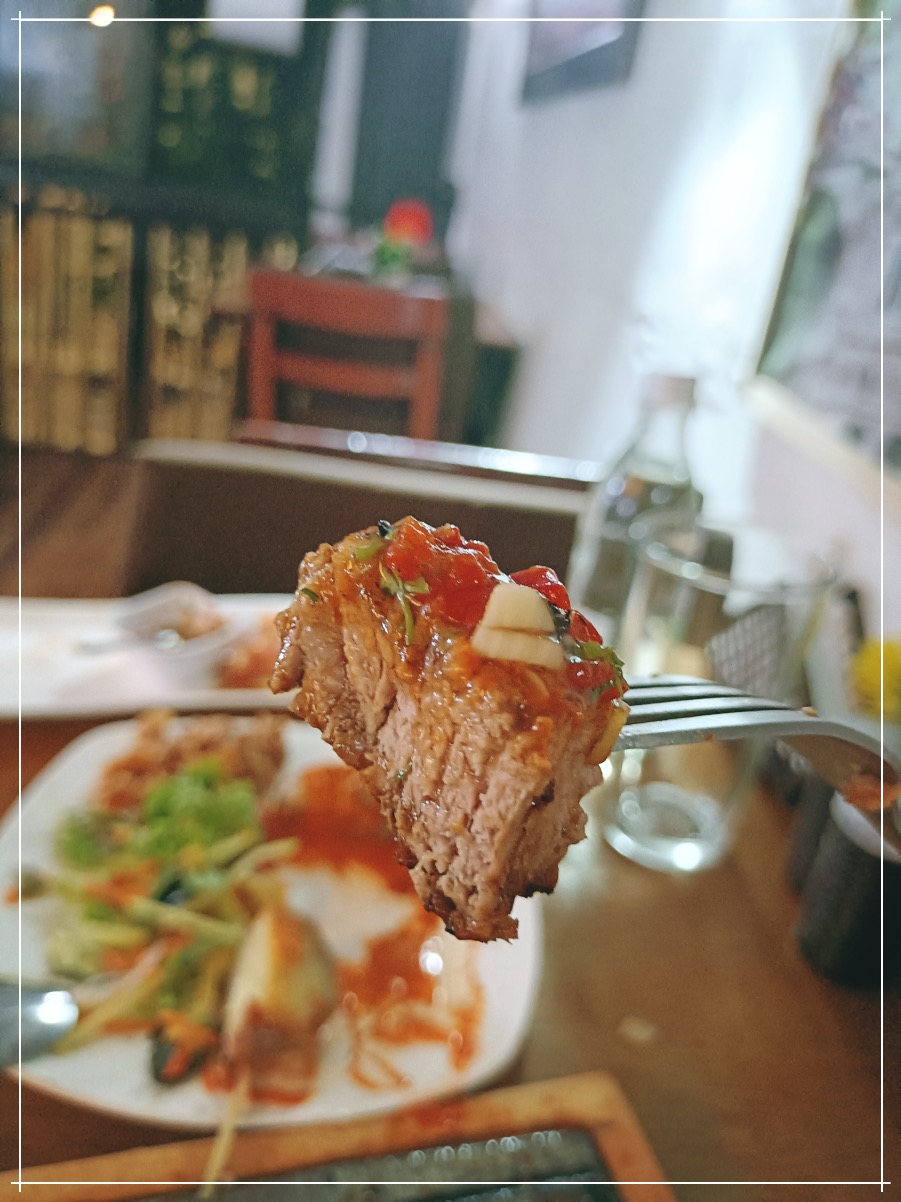
Meat is relatively cheap in Colombia. I enjoyed a thick slab of steak from Banquete Restaurante, a seated,full service restaurant in La Candelaria, serving good local dishes. This steak set cost me a little over 500 Php, i think; salad included. The red pepper\tomato gravy on top is mild. Not too hot. Picante as they say. Very different from our usual gravy here in PH. I also had freshwater shrimp ceviche as appetizer. Sobrang sarap nito. Shrimp is blanched (not raw).
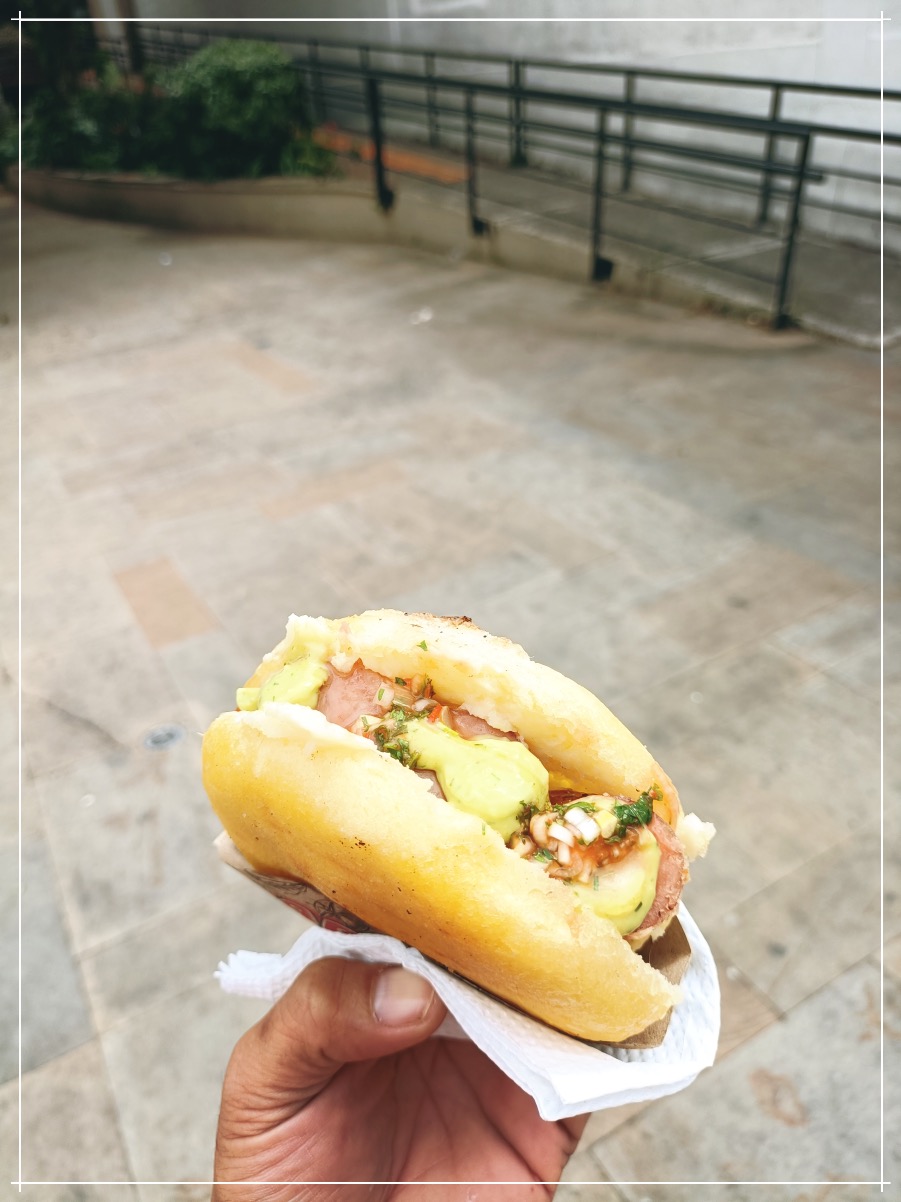
Sealed the afternoon with churros and Tostao Coffee, an affordable coffee chain in Bogota. Also enjoyed random street chorizo arepas (sandwich) I think went back 3x on this street kiosk during my stay. Ibang level ang chorizos (sausages) sa Bogota, I tell you.
A memorable last dinner in Bogota. I had this hefty plate of Bandeja Paisa, so i can try various dishes in one seating.
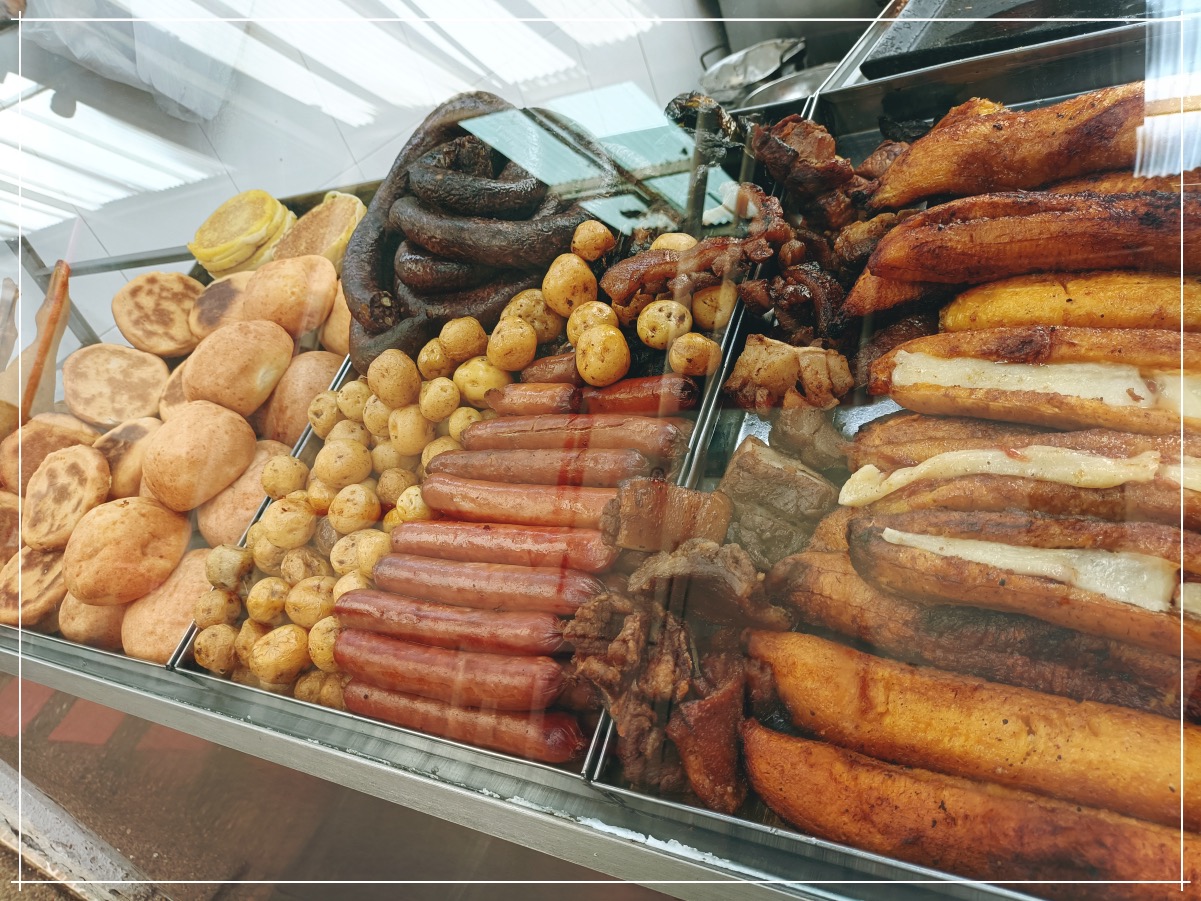
Bandeja Paisa is a traditional Colombian dish that contains beans, rice, arepa, traditioinal chorizo, plantain, chicharrón, avocado and marinated ground beef (like arroz cubana). I’ve noticed that Latins serve avocado as a side without any sweeteners; in contrast to us who only appreciates the fruit when it’s sweet and creamy.
To close the meal, I went to try the hot chocolate drink at La Puerta Falsa, known as one of the oldest continuously operating cafe in the world. The drink is set with 2 types of bread of choice, butter and a slab of white cheese. Colombians usually melt the cheese with the hot drink. I did not like it. The mix of sweet taste of choco and the salty\sour cheese did not work for me. The cheese is excellent though… with the bread.
Some more random street food photos around Bogota. Fruits and other produces are quite similar to the Philippines. Probably because of similar tropical lands, as well as strong Spanish influence.
New Zealand is mainly divided by two large islands; the Te Ika-a-Maui of the North, named after the sacred fish of Maui, and the Te Waipounamu of the South, which means “rivers of green stone”. Popular NZ destinations like Auckland and Wellington is located in the North Island, while Christchurch and Queenstown is located in the South.
For this New Zealand trip, we spent most of our days in the South where my companion’s family resides. From Auckland, we flew 2 hours by Air New Zealand to Christchurch. We also did a road trip to Queenstown via Tekapo, which was the highlight of this vacation. I shall have a separate post on that. For now, here are some snapshots around the lovely city. Big shoutout and Thanks to Richmon’s brother, Eric, for hosting and touring us around.
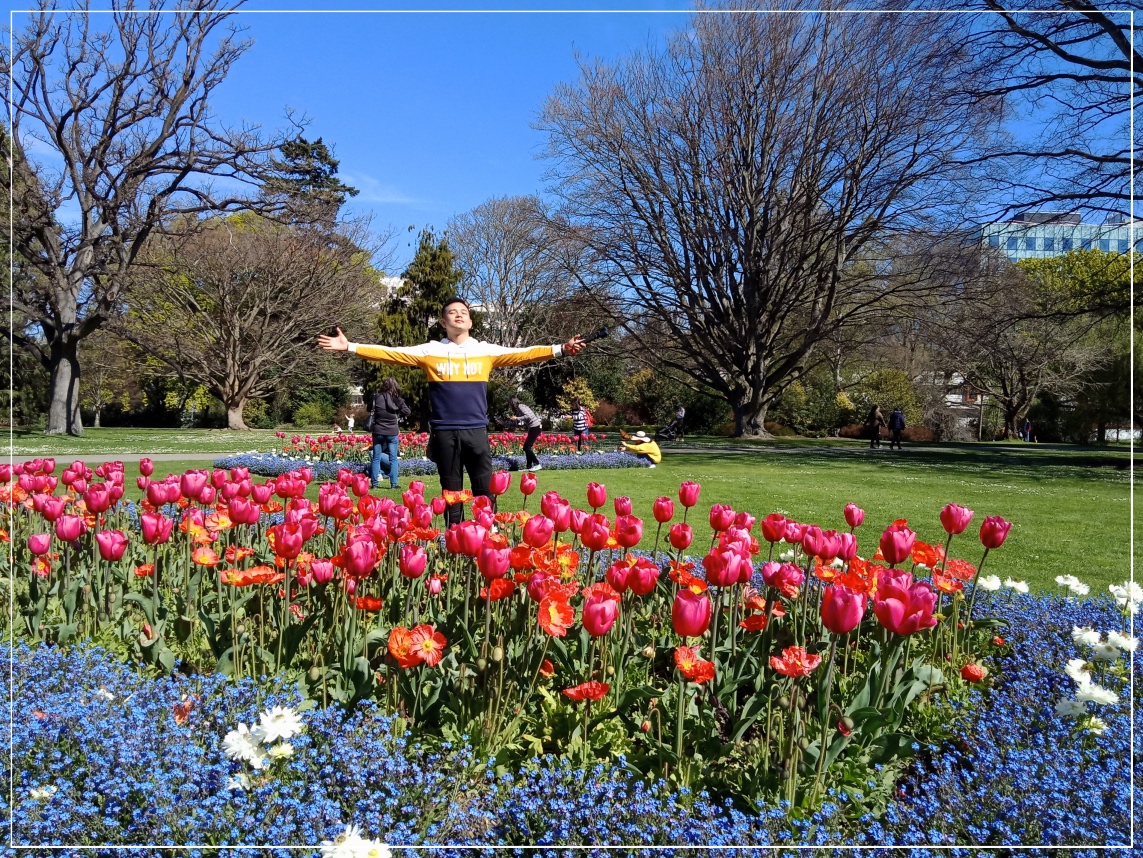
We popularly see September, October, November as Fall/Autumn months as it happens across Europe, Korea,Japan and the Americas. It is different, however, on the lands down-under, as these months are Springtime. This is the perfect time to visit as the weather is expectedly favourable and colours are popping out everywhere. In addition, you still get to experience snow on the higher grounds (such as in Queenstown during our trip).
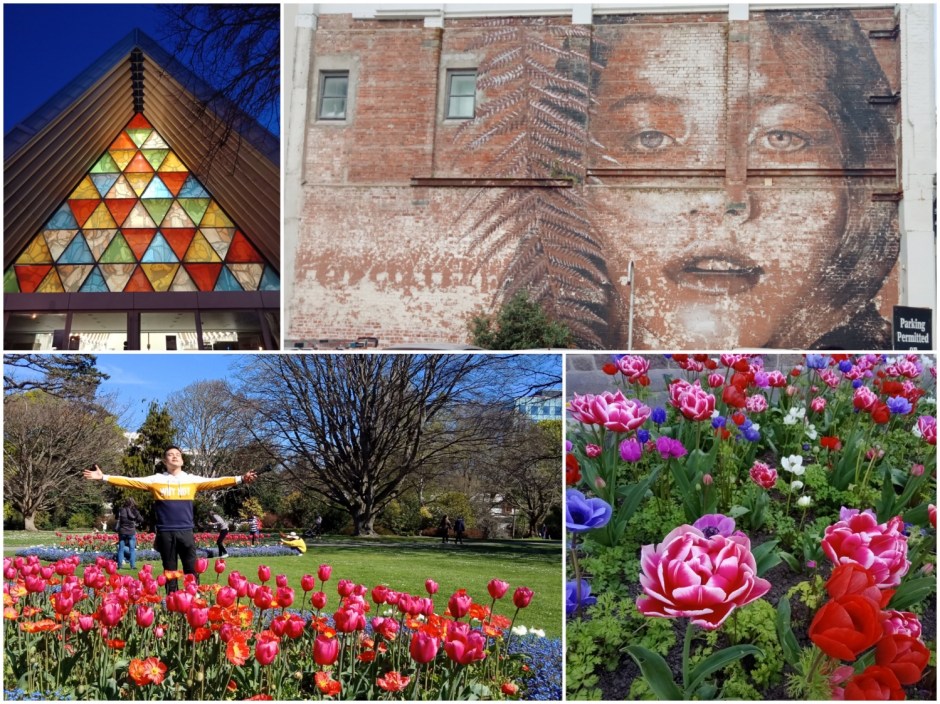
The Botanical Garden in Christchurch is a must see. The Museum is also located inside the garden compound. And it’s free of charge.
The City also boasts its Architecture. Streets are lined with contemporary buildings, using current materials and methods of construction. There are no high rises though; mostly low to mid-rise. Must sees are the The Cardboard Cathedral (a transitional Anglican Diocese of Christchurch with colorful facade) and the Hoyst Cinema Building. Check out the interiors as well.
The Cardboard Catherdral Facade
stunning interiors of Hoyts Cinema
Enthusiasts of architecture will definitely enjoy a stroll around the city centre, which is fairly walkable, with patches of greens and tree-lined parks and a charming- well cared stream the flows across the park. Wall murals and are also a thing around Christchurch.
Model model around the streets is also tolerated in Christchurch. Lol.
Drop by Rockpool bar at Hereford St. for some tummy fillers that will never disappoint. Their BBQ Ribs and Smoked Salmon Pasta are to die for.
Queenstown blog is up next. Stay tuned. =)
Going to NZ? Check out this EASY TOURIST VISA Application guide here link. https://iamjosemanuel.com/2018/04/22/new-zealand-tourist-visa-for-filipinos-2018-online-application-guide-with-photos/
Auckland Photos are also shared here. https://iamjosemanuel.com/2018/10/30/random-snapshots-aucklandnew-zealand/
Dreamy, surreal, unspoilt scenery. After visiting New Zealand, a whole new level of appreciation for a foreign land had been set.
Dream-like ocean views, lush green valleys, snow capped surrounding mountains, our short trip to New Zealand offered us a glimpse of good things that the country offers. The country enjoys peace, progress, opportunities and abundance. No wonder a lot of our Filipino friends opted to relocate there. Nasabi ko din actually sa sarili ko, ” I want to live here”.
Arriving in Auckland, me and Richmon opted to see in the capital city muna, before we headed to the south island where his family lives. In Auckland, we were hosted by Richmon’s relatives, Ate Mary Ann and Kuya Mario Molera, who’s been living in NZ already since the 1990’s.
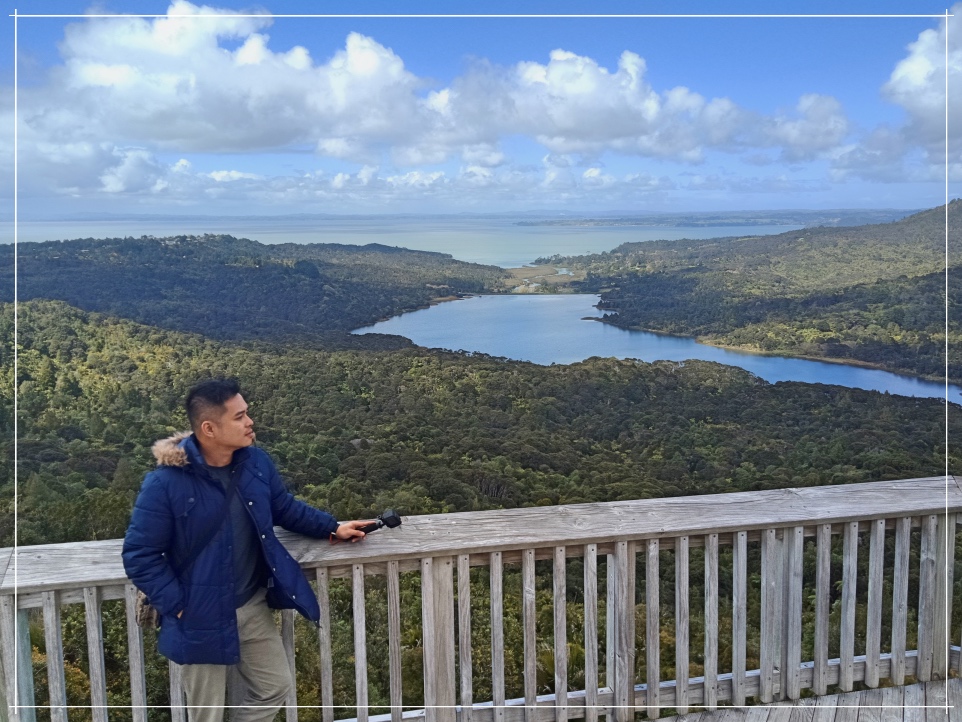
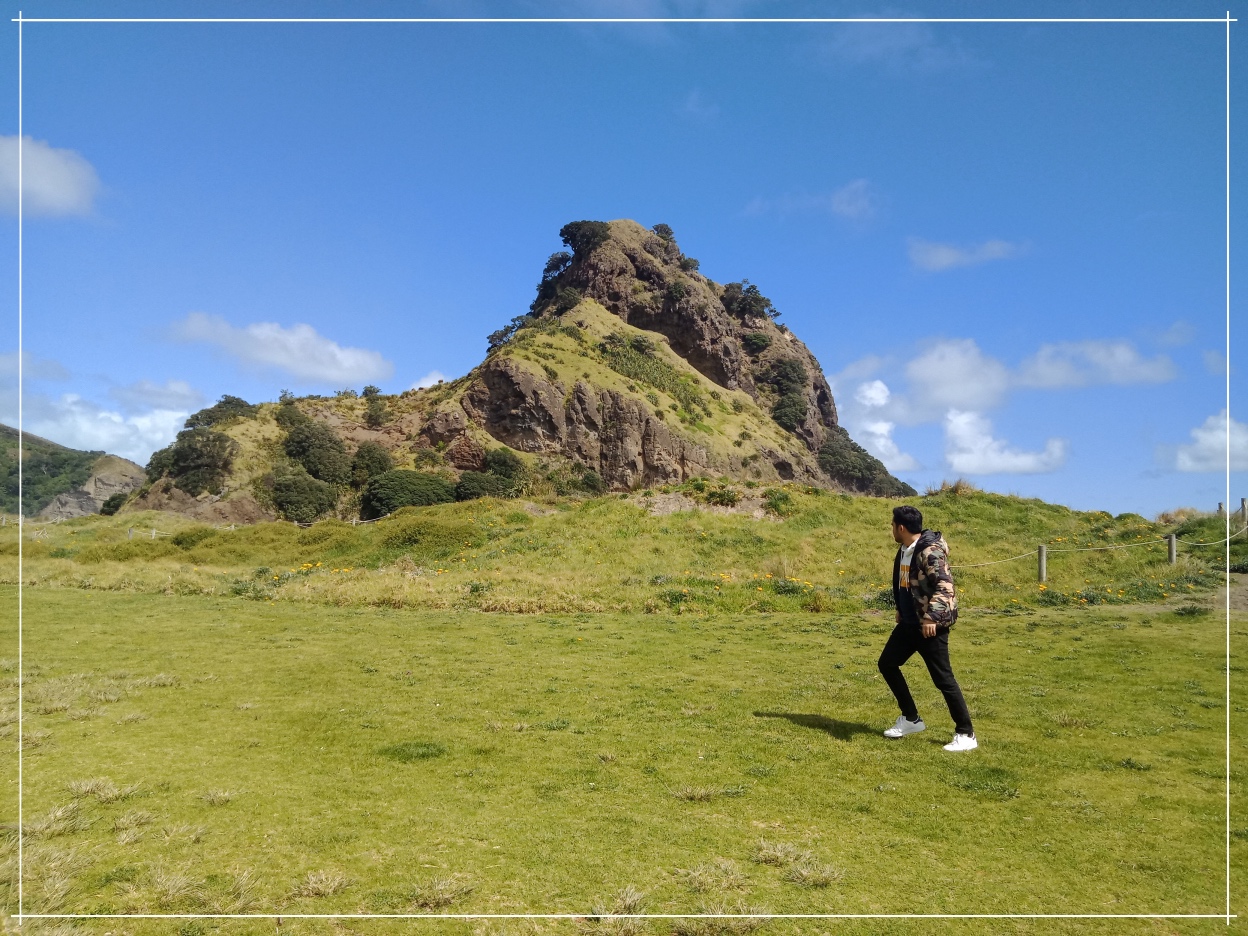
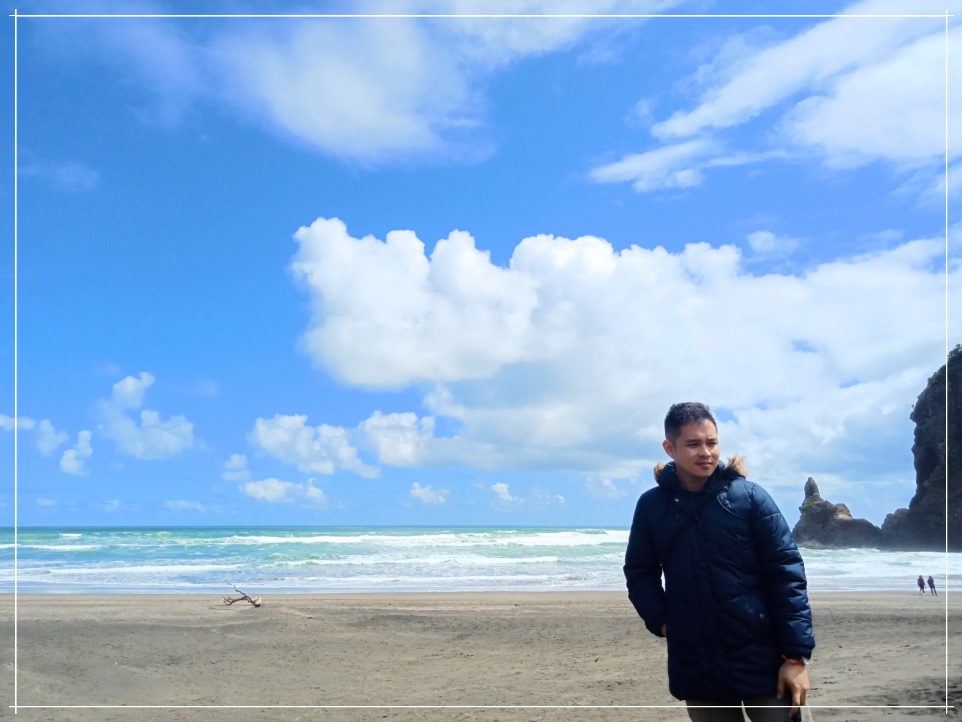
Having only two nights to spend definitely wasn’t enough to see all the nearby spots. With out limited time, we opted to see the natural sceneries of the west coast, instead of driving to the popular Rotorua and Hobbiton down south. Together with our lovely hosts, we did a road trip west of Henderson to the surreal ocean views facing the Australian-Tasman Sea.
Here are some snapshots of our DIY west coast day tour plus a glimpse of Auckland downtown. All thanks to Kuya Mario and Ate Mary Ann! =)
Auckland International Airport gave the Middle Earth feels as these giant 16′ Dwarven statues greet you at the arrival lounge.
Arataki Visitors’ Centre
Arataki Visitors’ Centre
Arataki Visitors’ Centre
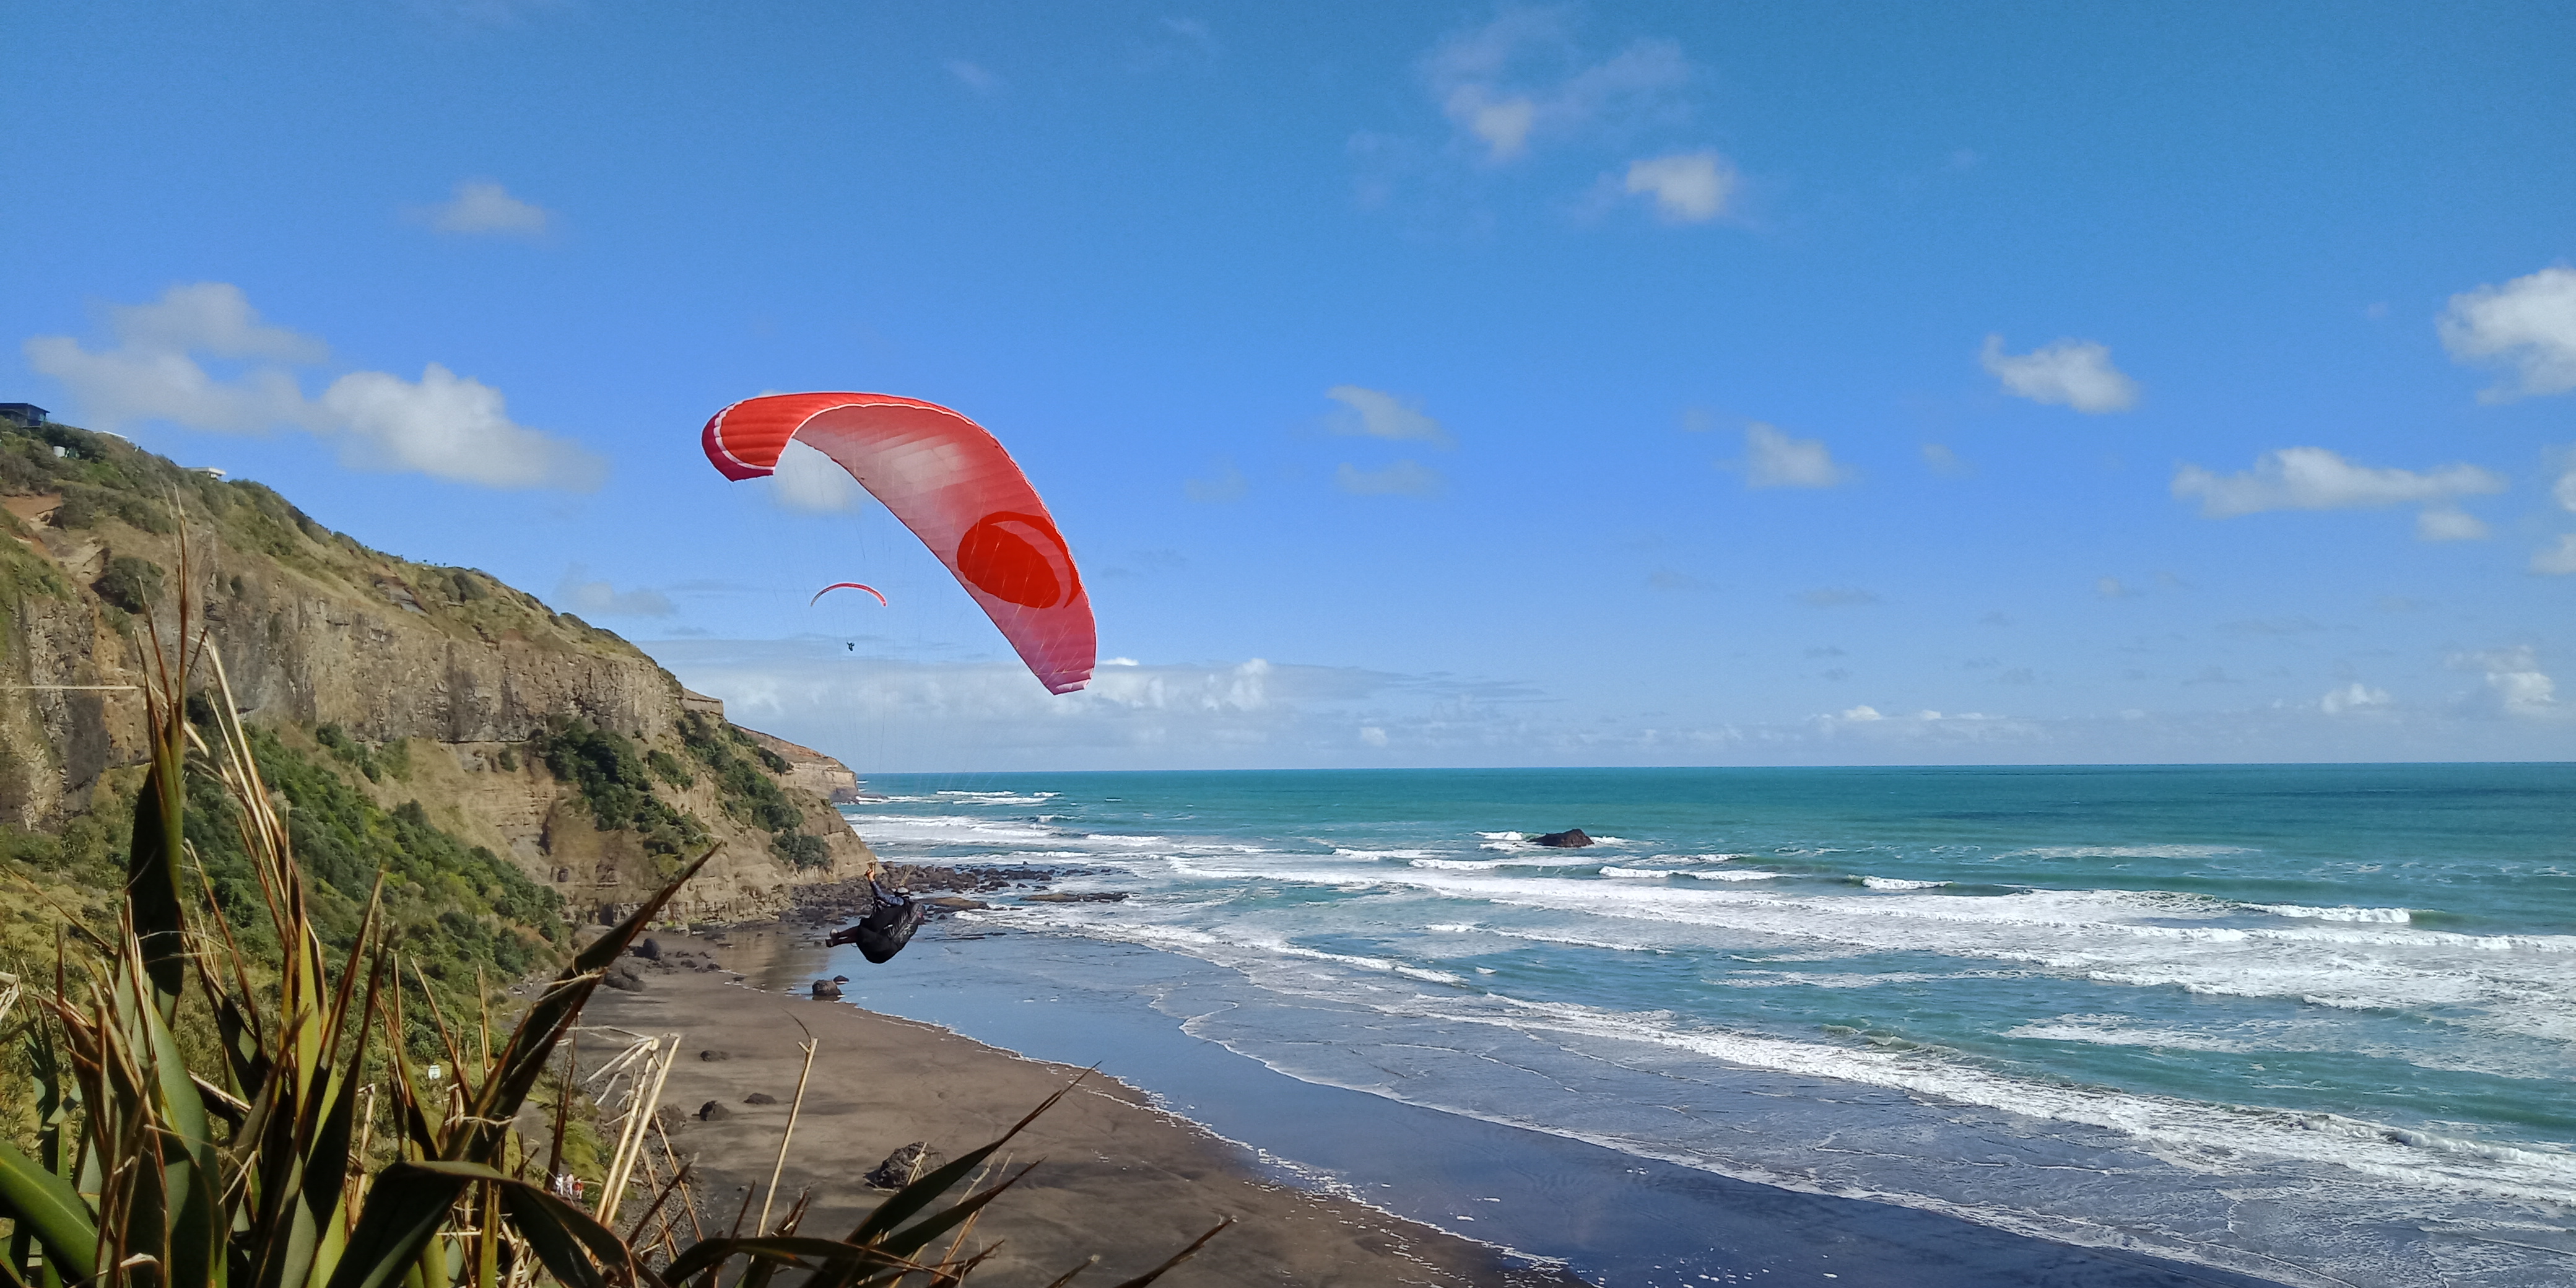
Muriwai Beach
Paragliding around Muriwai Coast
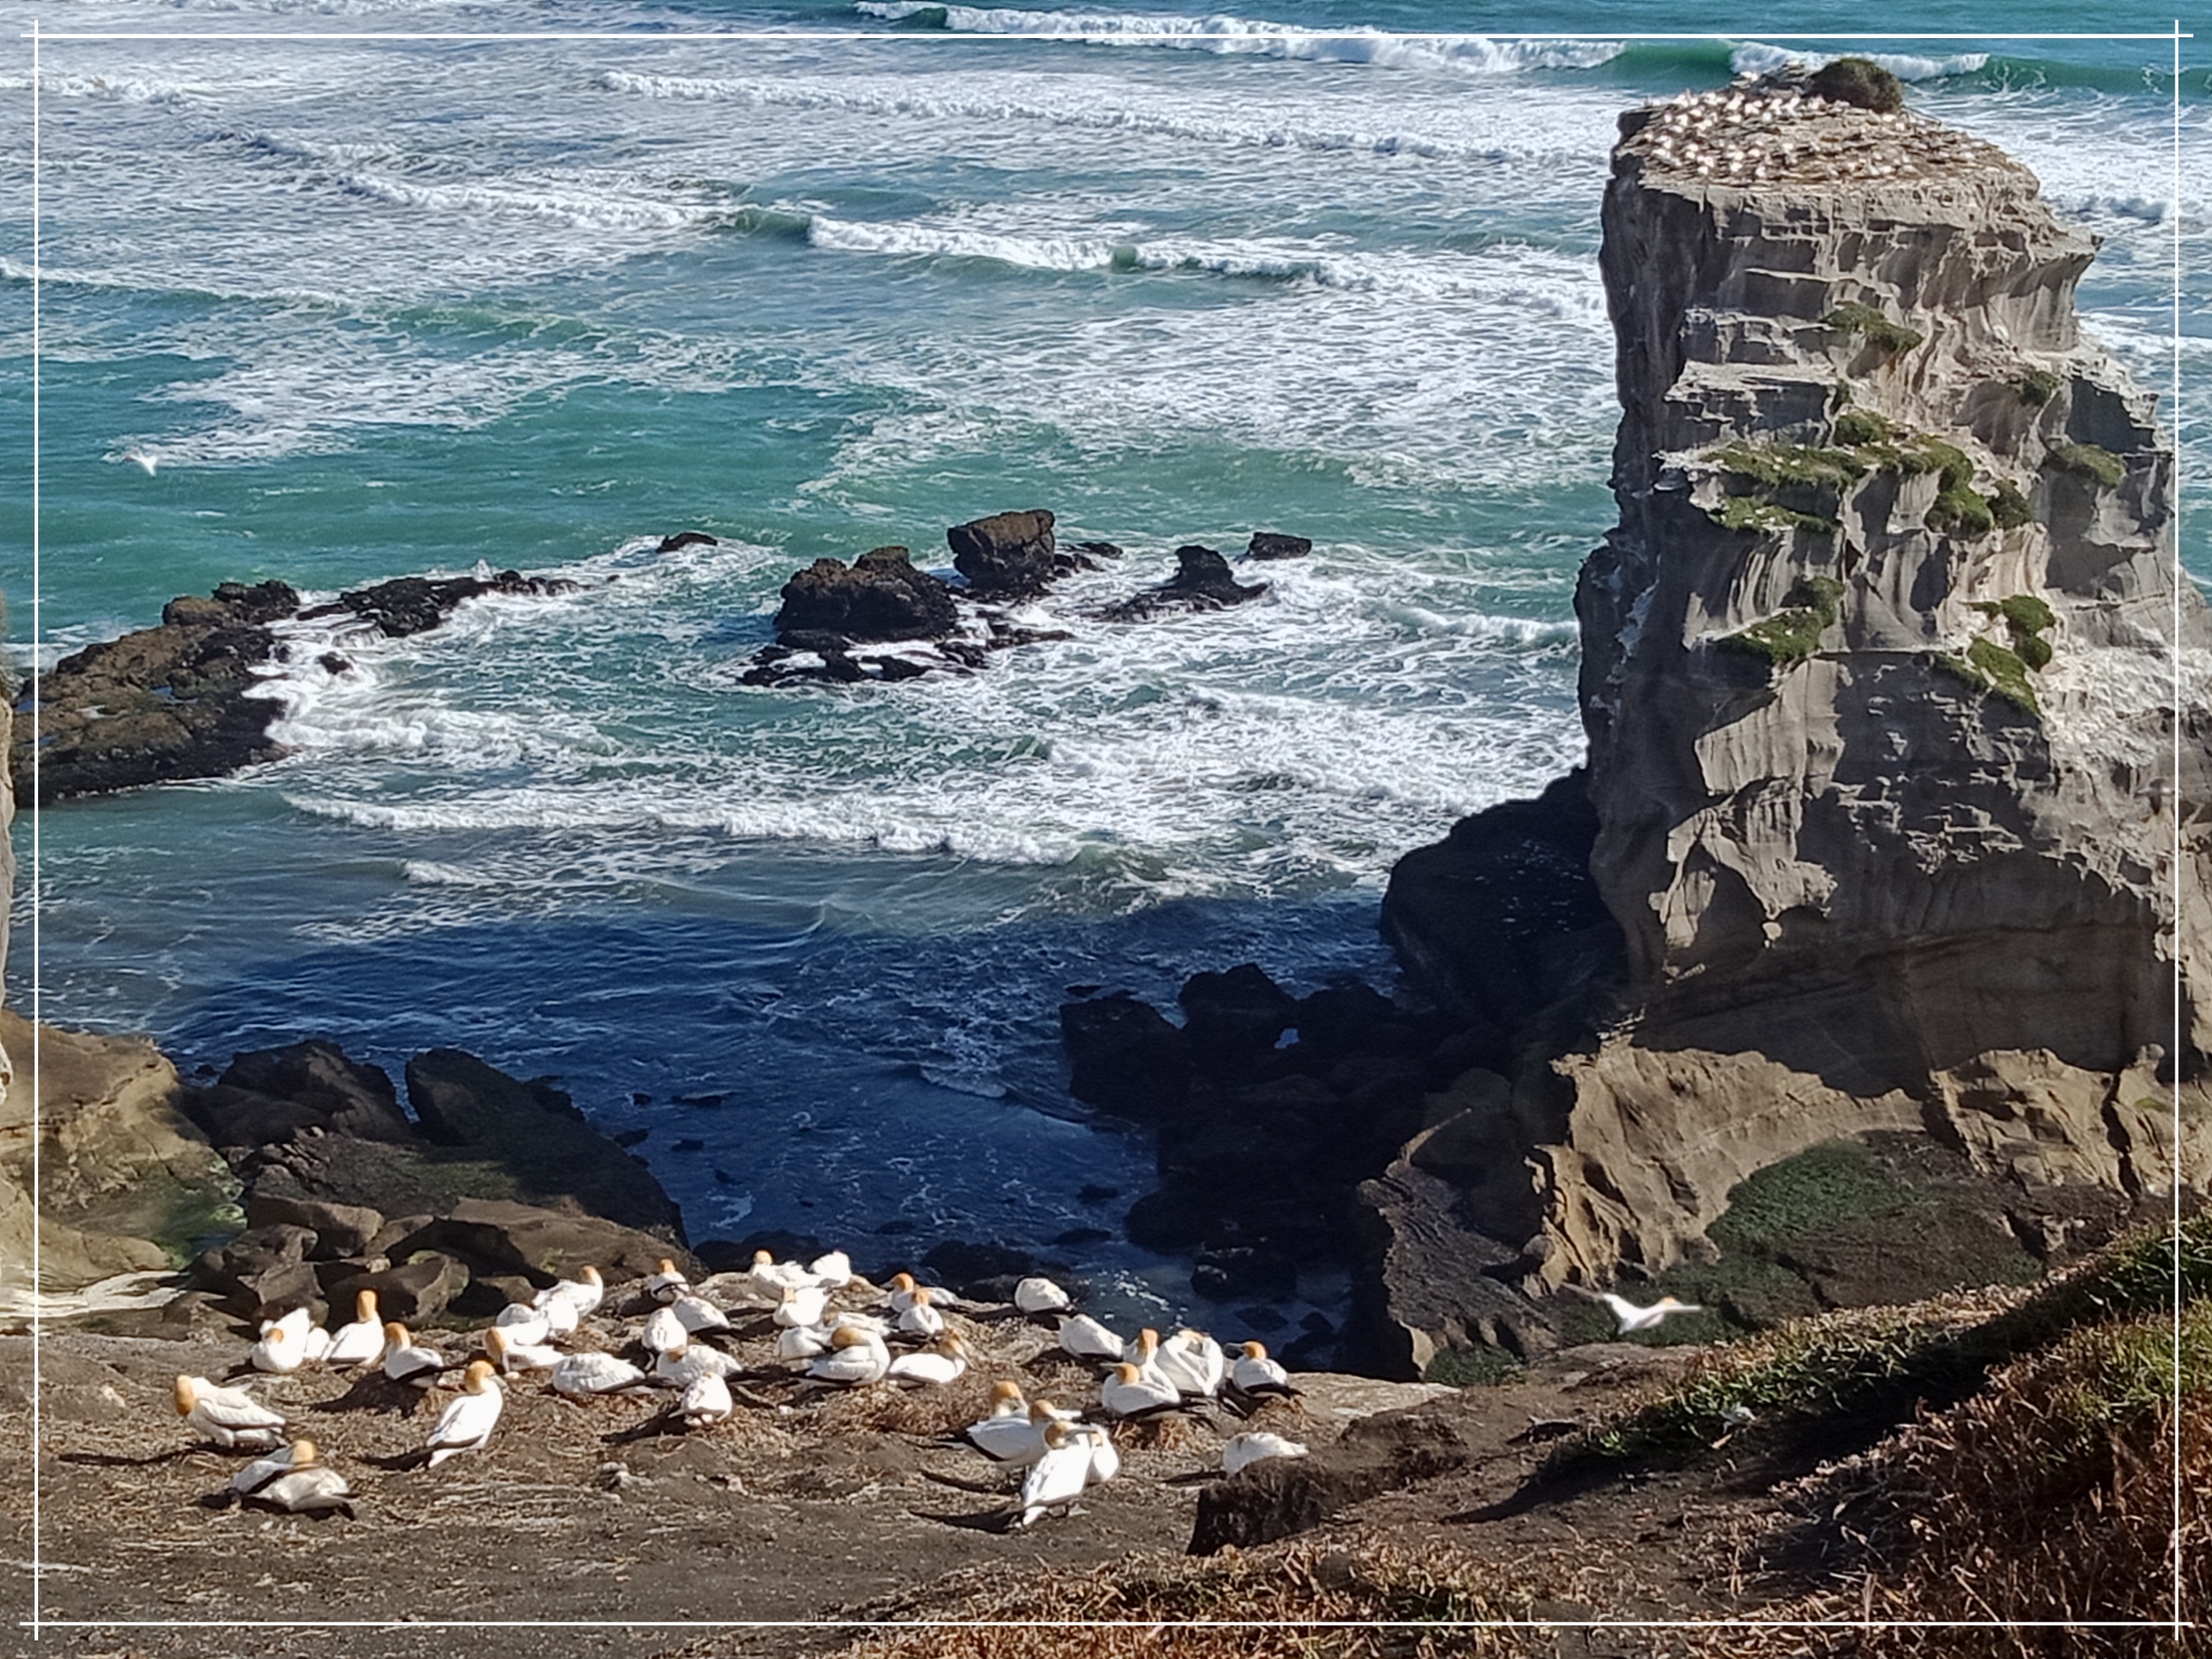
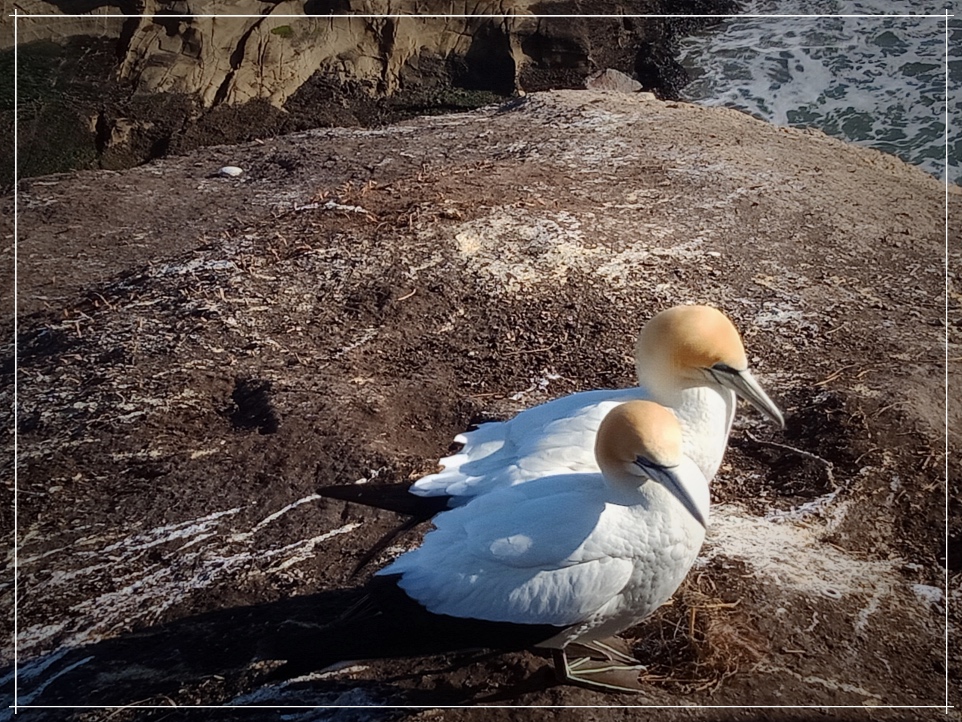
The Highlight of this day tour was definitely seeing flocks of migratory Gannet birds nesting on their natural habitat by the cliffs of Muriwai. Surreal experience to! I did not expect seeing this at all. Kuya Mario did not mention. It was a surprise!
Gannet Bird Sanctuary at Muriwai Cliffs
Here are some random shots and binge eating moments around Auckland City.
The Auckland Crew
And this concludes our two nights stay in Auckland. Christchurch and Queenstown are up next. Stay tuned.
We flew to Auckland, NZ with AirasiaX Via Kuala Lumpur; smooth nine hours travel time, with a quick – 90 minutes lay over in Gold Coast, Australia. Airport Transit Visa to Australia shall only apply if your lay over exceeds 4 hours. So for this trip, no need!
How we secured our NZ Tourist Visa? Check my detailed blog on the link below . below https://iamjosemanuel.com/2018/04/22/new-zealand-tourist-visa-for-filipinos-2018-online-application-guide-with-photos/
Hey,hey,hey! I just got my Australian Tourist Visa approval a few weeks ago. The process is relatively easy and is very much DIY-able. Aside from rejoicing for the approval, I am also thankful that the Aussie Immig was generous enough to grant a multiple entry ’til 2020. Cool, diba? As such, I will be sharing here the step by step DIY guide I did for this application, para naman sabay sabay tayo mag selfie duon with the Koala Bears!
This blog guide however, shall focus solely on Tourist Visa – Online Application for Filipinos living in the Philippines. If you are looking for Business, Study or Fiance Visa, I reco you visit the main Australian Immigration Website at https://www.homeaffairs.gov.au/ for the specific process.
Yes po, Australian Immigration now accepts visa application online. Meaning, no more personal interview. You only need to prepare and properly scan your valid requirements, submit online and pay by credit card. If accepted and approved,the grant certificate shall be emailed to you. No more submission of passport to the embassy for verification and stamping. Easy breezy!
If opted, you can still submit your traditional application personally at the Australian Embassy via VFS Agency. But since I reside in a city that is 2 hours away by plane from the capital, it is more practical for me to do all transactions via online.
The difference between personal and online application? Walang Visa Sticker when applied online. In lieu, a grant certificate shall be issued via email, which you have to print and carry with throughout the trip. The traditional sticker eklavu on the passport are only given when documents are personally submitted.
Online application however, may still be required a personal interview if the evaluators find your documents questionable. That being said, let me just cite na din my travel blogger idol Aileen Adalid’s disclaimer, “NO ONE can give you a guarantee on your approval — not even a lawyer, a consultant, a travel agent, or an embassy employee. Anyone who says otherwise is most likely going to be a scammer.”
So without dragging this further, here is the DIY step by step process I did,
Prepare basic visa requirements.
–Photograph file – Passport sized with very light gray background 500 KB Max. (Alam ng studio ang size, Raw file straight from camera, unedited, scanned photo not allowed )
–Evidence of Family Composition -Scanned Copy NSO Birth Certificate in Colored Paper
–Evidence of Employment – Current – Scanned Copy Employment Certificate with Salary Details and approved date of leave, signed by your boss.
–Evidence of Financial Capacity – Scanned Copy Current Bank Cert, Bank account statement, Credit Card statement , ITR or Business Permit (If available, but I did not submit. Instead, I scanned property titles under my name. Insurance policy and bonds may also count. I submitted my PRU Policy. This is optional)
–Evidence of Previous Travel – Scanned Copy of Past and Current Passport showing all stamps and visas.
–Evidence of Planned Tourism Activity – I made a mock up day to day itinerary. Hotel Reservation is optional, but may help. Don’t pay for this muna.
When scanning, only file formats .JPG, .PDF or .PNG are accepted. Each document must be of good quality but must not exceed 5MB in size. Except for the Passport photo which is ideally 500 KB size and of Jpg format. It i advised that filenames shall contain your name in it (example ” LIM,JOSE PASSPORT PHOTO.jpg”) . If this preparation is too difficult, then I recommend you rather apply though an agency than doing a DIY.
Lastly, as you noticed, AIRLINE TICKET OR EVEN A RESERVATION is NOT REQUIRED.
Log on to Australian Embassy Official Home Affairs Website
The page that will launch your ticket to a brighter future. click “start application“
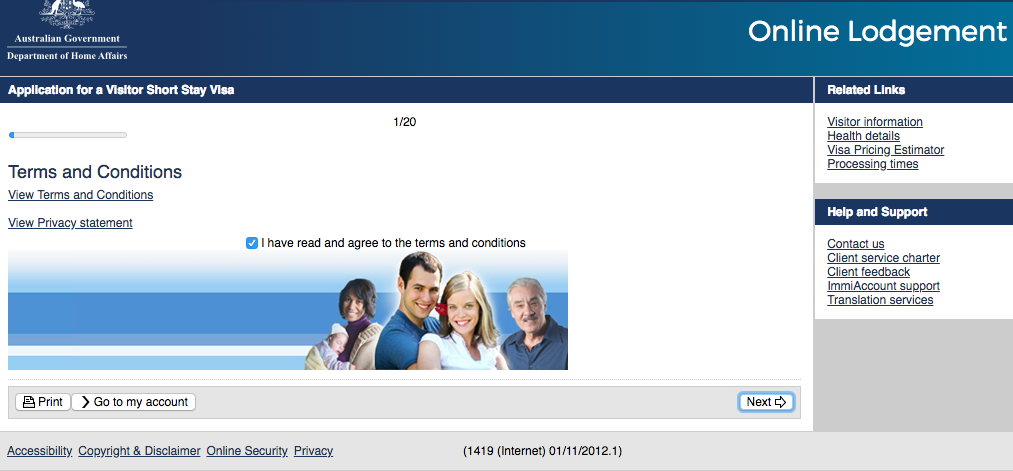
2. The “start application” with then prompt you to create an ImmiAccount. ImmiAccount is the main portal for accessing the online services of the Australian government’s Department of Immigration and Border Protection. Parang facebook lang ito that you have to provide basic information, contacts, a valid email add and a strong password. An email verification will be done. This Immi account shall become your official access and monitor this application and for future transaction with AU immigration.
If you already created an Immi account, click login.
click New Application at the upper left
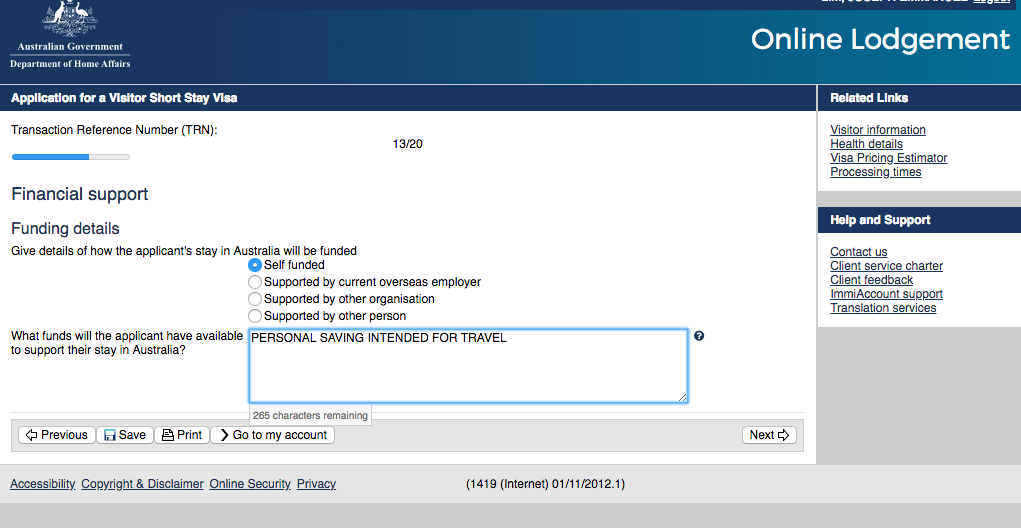
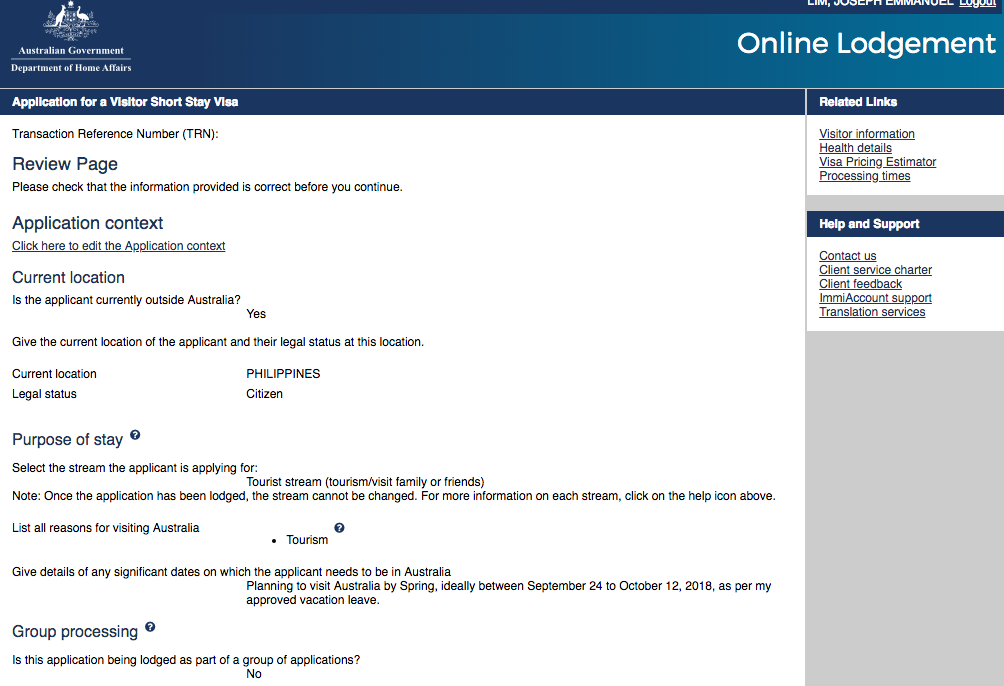
3. Start filling up your e600 form. Here is what you will likely see. Easy to understand.
4. After filling up,you will be led to a document uploading interface which looks like this. inappropriate file type and size will be prompted. refer to requirements given above.
5. After all scanned files have been accepted by the online interface, you will be prompted to the payment page. I I paid mine via credit card for AUD 140 (Around 5,500 Pesos)
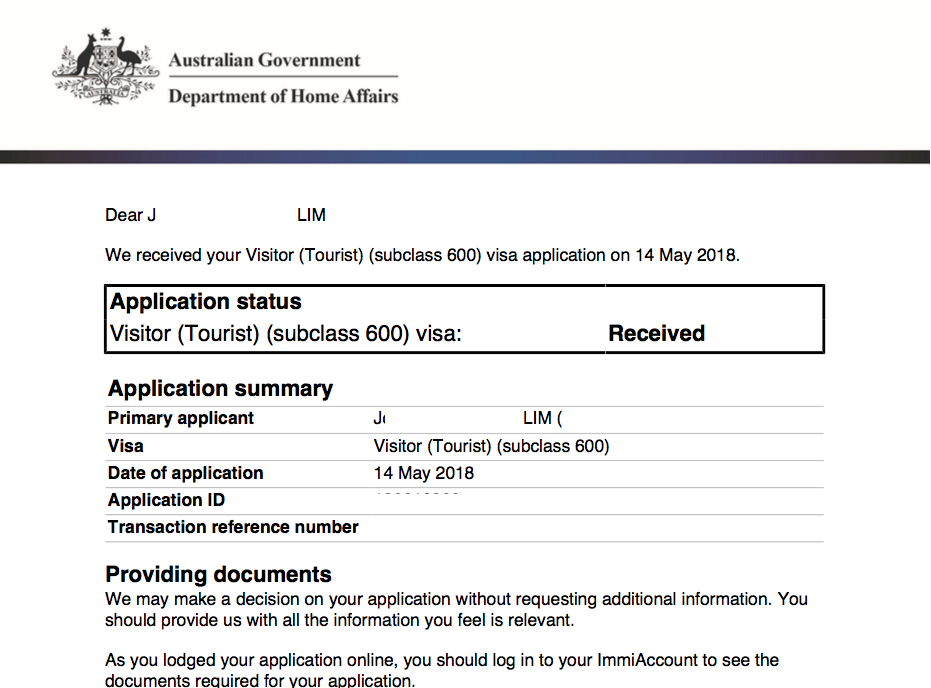
6. Submit and wait for Confirmation Email “Received”. This is the waiting time that your scanned documents will be evaluated. Also the perfect time for novena and pa-misa sa church for grace.
7. Receive decision via Email. I got mine after 10 days. The grant certificate will look like this. No need to submit your passport na to the embassy in Manila for verification and stamping. This certificate will suffice.
And that’s it! You have approval na and you’re ready to sell your kidney for travel funds.
Points to remember:
As per website, results are released 30 to 60 days after the submission. However, most of the recent applicants got their results earlier; provided, complete at valid ang scanned documents. I got mine after 10 days.
Since this is an online application, no need to print and submit paper requirements. Unless your uploads are not clear, then they may ask for those, or require you a personal appearance.
Bank account: As per usual travel blogs, bank accounts are ideally at 100 dollars x number of days stay x 2. better if more.
You can apply as early as 6 months before the trip.
Again, walang assurance ng approval. I feel that I got approved mainly because of the stamps I collected from my previous trips.
Lastly, IF UNSURE, WAG MAG DIY APPLICATION. Seek assistance from a reputable travel agency. PM me for recommendations. Chos! =)
WAIVED NA PO ANG TOURIST VISA FEE FOR NEW ZEALAND!
True! Hindi po ito fake news. Before, it was mandatory to pay NZ$ 165. As of June 2017, A resolution has already been approved, stating that the Citizens of the Philippines do not have to pay anymore the fee or immigration levy for TOURIST/VISITOR VISA application, when coming to New Zealand for fewer than 60 days (Reference: https://www.immigration.govt.nz/new-zealand-visas/apply-for-a-visa/).
However, point out ko lang po clearly, NZ is NOT VISA FREE. It is only the big amount of fee that was taken out. We still have to submit necessary requirements to the NZ Embassy for the issuance of visa prior to our trip.
Traditional method of submitting paper requirements is still being implemented today. However, NZ Immigration already formulated a “Passport Handling-Online Application” method, which has taken visa application to the next level of easiness. With this method, applicants are only required to completely fill up a form on their website and then submit online the scanned copies of usual visa requirements. For this convenience,however,applicants shall pay a fee of less than 1,000 Pesos for the “Passport Handling”, which shall be discussed later. This is relatively a small amount compared to the big chunk of levy that has already been relieved from us. Passport handling fees may also be bank transferred na. This has made the application process more convenient, especially for us living far away from Manila/Cebu where embassy offices are located. This guide blog focuses solely onVisitors (Tourist) Visa via Online Application. For other types of Visa, refer to https://www.immigration.govt.nz.
So without further ado (Char), here is a step by step guide on how I completed my application.
STEP 1 : Gather the visa requirements,
Photo – passport sized (900 x 1200 pixels minimum), light colored background(except white, ideally light gray), JPEG Format straight from file. Bilhin nyo yung file ng picture sa studio. scanned from printed photo is not allowed; file size between 500KB and 3MB
Valid Passport – scan pages with personal information; PDF Format
Government issued Identification Card – either driver’s license, PRC, SSS, GSIS, TIN, Philhealth; PDF Format
Proof of Employment – letter of approved leave from employer ideally with salary and other details ; PDF Format
Evidence of Fund – Bank Certificate with ADB; Bank Statements; Updated Passbook; PDF Format
Evidence of Onward Travel – Airline confirmed booking(meaning, ticket reservation from a reputable travel agency); PDF Format ; pwede rin Airline ticket mismo if you already have one, but not advised.
Cover Letter – letter of intention. You may also put here your proposed day to day itinerary ; PDF Format
Other Financial Document – Credit card billing statement, ITR; ; PDF Format
For Self Employed – business permit, SEC or DTI registration. Annual ITR for the employed; PDF Format
Record of Previous Travels – Scanned copy of your past and current passport with all stamps
Copy of other Valid First World Visas (If available) – USA, Schengen, Japan or others; PDF Format
Re bank funds, some successful applicants mentioned “100 USD per day x # days stay x 2” maintaining balance. I guess we should prepare the same na din (or more) to prove our capacity to visit their country.
Select appropriate visa options. it will look something like this.
Click on the RealMe Link at the bottom to start application
Step 3: Create a RealMe Account which serves as your application form. This is where you will be uploading all your infos and scanned documents.
Provide usual infos, username and password. This step will also ask for an email verification.
After Email verification, your RealMe account will now look something like this. Click the “Visitor Visa” Highlighted in RED.
Step 4: Fill up RealMe Form in order that is given.
Fill up all the “Identity and Contact” requirements. one after the other. Save infos from time to time.
This may be intimidating, but just say No to all these entries, unless you seriously have a condition to declare.
The interface still asks for this stage even if you declared “single” early on. Samok ha!
This is the part where you upload your JPEG and PDF files
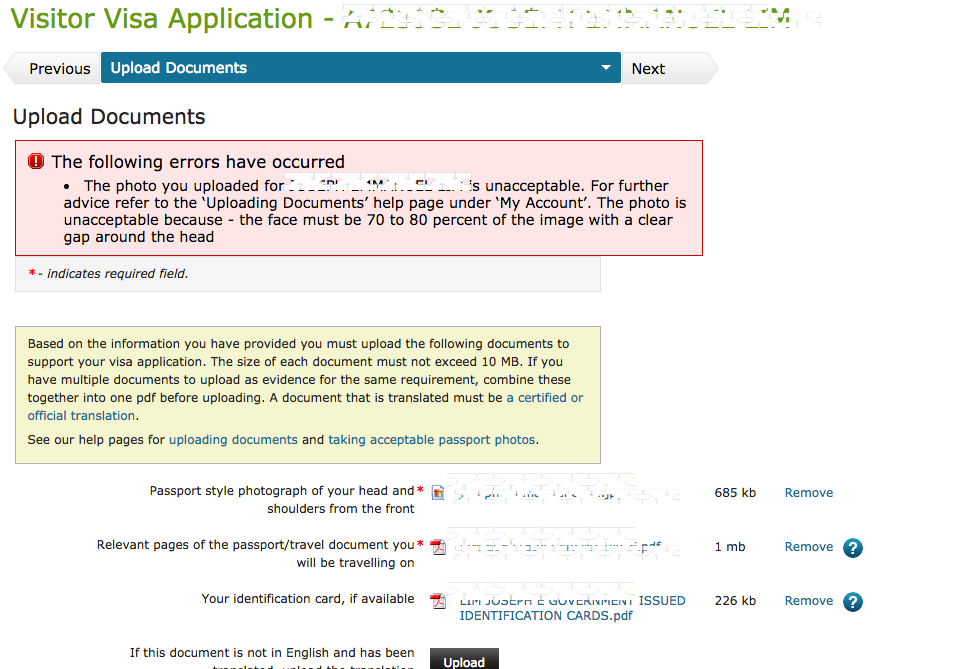
The good thing about this interface is that it prompts you for detected errors such as this. Cool! Very first world!
Step 5: Submit online your completed RealMe Form. In 24 hours, you will receive an email confirmation and instructions on where to submit your passport. This is not yet your approval.
Step 6: Payment of Passport Handling Fee thru Bank.
While it is most common for applicants to submit their passports personally, NZ offers an option to pay through Banco de Oro, which is very favourable for people away from Manila. Passport handling will be catered by VFS Global, which is NZ embassy’s partner agency. Details can be found at http://www.vfsglobal.com/NewZealand/Philippines/how-to-apply.html
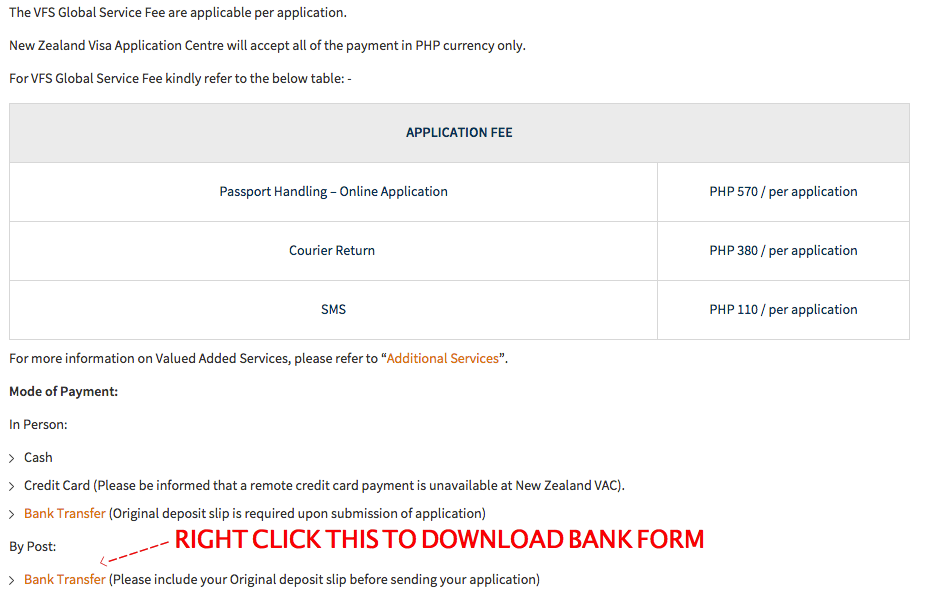
Instructions on Bank Transfer Payments are detailed on this website.
For my application, I paid the 570 Handling fee plus 380 Courier Fee for them to return my passport after assessment. I did not avail the SMS assistance anymore, since the updates on my application can be monitored on my RealMe Account
Print the bank form and show to the bank during payment.
Step 7: Submit Passport to VFS Office for Assessment and Verification
Photocopy Bank Deposit Slip/ Transfer Slip and submit this to VFS together with your valid passport, the printed and signed bank form, a printed copy of “thank you” page and the Email Confirmation. Applicants from the province may send their documents ti VFS via any preferred courier.
Step 8: Result
Once the result is released, VFS will send your passport back to your given address. Courier fee for the return is part of the prior payment.
NZ Visitor Visa issuance is indeed fast. I got my approval 4 days after submission of passport to VFS.
Points to remember:
As per website, results are released 20 days after the submission. However, most of the recent applicants got their results within 3 to 4 days!
Since this is an online application, no need to print and submit paper requirements. Unless your uploads are not clear, then they may ask for those.
You can apply as early as 6 months before the trip.
Grant on duration of stay varies. Wala talagang template for this. But definitely, your stay will not exceed 59 days at a time.
For online application, No more sticker on your passport. The approval certificate that will be emailed to you shall serve its purpose.
—0—-
So there, hopefully this blog will be of help by the time you apply for your own. Though I am fully aware that this guide will not guarantee approval for everybody. Kaya sabayan nyo nalang din ng Novena for 14 days with miryenda cream bread and mayonnaise.
This guide,however, is focused purely on tourism/holiday visit. For other types of application, see https://www.immigration.govt.nz for details.
Re Waived visa fee, there is no information on until when this waived fee will last. So while we are enjoying the current privilege, might as well consider visiting this green country very soon.
Lastly, if you are unsure of your documents, or if you find the D.I.Y. online application too complicated, please get in touch na lang with a reputable travel agency to process your papers. Life is short, wag na pa stress!
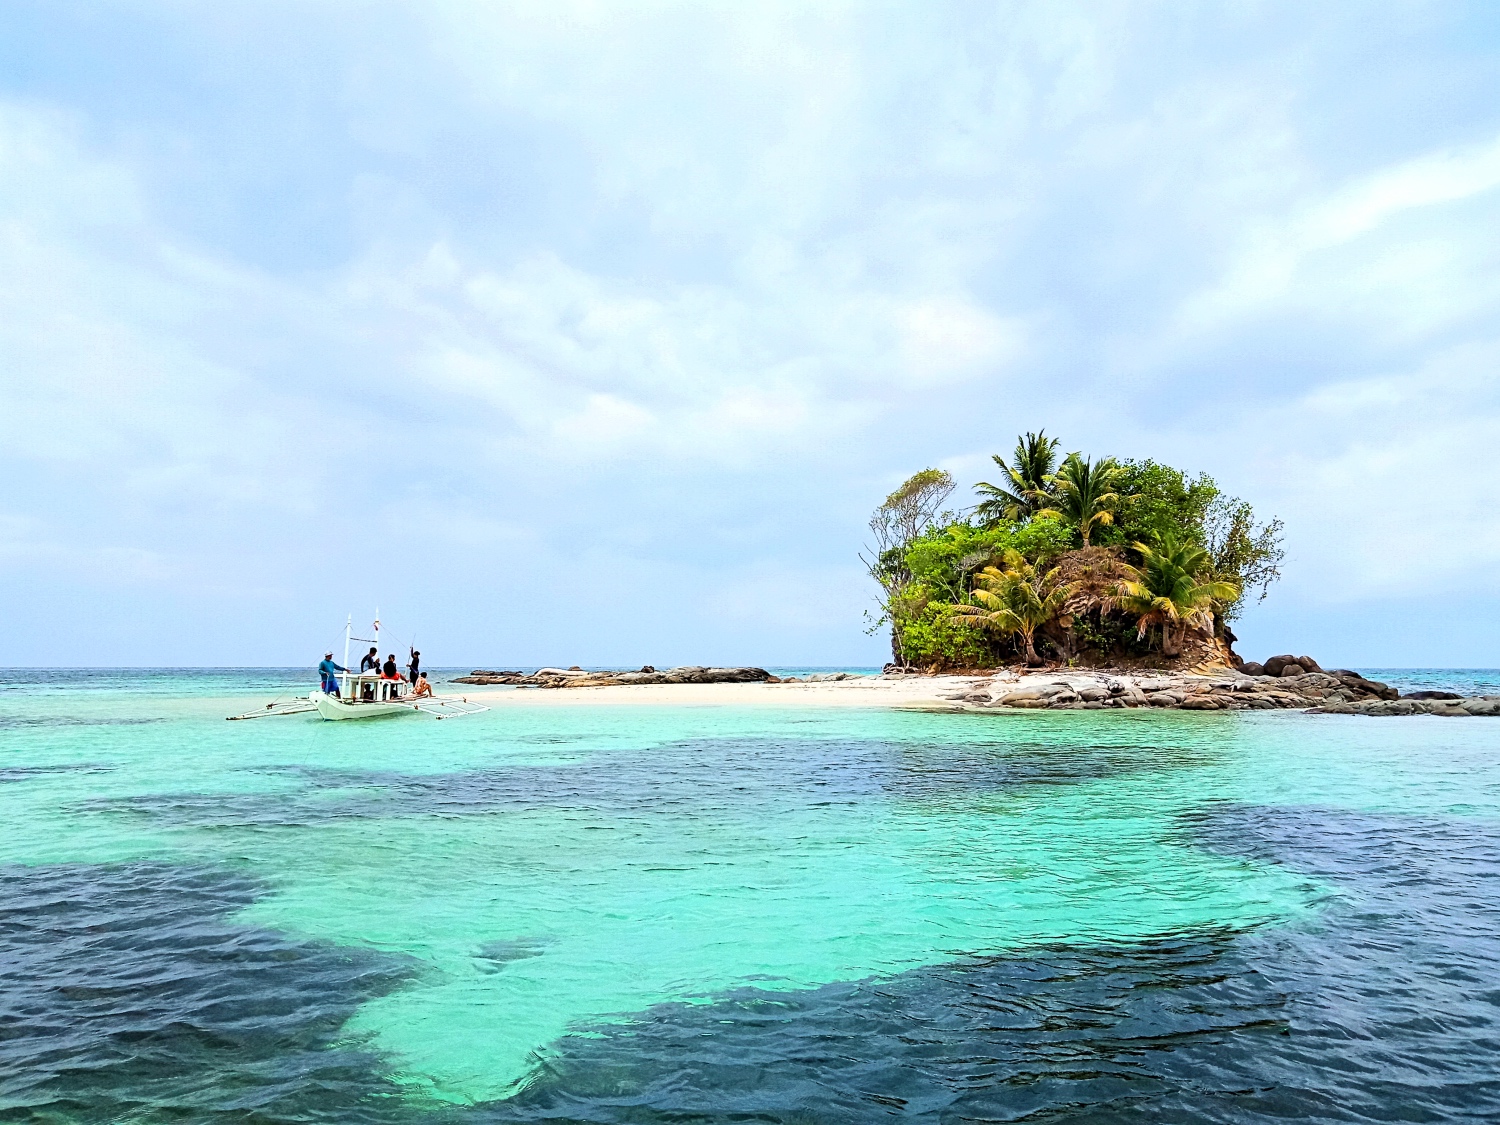
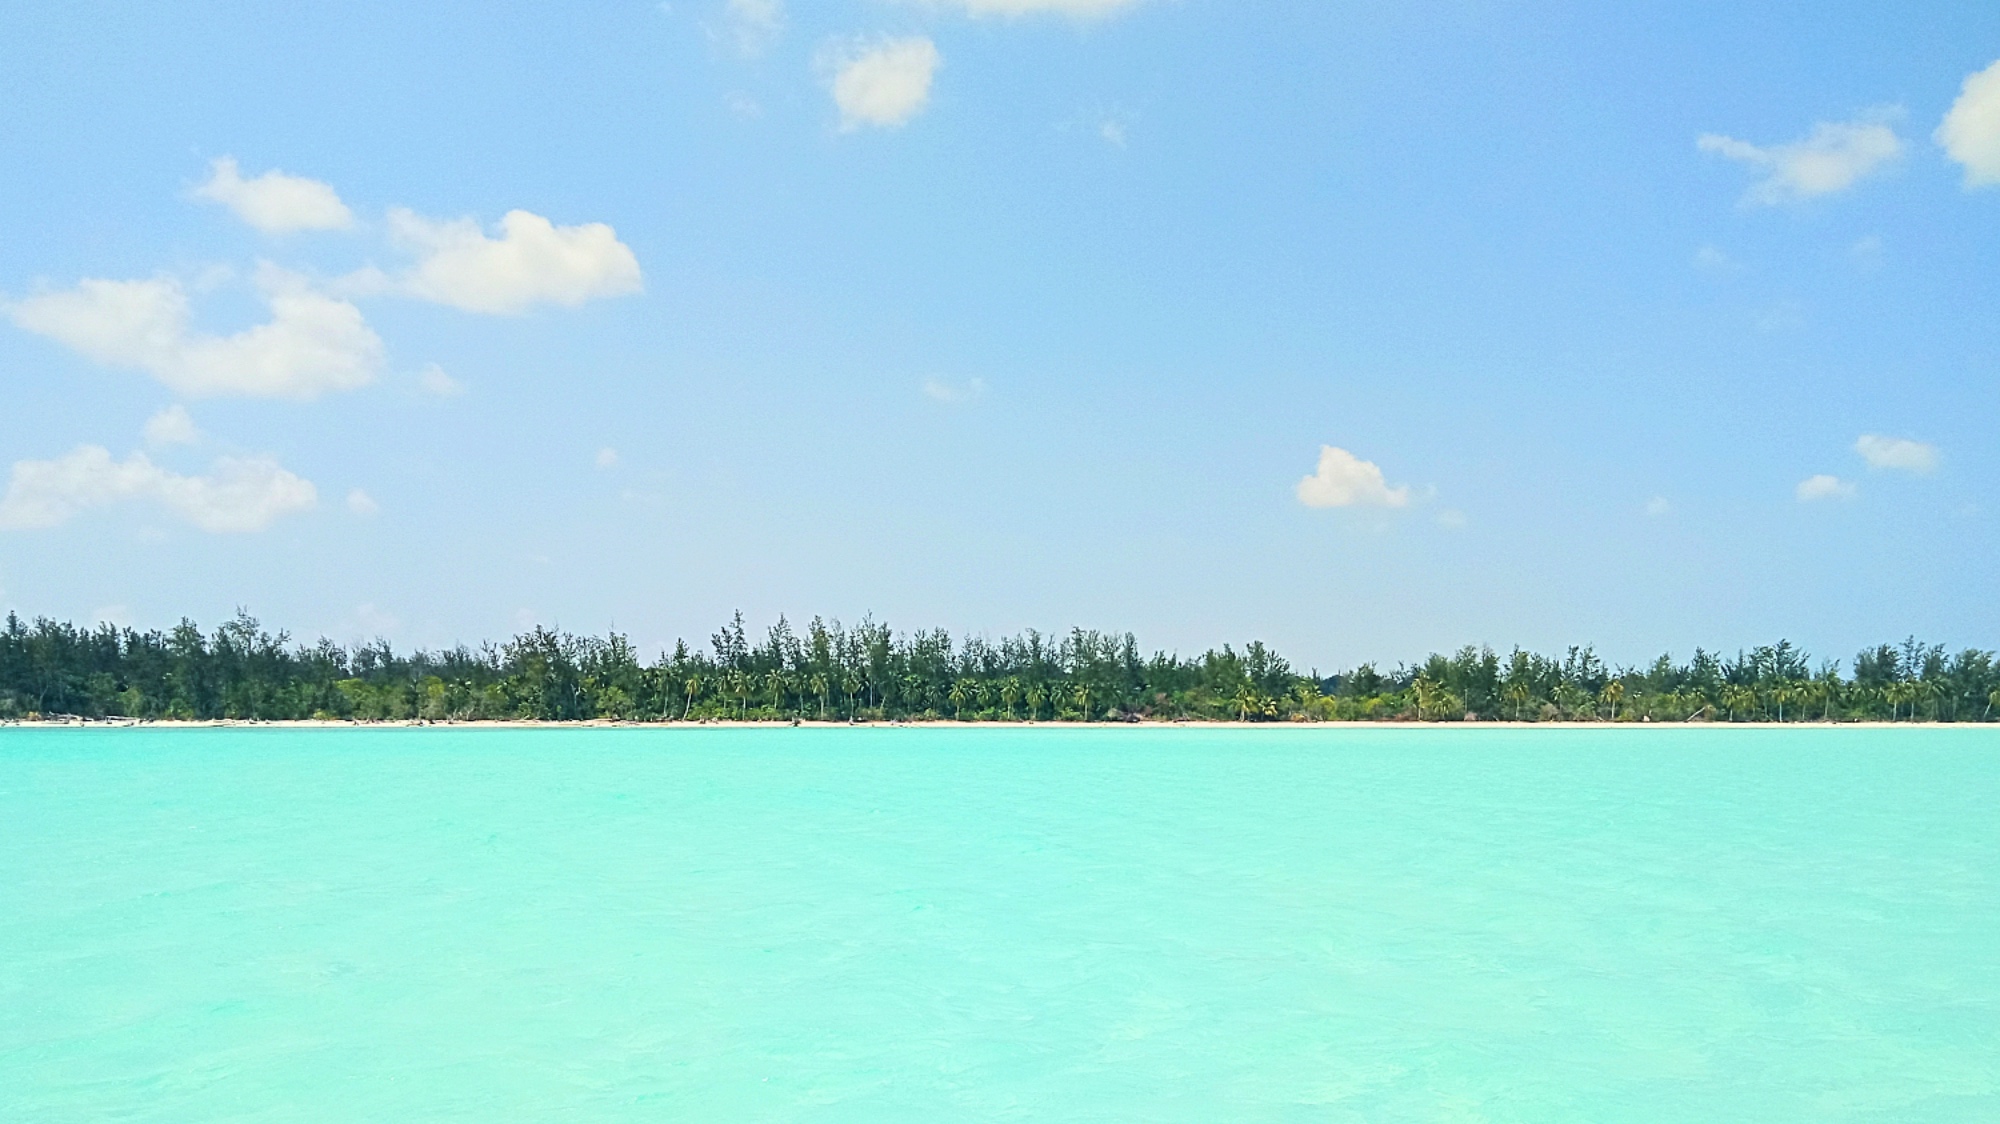
With the clearest turquoise water and unspoilt shores, Balabac is one of the less visited destinations in the Philippines that deserves a spot on top of your travel bucket list. Here’s a quickie blog with nitty gritty details on how I reached the Balabac Group of Islands. But first, a little information muna about the place.
Balabac is a 2nd class municipality situated at the southwestern tip of Palawan province. Surrounded by the rich water of Sulu Sea, Balabac is a group of 31 islands and islets blessed with unspoiled fine sand beaches, wide sandbars and rich marine life. As per record, there are only about 40,000 inhabitants scattered around the islands. The province got much of its recent popularity after being featured by GMA’s Jessica Soho. As the show mentioned, this group of islands is our country’s last of the last frontier.
Balabac is only 8 hours away by boat to Malaysia. Kaya expect nalang that Malaysian products are a common thing in this very small province. Some locals do back door (paperless) entry to Malaysia, but as a responsible Filipino citizen, please do not consider doing that. No, no, no.
How to Get to Balabac – DIY Style
The municipality of Rio Tuba is the known gateway/commercial port with public boats traveling daily to Balabac main island where most of the community is located.
Puerto Princesa City — 6 hours –> Rio Tuba by bus + Rio Tuba — 3 to 4 hours –>Mainland Balabac by boat.
Public buses leave Puerto Princesa City (Palawan) from San Jose Terminal starting at 4AM. Fare is at P275++ for non-aircon bus and P450++ for aircon shuttle or bus, travel time is approximately six (6) hours.
From Rio Tuba, A public boat departs daily at around noon to mainland Balabac. Travel time is approximately four (4) hours and fare is P450 one-way. Please note that there is no fixed schedule of boat departure as it depends on sea condition and passenger traffic. Best to be at Rio Tuba as early as 10AM. You may also opt to stay overnight at Rio Tuba town. Basic pension houses at P 300-500/room can accommodate you.
Balabac Main IslandAccommodation As recommended by a friend, JD lodging: (0910 662 0073) at P400 per night for 2 pax.
DIY Island Hopping from Balabac Mainland. To go around the sub islands, the only mode of transport is by boat. There are no public boats that go from island to island since most locals here own their own motorised boats. Chartering a small boat (4 pax-6 pax) from the locals usually starts at P5000 per day. Lodging houses can recommend this to you.
If you intend to stay outside of mainland Balabac, expect to homestay or with guided camping for a fee. It is advised that you pass by the municipality tourism desk upon arrival and have yourself registered. Small amount may be imposed to visitors in the coming months, as Balabac Tourism Board is already being put up at the moment.
Budget for 4 days 3 nights? Probably around P 7,000 to 9,000, assuming you’d share the boat rentals with 4 -6 pax.
Pre-arranged Tour Style – I Prefer this!
Considering its isolated location and limited facility, Balabac is relatively new to the tourism industry. Tourism standards are yet to be formalised. For convenience, as well as safety, I HIGHLY recommend joining pre-arranged tour to take you around the islands. A number of independent tour providers offer “island camping” packages with rides, insurance and on board meals for P 10,000 to P 12,500, 4 days,three nights. Check out Biyahe ni Josemanuel on facebook for recommendations.
What to Expect. As a relatively isolated destination, do not expect fancy accommodations and the comforts you’d find in Boracay. Balabac is more on the rough side for the adventure seekers. Clearly, it is not a destination for everybody at the moment. In addition, there are no ATMs in the Island. Bring enough cash with you; preferably small bills.
Best Time to Visit. Summer . March to May when the sky is clear and the water is calm. Imagine island hopping with a nagbabadyang typhoon…. rainy season is a no, no!
Safety. Security concerns have been raised in the past, particularly on foreign travelers (you may google these issues). As such, joining a pre-arranged group tour an advantage for safety and monitoring.
The importance of Insect Repellent Lotion. Some of the stops during the island hop have lots of mosquito and sand fleas. More to that, some parts of Balabac experienced Malaria scare last December 2017. As a precaution, bring your off lotion everywhere you go. Sleeved tops and long pants are also recommended, especially at night.
Mobile Networks. Mobile networks were said to be moderate 2G on the mainland, but most of the islands have none. Prepare to disconnect with your social media hang ups.
Toilet and Water Supply. When camping, expect the most basic toilet there is. Deep well freshwater on the islands is very limited. As such, limit your flush and bathing requirements to the minimum.
Electricity. Electricity at the mainland is said to be up to 12 midnight only. For island camping, solar power is utilised to supply only basic light and gadget charging between 6 to 10 PM.
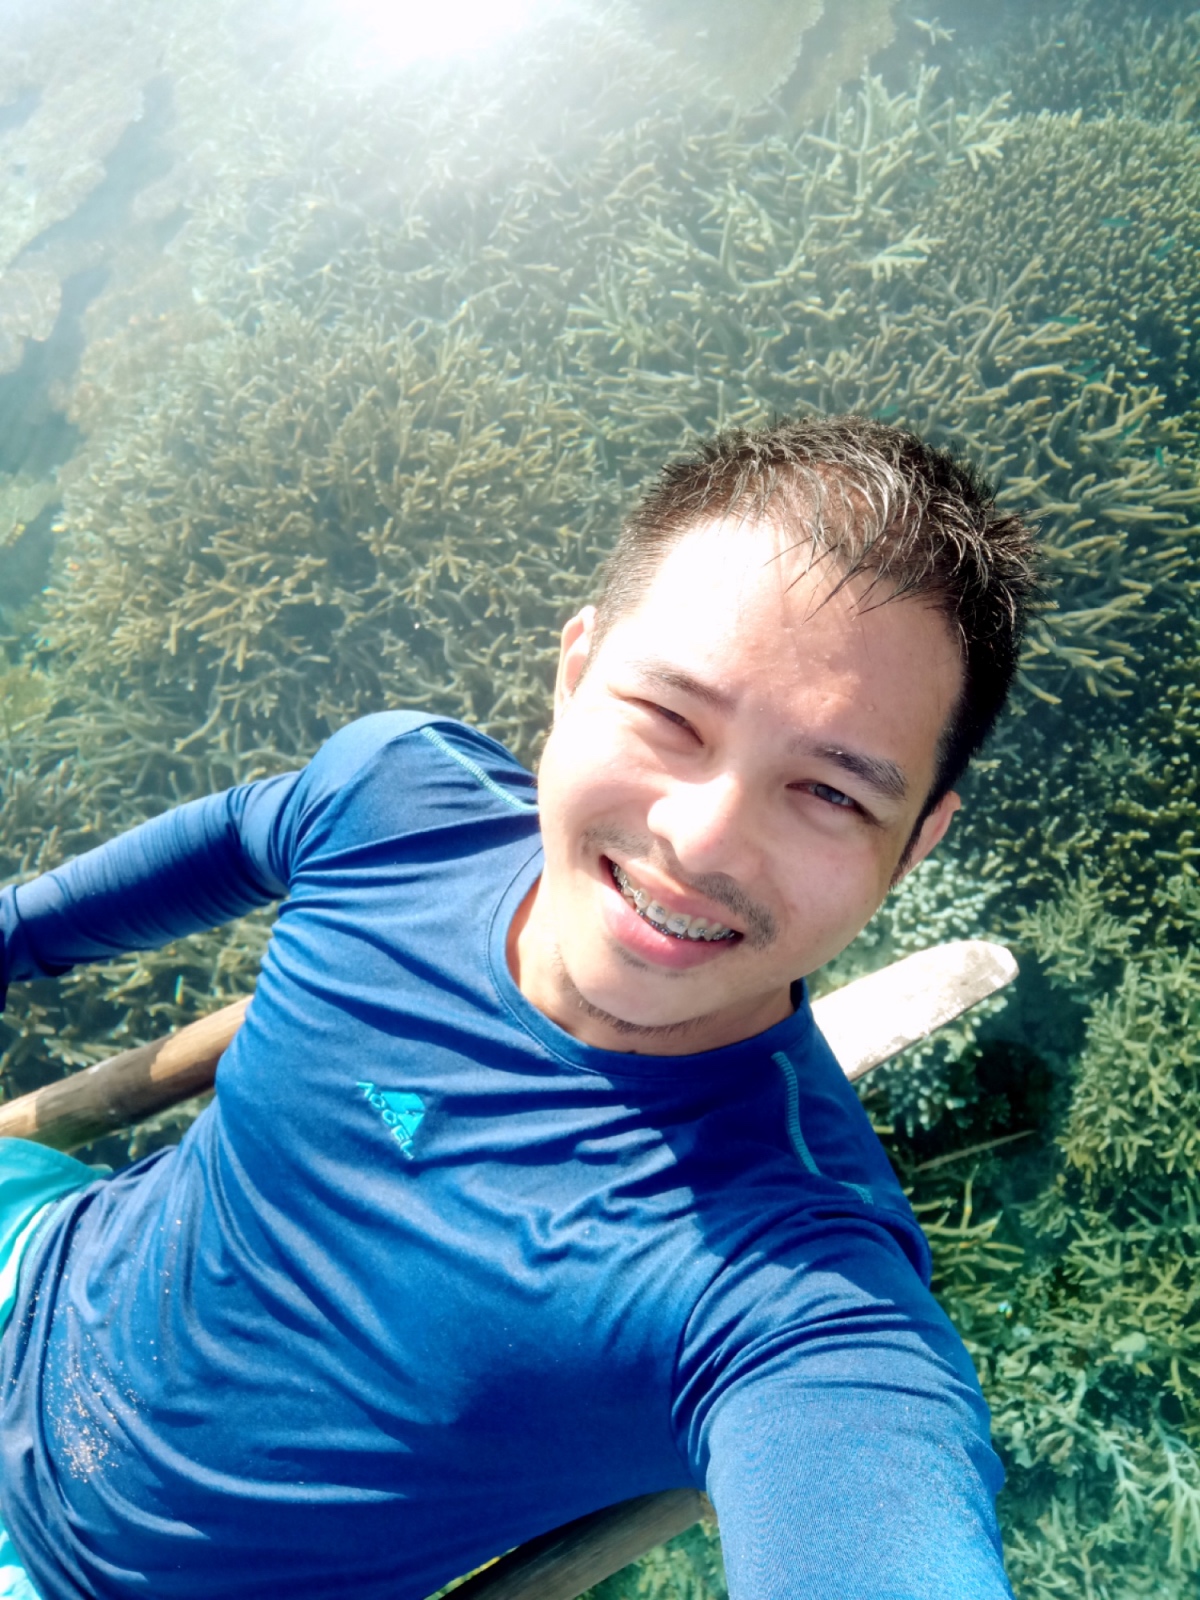
Snorkeling. Balabac offers the best snorkling sites I’ve visited to date. You can clearly see the corals from the boat as the water is super clear and calm, hindi mo na kailangan bumaba. As a safety reminder, never do snorkeling on shallow water. Only do this when the reefs are ideally 3.0 meters away from you.
Kill nothing but time. Leave nothing but footprints. Take nothing but pictures. Keep nothing but memories.
Checklist on Things to Bring
-A Lot of Sunblock (Organic/Reef Friendly Please!)
-Insect repellent lotion , moisturizing lotion, skin cooling mist spray
-Rashguard / Aqua Shoes
-Long sleeves / leggings
-Flash light / head lamp
-Powerbanks and extension wire
-Camera / Go pro (Having a drone would be perfect!)
-Snorkel gears
-Waterproof Bag
-First Aid Kit
-Sleeping bag ,Extra food/Snacks/Canned goods if you’re going camping.
Here’s a short video blog from by Balabac Tour. Enjoy =)
As a new year tradition(and hopefully I can keep it up), I am sharing these simple travelogue postcards of beautiful cities I’ve visited the past year. All shots were taken by me with my Sony. Feel free to share. =)
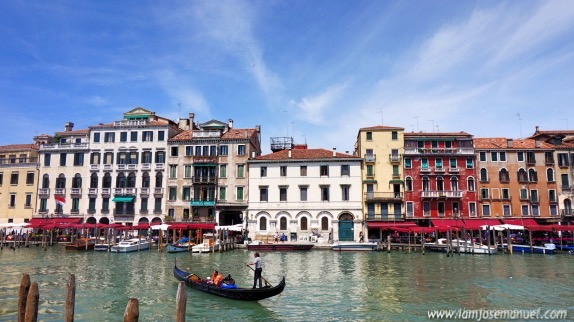
Venice, without a doubt, is the most picturesque place I’ve ever been. The romance, the beauty of its unique setting, its architecture, and the old world feel you see it in movies and on TV, makes this city even more interesting. Every corner and turn in this city are layers and layers of beautiful subjects, making Venice a street photographer’s dream surrounding.
My favourite shot of Venice., taken near the Rialto Bridge
Sited on a group of small islands separated by canals and linked by foot bridges, the city in its whole is listed as a World Heritage Site. Before arriving in Stazione di Venezia Santa Lucia from Milan, I already prepared myself for a lot of walking, as I’ve read that there are no taxis or public buses on the Islands. Venice does have water buses circulating the islands for convenience, but the maze like street set up of the city is just too interesting not to conquer. Streets of Venice were never planned to be on grid and orderly manner. And true enough the twist and turns of the streets got me lost in finding my hostel, and took more than two hours of my time. Even google map wasn’t able to clearly list every turns of the city. Nonetheless, walking (or more like wandering) in Venice was the best part of my two days stay, as you get to see experience all the randomness and interesting things of this unique city.
An aerial view of Maze like Venice. The street names are only either painted or embossed on the first building of the block, and every block has unlabelled walkways and footbridges, making navigation even more complicated. Complicated, isn’t it?
Anyways here is how I spent my two days in Venice. No itinerary at all. I only had Piazza San Marco in mind and eat good pizza. Still, it was a well spent stop in Italy. My favourite two days, in fact. =)
Since the streets of Venice get complicated, I take the riverside route every time I can. It is easier to navigate from there.
San Marco Square is the city’s main Piazza. St. Mark’s Cathedral at the background
The Piazza Campanile.
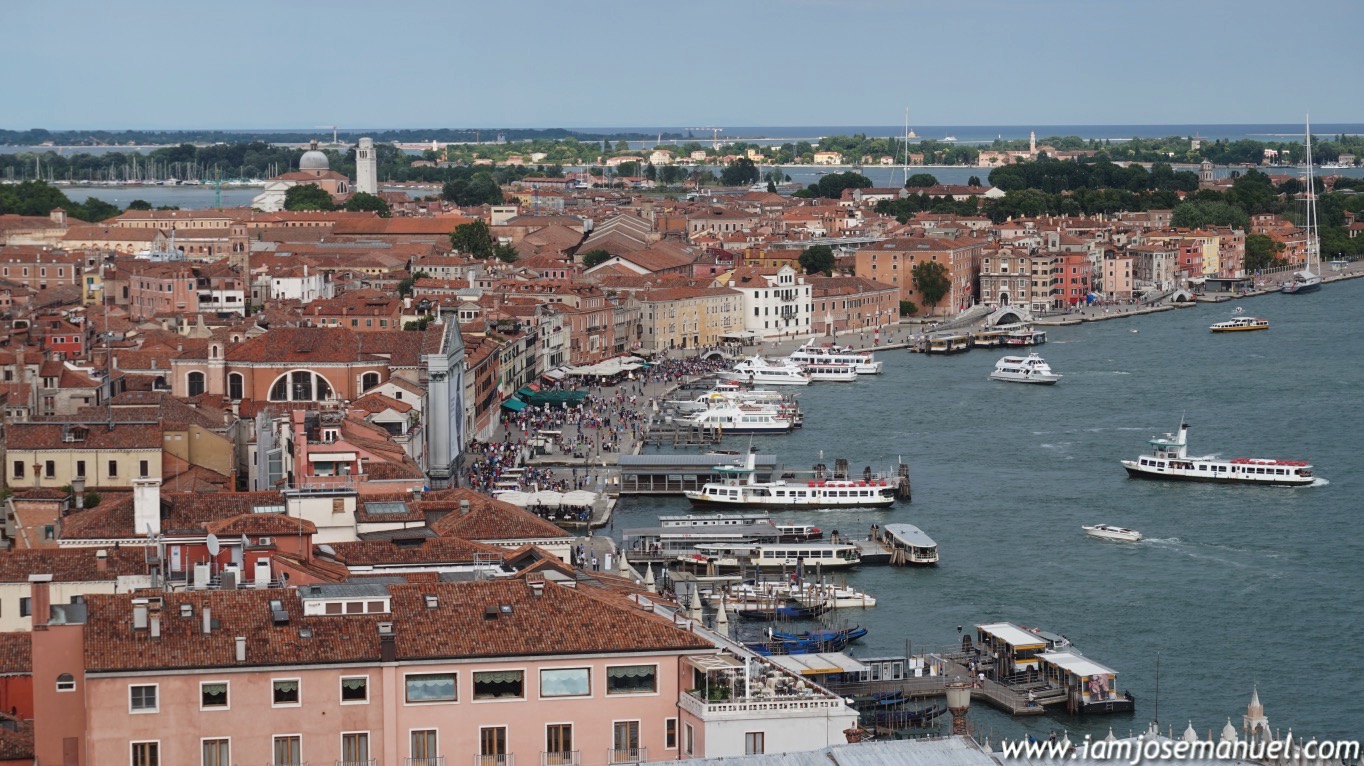
Who wouldn’t fall in love with these views? Going up the Campanile for 9 Euro was super worth the money. I recommend really everyone to do this. Skip the peak of Vatican or Milan, reserve your money for this view.
The south view of the Piazza
A view of the port for inter island waterbuses
A view of nearby Islands
A view of nearby Islands
“Experiencing Venice as a solo backpacker is best done on foot. Skip the expensive gondola ride, pang mag jowa lang un. Corny pag single at alone.” – Josemanuel . lol
Anyways, more street scenes here … =)
randomly found this quaint bookstore with lots of crazy finds in it.
Crazy finds such as this !
Inside the bookstore
More street shots here =)
Apron for sale. lol
Sakit na ulo ni ate. Zzzzzzz
Cute Doorbell buttons
Alone din si Ate. laban !
Walking around Venice will never be boring. The streets are lined with vibrant contrasting layers such as this corner.
An interesting shop mannequin
A Random street painter, a usual sight in Europe.
Food Trip :
Pizza Slices are super huge at 3 Euro (150 pesos) per slice.
Vegetarian pizza with ricotta cheese. 4.5 Euro (225 pesos) per slice
Gelatto is a bit expensive. 2 scoops 3 Euro (150 pesos)
The slice is actually bigger than my face ! for 3 Euro (150 pesos, sobrang busog na!)
Coffee can be a bit pricey anywhere in Italy. These dispensers are good to go in the morning (just 1.5 Euro/ 75 pesos per cup). Reserve your money for better coffee in the afternoon when you can make padisplay sa cafe.
Very cute how they keep the cherries cool
Pasta is expensive in Italy. This cup of pesto pasta is at 7 euro (350 pesos) . I never found any pasta there lower than 5 Euro. kaya madalas ako pa pizza pizza lang. lol
As for my accommodation, I stayed for two nights at Astoria Hostel in Via Faenza (near Piazza San Marco). A bed in a shared room was at 1300 pesos plus 5 Euro city Tax. Its the cheapest I’ve found in Venice that is near a Piazza, making it easier to find. I booked this through Agoda.
The Bed. Ok naman cya. A bit expensive for what you get, but Venice na to e, so given na tlgang mahal ung tirahan.
“I spent 8 hours in the Louvre, and it wasn’t enough!” That is how I replied when once asked about my visit to the famous museum.
It is no secret that the Louvre is one of the world’s largest museums and a historic central landmark in Paris, France. The Louvre houses vast collection of art and architecture from all corners of the world. What made the Louvre Museum more interesting is on how the galleries are presented with a chronological order; From the Persian and Mesopotamian collection to the Egyptians, the Greeks, the Romans, the Renaissance, to the contributions of Monet, among other 19th/20th century iconic artists. As the galleries somewhat bring visitors back in time, a full day in the Louvre definitely isn’t enough, especially for the art and architecture junkies.
Mowdelling sa Louvre. Walang kokontra
Here are some tips when planning to visit the Louvre,
Entrance Ticket is at 15 Euro for a full day visit. Assessing how much art the museum houses, 15 Euro (750 pesos) is already worth every penny. There are packaged passes for multiple museums for 45 to 72 Euro, but I opt not to avail such pass since I only intend to visit the Louvre.
The iconic glass pyramid is the museum’s main entrance, and lines at this point of entry almost always go crazy long. As advised by experienced friends, I bought my ticket at Carrousel du Louvre, which is the basement mall connected to the Louvre Museum. The Mall also connects the museum to the Paris Metro Rail. As soon as you exit the metro station and enter the Mall, the ticket booth/souvenir shop is at the left side. Very much lesser line here, as compared to the main entrance.
As blogs mentioned, Wednesdays and Thursdays are the lease busy days. But still, expect to fall in line prior to entering for security check up. I visited the museum on a Thursday morning at the opening hour(10 am); Fell in line for just around 15 minutes.
For visitors with longer time, I recommend to start with the Persian and Greek on the Left Wing, going up the loop. The Galleries are presented via timeline, making it a much easier experience.
For visitors with limited time, refer to the free booklet given at the entrance to go straight to the most iconic galleries, such as the Mona Lisa.
Unlike other museums, visitors may bring bottled water and some light snacks if intended to stay long. They are not strict on that, or at least during my visit.
Visiting hours are listed at www.louvre.fr/en
Anyways, here is how I spent my visit to the famous museum. More photos to follow =)
Also fun to observe and judge other tourists, especially the Chinese and their funny poses. lol
As recommended, I visited the Louvre on a Thursday at the opening hour(10 AM). Timing di busy at that day.
Persian Art Collection.
Persian Art Collection – Stone wall frescos dating back 300 BC
A revived stone carved column from a Persian palace of the ancient times
Statue of the Nike (The Winged Victory at Samothrace), estimated to have been created around 200–190 BC., from a 19th century expedition in Greece. Described as “the greatest masterpiece of Hellenistic sculpture.”
Venus de Milo, is an ancient Greek statue created between 130 and 100 BCE, and regarded as one of the finest Classical sculptures in existence
The Roman Art Gallery
The Roman Hallway
The Roman Gallery
The Roman Gallery
Most of the Roman statues are carved from blocks of marble, thus maintaining its pale white appearance through centuries.
An authentic hieroglyph block from the ancient Egyptian times.
An authentic Egyptian Sphynx, carved from whole block of granite, this is part of Napoleon Bonaparte’s collection
Egyptian Sarcophagus (Coffin)
The lavish hallways of Napoleon Bonaparte’s Parisian apartment.
The Crystal Chessboard of Napoleon Bonaparte
The actual living apartment of Napoleon Bonaparte in the Louvre.
A quirky French Renaissance painting. The French are quite playful with their art sometimes
At last, napost na din first blog ko from my recent Europe Trip. Sorry natagalan, busy eh, kailangan mag effort sa work. Daming ganap sa Europe, sobra. Sharing those memories will take me ’til December cguro to blog (considering my pace in uploading, hihi).
This is my first post, and what better way to share my experience than to start with Bonjour Paris! Just a recap, my entry and exit point in Schengen Area was Paris, since it was the cheapest way I found to enter Europe. Will upload another article re the detailed itinerary on Paris with fare and all. But for the meantime, share ko muna ung ginawa kong tour route that we followed kasi excited ako. Pinag hirapan ko to eh. Pag bigyan nah. Hope you all enjoy my photos=)
Here’s our one day ‘do it yourself’ walking tour to most of the spots and architectural landmarks of Paris. We paid no entrance fees for these stops, photo op lang and coffee and food trip along the way. It is free to go inside the churches and the Pompidou Bldg. Unless you go inside the museum or climb um Eiffel then that’s the time you pay.
This was the route me and an accountant friend Mary Annilou Bravo did in Paris. Commending her for the patience to walk 6:30 am to 7pm, and bear with my energy. hihi. After Eiffel, which was the last stop, we took the metro na back to our place, took our bags and head to the airport by public bus around 10pm, haha and we slept there. Imagine the hirap para maka laag lang jud and tipid.
This walking tour takes around 12 hours, including the stops. If this would be too kakapagod for you then the Bus Hop on Hop off is the best choice for around 27 to 30 Euro (1500 pesos).
Our route covers most tourist spots and interesting architectural icons that are located along (or near) Le Siene River, making it easy to navigate. When visiting Paris on a thrift, work up those legs and feel free to follow our walking route =)
We stayed at Young and Happy Youth Hostel, which is very near Place Monge Metro Station. This area, known as the latin quarters of Paris, offers fairly cheaper accommodations, that are still considerably near the city center. An overnight stay was around 1,350 pesos/night for a bedin a shared Attic room; very Princess Sarah Feels, lol. The price comes with a continental breakfast (basic bread, jam, cereals and coffee).
The Parisian Latin Quarters at night.
Inside Young and Happy Hostel with that Hippie Vibe.
The dorm bed at the attic. Not for the maarte and mayabang but the bed was clean.
We started the walking tour at 6:30 AM. Our first stop was the Pantheon (1), which was just around 15 minutes leisurely walk from were we stayed in Place Monge. The Pantheon and its surrounding buildings are great examples of Classic Revival Architecture. It houses the tombs of famous Frenchmen; Victor Hugo to name one.
The Pantheon itself. We were not able to go in the tombs kasi it was around 7 am pa. Wala macyadong tao dito kaya perfect for video2x feels, which I shall upload later =)
A Parisian Summer Morning feels.
After having photo ops at the Parthenon, we walked towards Le Siene River to see the majestic Notre Dame Cathedral(2) . We got there around 8, just as soon as the church opened. Crowds flock in around 9, as a local mentioned. Along the way we also got some coffee and patisserie from Hure Bakery, which was located, just before crossing the bridge to Notre Dame.
Pastries of Hure créateur de plaisir (Bakery) are relatively affordable in Paris. A Framboise (raspberry filling) costs 2 Euro (100 pesos) This is as big as my face. can be shared by two
Eclairs in Paris may be pricey ( around 250 pesos) but there are really huge and topped with fresh fruits. Minsan sayang kainin kasi they are super pretty.
Coffee to go for the Char !
The Majestic Notre Dame Cathedral. Imagine Disney’s Quasimodo ringing the bell para fairy tale ung feels.
Building work began way back 12th century, it was not until some 300 years later construction finally came to an end. Several renovations have been done in the recent centuries due do damages of fire and war, but the original structure has been maintained. Notre Dame until these days is considered one of the most iconic churches in Europe. Getting in the church is free of charge. Unless you go up the tower then that’s the time to pay.
Architectural styles: French Gothic architecture
Details of Notre Dame Facade.
The cathedral’s Vaulted Ceiling.
Cathedral’s Gothic interiors. Imagine walking on this grounds that once held so much France’s history.
Crossing the Notre dame by bridge to the northern banks will bring you straight to Hotel de Ville (3), housing the city’s local administration. This is also an iconic architectural landmark for the French. When Vietnam was under the french rule, they built an administrative building in Saigon, patterned and also naming it ” Hotel de Ville “.
Architectural styles: French Renaissance architecture, Renaissance Revival architecture
A short walk from Hotel the Ville stands Pompidou Building(4). Built during the late 60’s, this center is an iconic landmark especially for architects as this is among the most recognised post modernist structure that paved way for the acceptance of such form. Getting in the building is free, (and there is a sports center at the basement). Entrance fee is asked for the museum floors.
Rue de Temple ( which is the street next to Pompidou) is also a destination for Parisian Nightlife for the Yuppie crowds.
Me at the Pompidou Center
After the side trip to Pompidou, we walked back to the riverbanks since our next stops are located there. Prior to getting to the Louvre Museum, we stopped at Pont Neuf (5), a bridge that also has the iconic lovelocks of Paris. The Original lovelocks at Pont du Arts have been towed away already when we got there. Even so, French people are trying to revive the culture na today at Pont Neuf.
at an area near Pont Neuf. Its impossible to miss this as long as you walk near the riverside. This is also super near to the Notre Dame
Palakihan daw ng locks para walang iwanan. Bet?
Next stop is the iconic Louvre Museum (6). Photo Op lang kami nito sa labas, which was around 11 AM na; And you can also go in the main lobby located at the Carrousel du Louvre, which is an underground shopping mall in Paris. I went inside the Museum on another day, kasi it will take you hours to enjoy the galleries, which houses one of the biggest collection of history and art in the world. Will upload another article re Louvre. Entrance is around 12 Euro (15 Euro kung sa agencies). Nasa 600/750 pesos lang. Sobrang mura na to for a museum to house vast riches from all corners of the world.
Modelling feels sa labas ng Louvre.
Louvre Main Lobby
Yung kasama ko had lunch at the Carrousel du Louvre, madami naman fastfood dun. When in such touristic place in Paris, expect to spend 10 Euro (500 Pesos) at least for lunch.
Moving onward, we just had a leisurely walk along the riverside, and we got to see a lot of spots like the Jardine de Tuileries, the Place de Concorde. Though not along the riverbank area, I recommend visitors to check La Fayette Shopping Center (7). You can either have lunch here or coffee. And the shopping center has a nice roof deck with a good view of Paris. Just opposite the shopping center is the Paris Opera House.
Inside the shopping center. Amazing isn’t it ?
As soon as you had your rest na sa mall, walk back towards the riverbank. On your way, you will pass by Le Madeleine Church . Famous to for the kids of the 90’s kasi ung movie na Madeline.
Walking back to the riverside, you will also pass by Laduree Pastry Shop, famous for their prettiest Macarons. mga isang piraso, 2″ ang laki, nasa 150 pesos. Laban?
After the Madeleine Church, nasa riverbanks ka na ulit nyan, you may opt to walk towards the Eiffel along the Le Seine River (9), which is about 1 hour and 30 minutes on a slow pace. or pwede rin naman mag train ka na or mag bus. There are tourist kiosks in Paris, should you need assistance. As for me, I’ll definitely walk the afternoon up, because it is when i get to see and really experience the Parisian streets, and those cute details everywhere. I also get to see a lot of cafe interiors to get inspiration from.
The view of Le Seine on the way to Eiffel.
Some green building that i personally liked.
Toilets are no worries in Paris. These on the street are free. Although sometimes these cubes get busy, you have to wait 30 minutes more. Bet?
May issue si kuya. This is a common detail you see along buildings.
Paris is and Art City, with buildings that are generally renaissance/classical revival. Tourists will never run out of details to see. Finally around 5 pm we reached the Eiffel (10) Park. Thou in all honesty, it is difficult to find a good angle for a shot as the grounds are packed with tourist. As per blogs, the best shots are taken from Trocadero, which is just across the river by bridge. Tourist enjoy the Eiffel grounds free of charge. You only have to pay the moment you go up the tower, which is a hefty 15 Euro (750 pesos), not to mention the cue. Sobrang daming tao. So we opt to stay on ground nlang and enjoy the cool breeze. Beware of pickpockets specifically in this area. They are as swift as rabbits.
The Obligatory Eiffel Shot. Simple lang.
You can also spend your time here in Eiffel ’til evening to see the light show. That is free. =)
And that was how our one day walking tour happened. After Eiffel, we head back to our place in Latin Quarters by metro to Place Monge Station. Train Ride wont cost you more than 2 Euro (100 pesos). I will upload another article on the complete D.I.Y. tour with costing. Wait lang ha? Hope you guys enjoyed this. Excuse nyo lang my imperfect grammar haha. But, Kebs =)