Advanced Selfie:How To Take Creative Self Portraits During Solo Travel

When traveling solo, taking good photos with yourself in it is probably one of the biggest challenges to deal with. Excluding those naturally photogenic people without any bad angle,taking selfies with a cam phone often produce awkward compositions. Your face may be too near the camera, which is not flattering at all. Using a selfie stick may solve this, but it does limit your creative poses and movement. Timers on the other hand, take a lot of effort. I myself have been struggling with these, until I was introduced to the Advanced Selfie Technique.

Handheld selfie. Oh di ba am’pangit? mukhang undin.

What is Advanced Selfie?

Advanced Selfie is coined by Sorelle Amore, a popular British social media influencer. The technique is shooting creative selfies from a digital camera that is remotely connected and fully controllable with your handheld mobile phone. No help, no production team—completely solo.

I was introduced to the art of taking better self portraits by my friend Kareen Lucero, who is also a travel enthusiast. Then on, selfies from my recent solo travel have improved greatly.

With a camera that is remotely controlled by your mobile phone, you get to see your background and angles, thus make corrections and improvements on the spot. It’s something that a timed camera cannot provide easily.

The Tools Needed to do it:

1.) Digital Camera – Wifi Connect-Capable. I use a Sony Mirrorless Camera that I can remotely control with my smartphone.  Most recent cameras of any brand that bought 5 years ago (or maybe earlier) have this feature already. Ask your camera seller to verify.

2.) A Smartphone. I’m using an Android operated – Oppo Phone.

3.) Imaging Edge Mobile App installed on my android mobile phone. Imaging Edge is provided by Sony,which is  downloadable via Play store.There are other respective ‘Cam to Phone’ connectivity app for Canon and etc. Just ask your camera seller or google it.  After installing the app on the phone, you must remotely connect the phone and the camera via its wifi feature. The phone gives instructions on this. For further assistance on the app, click here. Installation videos are also available on youtube. Just search Image Edge to Sony Camera.

4.) A Handy Tripod for the camera. I use a flexible octopus tripod bought from lazada.

5.) Practice,practice,practice!

The Image Edge App as shown. This app is for Sony “Cam to Android Phone” connection. There are also apps for other cam brands that can be downloaded from Google Play Store. Apple Phones, I did not research. Probably meron din.
The Phone, via the Image Edge App, lets you view whatever the camera sees.
My Octopus Tripod. This beauty was first introduced to me by my friend Ian Garcia. The tripod is flexible. You can actually tie it on railings or wherever safe.

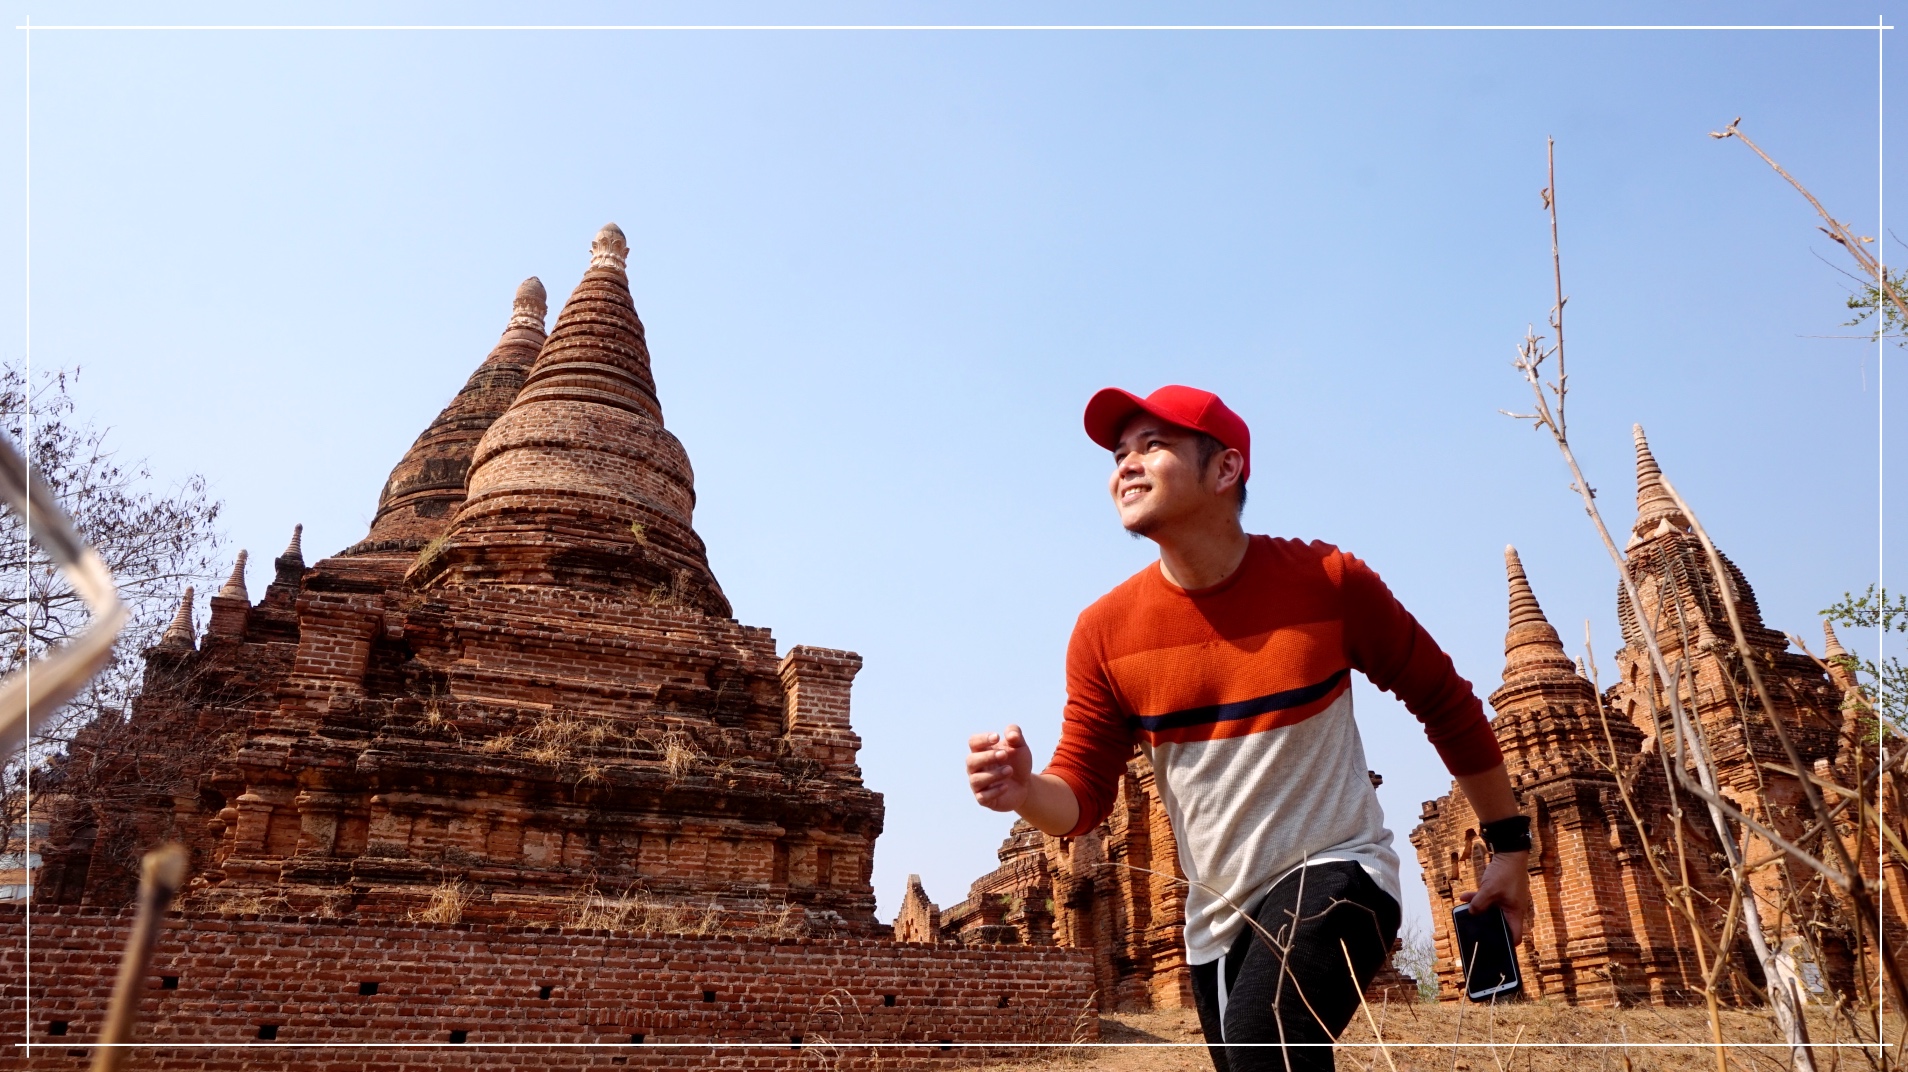
Sample photos and the advantages explained:

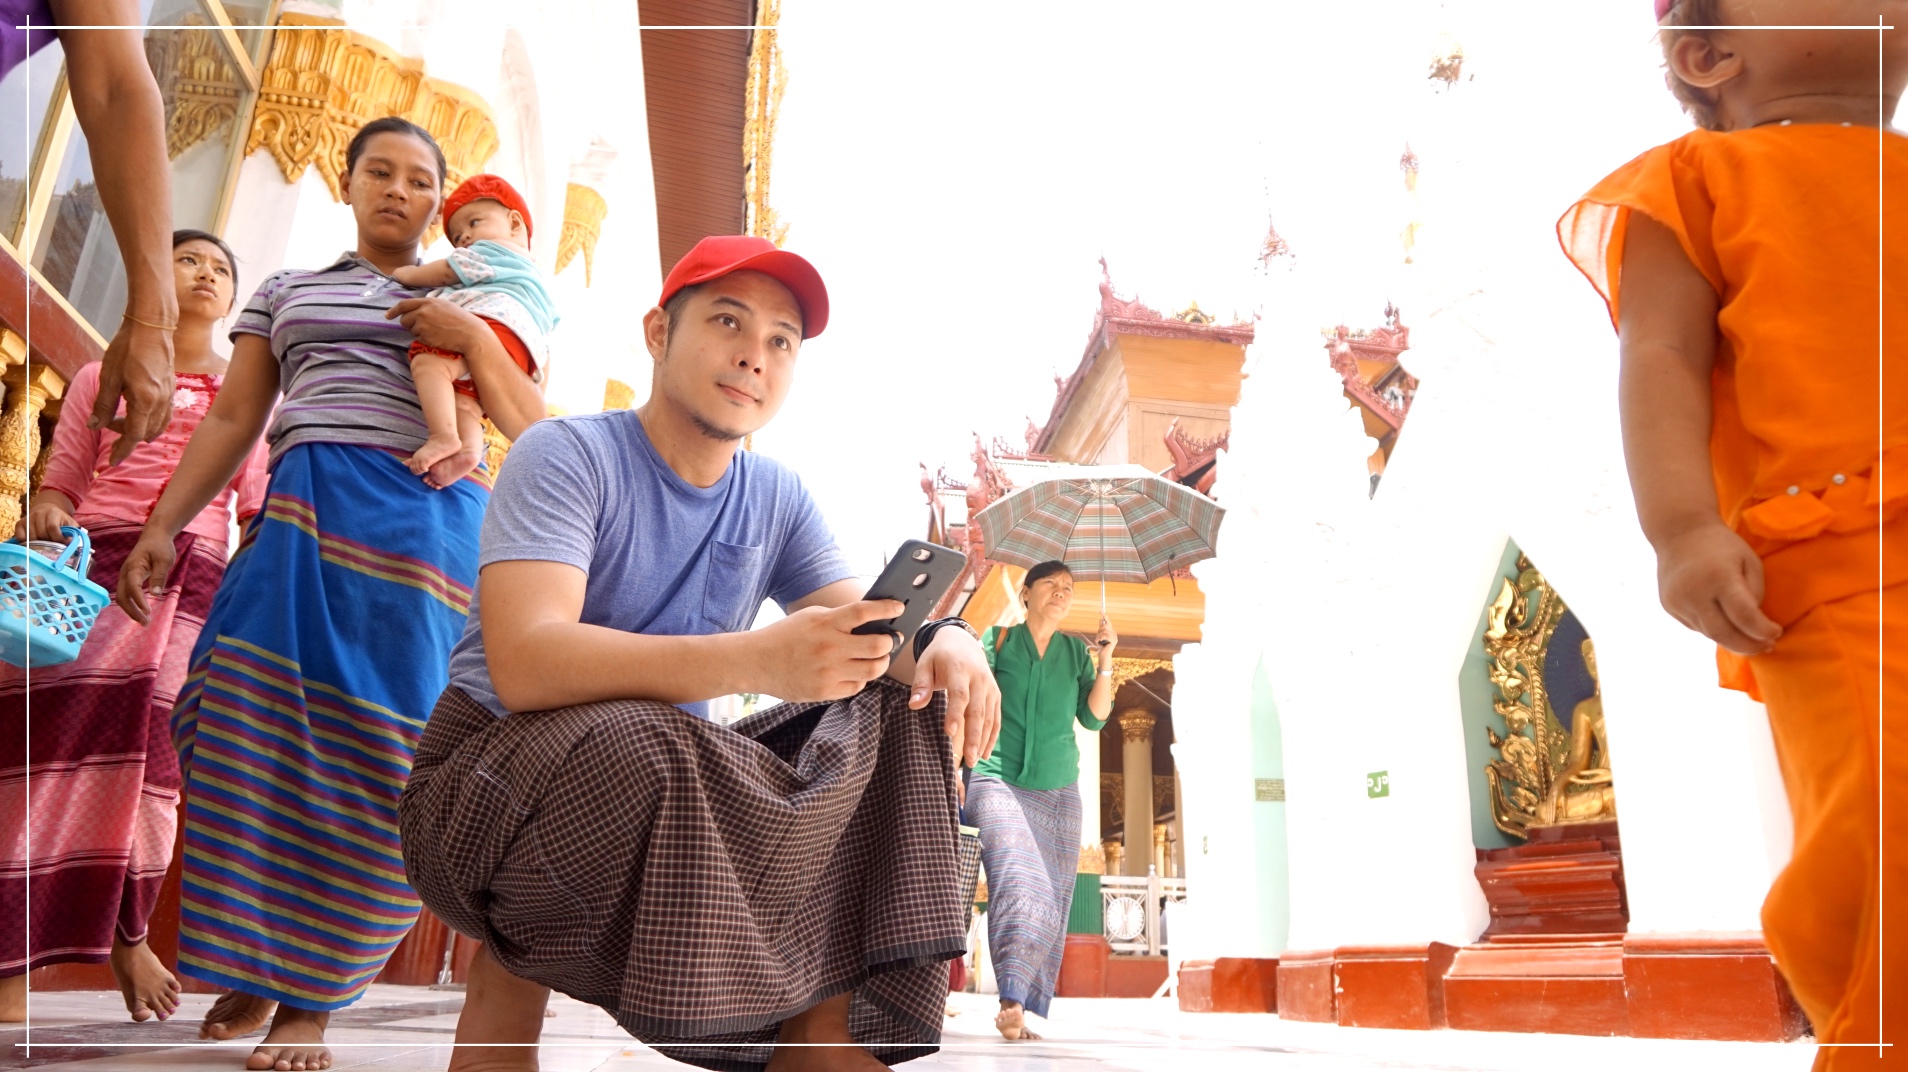
  • Find Better timing. Crowd and passerby are always a struggle. With a remotely controlled camera, you can easily take a shot when the background is clear, as seen from your mobile phone. This is probably the best advantage that a timed camera alone cannot provide.

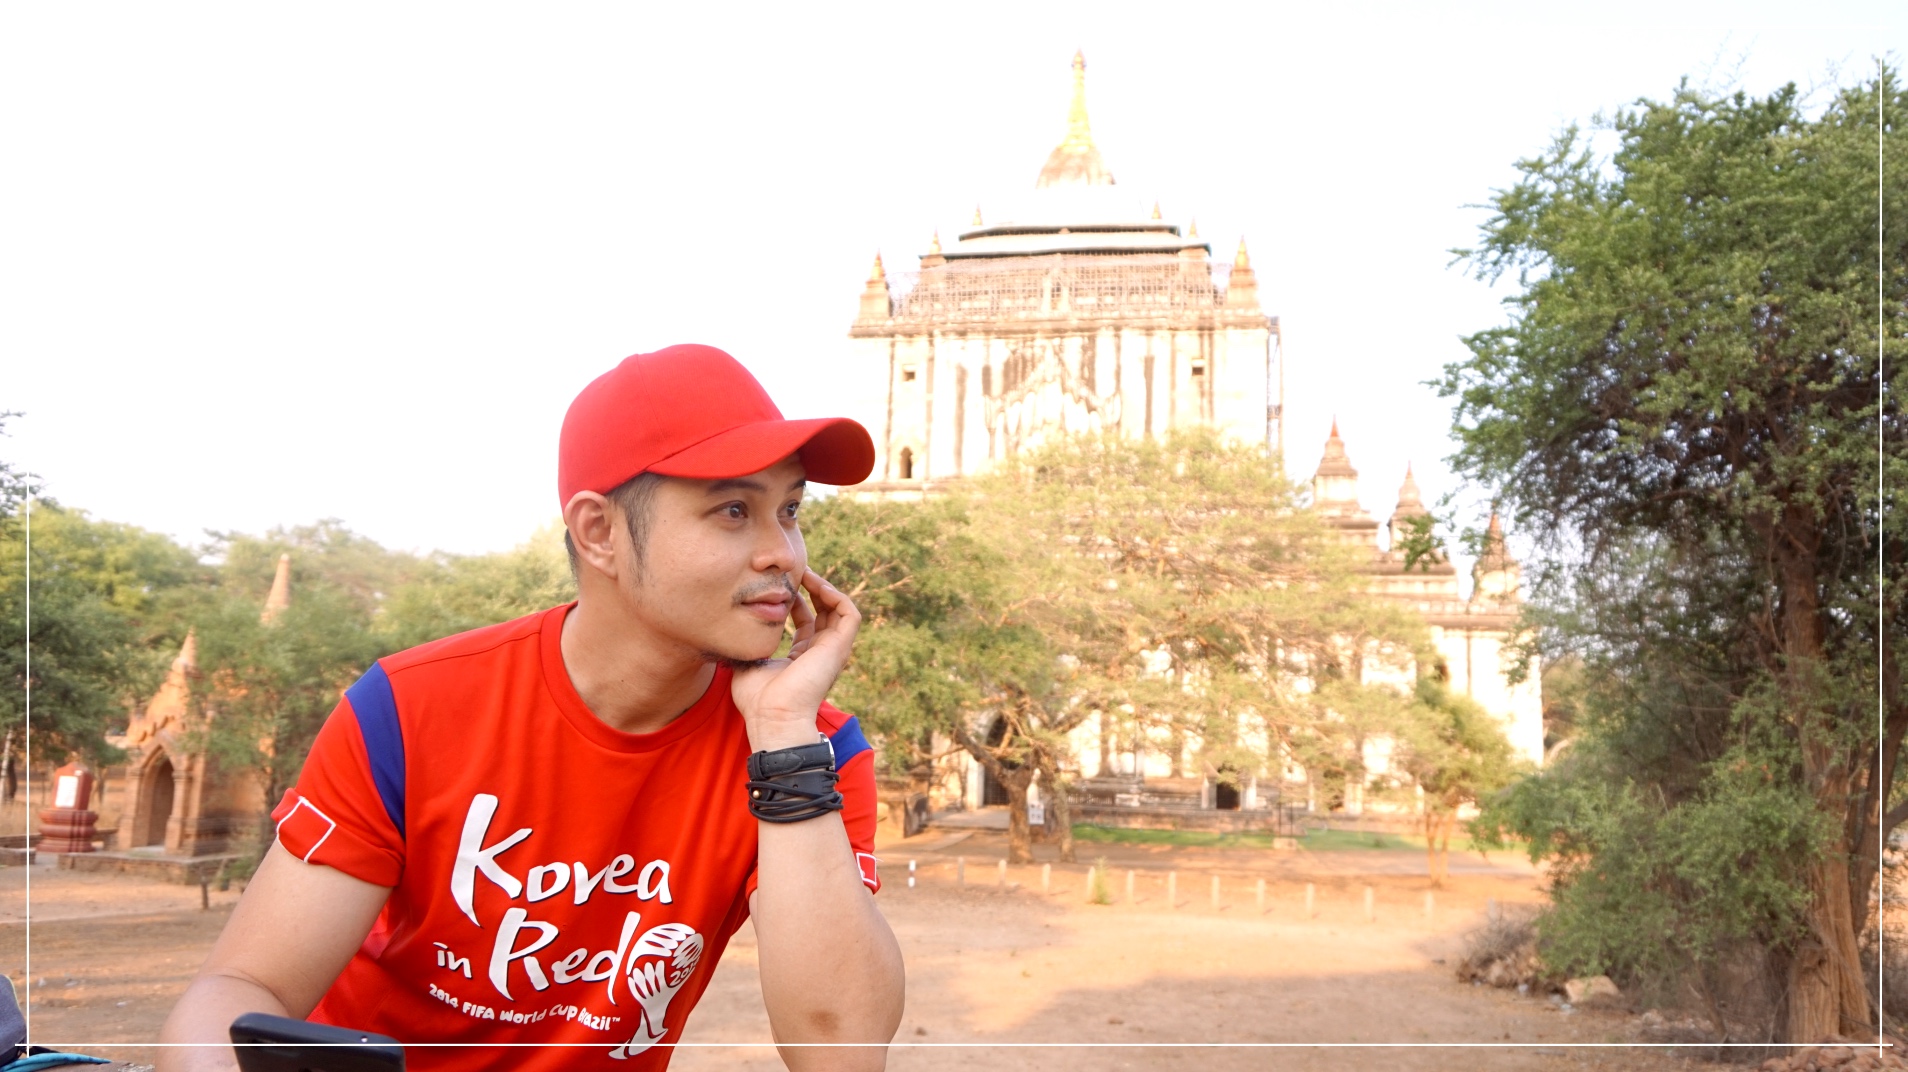
  • Find better facial angle. Oh di ba, nagmamaganda?

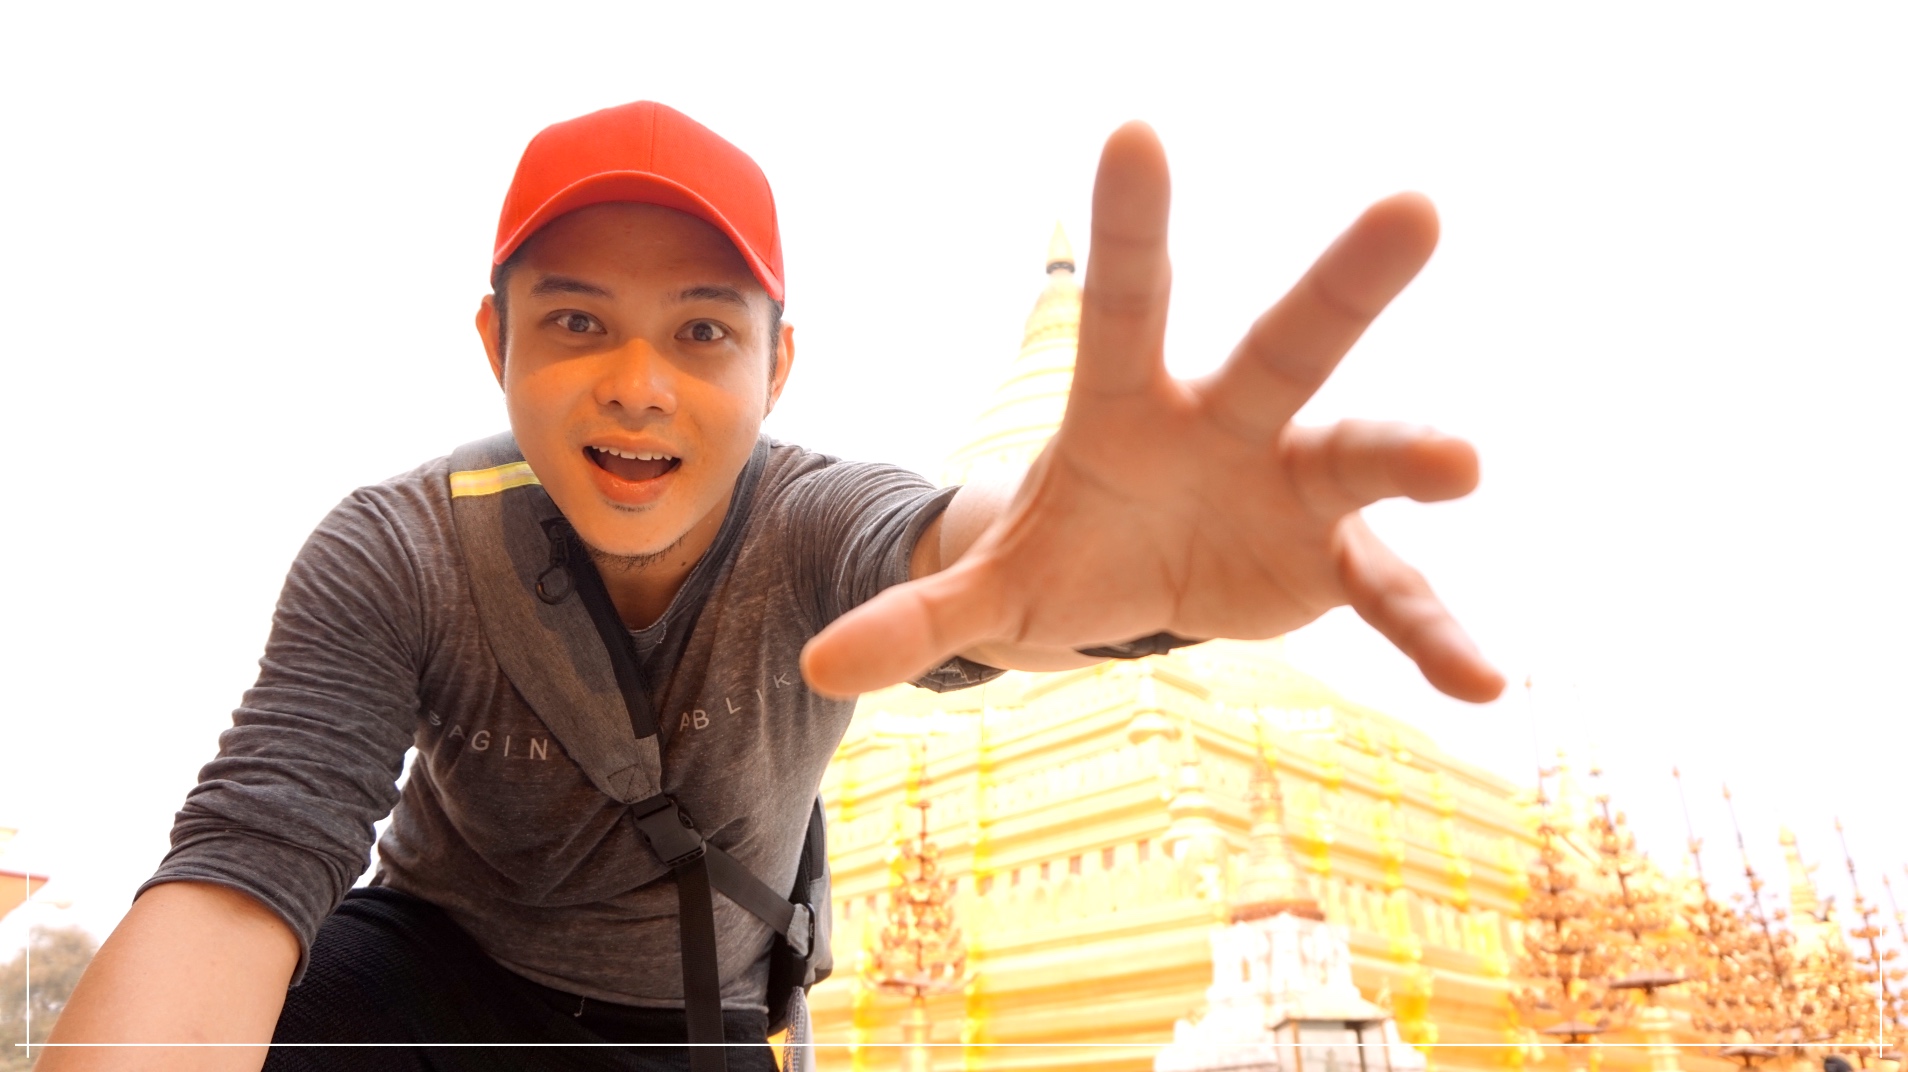
  • Create Dynamic Poses. You can play different movements and framings to level up your composition. This is definitely impossible to do when using a selfie stick. Another advantageous feature of the Image Edge App is that also has a timer option that can delay the shot on your camera.


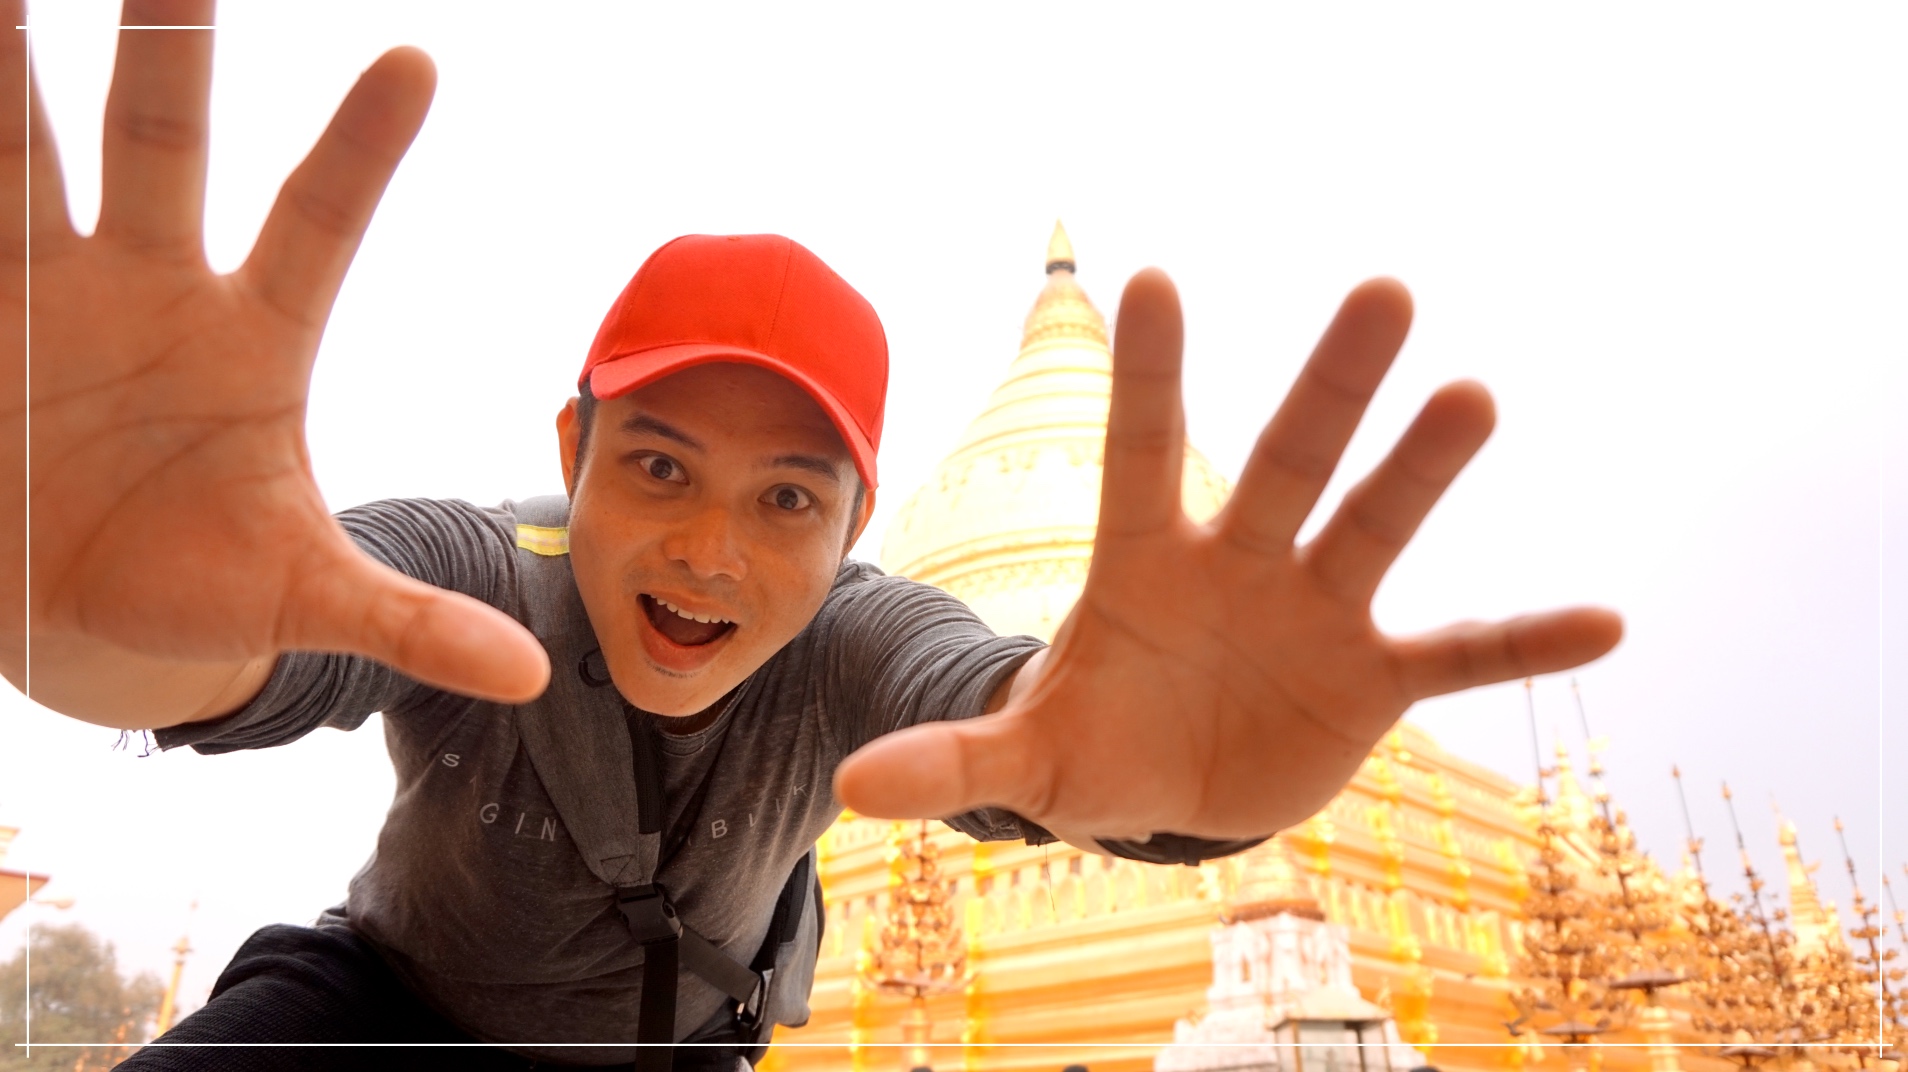
  • Play on Distance. Wide frame or close ups, pwede! This feature is camera dependent though. My Sony allows 10-15 meters distance. But I believe most cameras do. baka nga better pa.

No help, no production team—completely solo.

Possible Cons:

  • Since you’ll be placing your camera at a distance, always keep an eye on it for snatchers and kawatans.
  • Hiding your handheld mobile phone is a challenge for beginners. But this can easily be solved. You’ll probably develop your own technique din.

So basically, that’s it! Easy-breezy, right? Kaya nyo din yan. Practice lang. I myself, beginner’s level pa din in terms of creativity. There will always be room for improvements and more inspirations to absorb.

For more Advanced Selfie techniques, follow Sorelle Amore (@Sorelleamore) on IG. She also handles the @advanced.selfie IG page, which I also follow.

For more photo samples, click on—> Bagan Itinerary Blog.

6 Days in Myanmar:Sample Itinerary for First Timers

I spent P 35,000.00 for 6 days in Myanmar, including taxes and plane tickets. I am sharing with this blog my costing and day to day itinerary for future reference. Hope this helps.

I did the tri-city Mandalay-Bagan-Yangon route with modest choice of backpacker’s accommodation, comfortable transportation and an appetite that is always full. Real talk, pwede pa babaan ang budget na ito. Medyo mahal kasi yung ticket na nakuha ko pauwi, like i booked late. Also, I went during Thingyan Festival. My choice of public transportation were limited.

For preparations and planning tips, read more on  —>>>https://iamjosemanuel.com/2019/07/21/backpacking-myanmarpractical-tips-for-first-timers/

Day to day itinerary (Detailed costing is given at the end):

Day 1 – Travel time. Manila – Bangkok – Mandalay via low cost airline. Arrived late afternoon

Arrival Area – Mandalay Airport. Blue bus leaves every other hour to downtown, which is 40 minutes away.
Bus Ticket 5 USD with hotel drop off.
View of Mandalay city center

Where I stayed in Mandalay — Ostello Bello Hostel Mandalay. Located just two blocks from the Royal Palace. Hostel has good reviews at Agoda. Ostello Bello is actually an international brand which also operates in Italy. Hostel has an elevator.


Day 2 – Explore Mandalay City Center.

Kuthodaw Pagoda – A Unesco World Heritage site known for its intricate architecture and hundreds of brilliant white pagodas.

Shwenandaw Monastery – Interior and exterior is made entirely of hand-carved teakwood.

I was not able to visit Mandalay hill as the roads were closed for the Thingyan Festival.

Day 3 – Travel time. Mandalay – Bagan. 5 Hours by Tourist Bus (including hotel drop off). Arrived after lunch. Visited Shwezigon Pagoda – a 25 minutes walk from my Hotel. Explored Nyaung U district on foot.  Checked out the market and the Lacquerware factory,which Bagan is popular of.


Where I stayed in Bagan —> Royal Bagan Hotel, located in Nyaung U, the commercial district of Bagan. I’m giving high reviews to this hotel/hostel, for their buffet breakfast (like real food, rice, local dish, noodles fruits and pastries). They also have a swimming pool. I paid P 415.00 Pesos only per night (Dorm Type-Shared room).

Day 4 – Whole day tour around the archeological site of Old Bagan. Hired a motorbike with driver because I don’t know how to drive. hehe. The rent agency is just outside of Royal Bagan Hotel. Prepare for a very dusty ride.

I will upload a separate blog for the must sees in Bagan. Wait lang, mga teh!

STRICT DRESS CODE. Bagan has more than 2000 Pagodas. It is quite expected that visitors will do multiple temple hopping in a day. Myanmar is strict with dress code and “no shoes” policy before entering. Modest outfit is a must. You’ll be asked to rent a sarong if you are wearing shorts. It is also best to wear slip ons or prepare a pouch for your footwear, which you shall be taking off several times; including socks. The concrete foot path gets scorchingly hot. Sometimes, you have to step on bare ground with sharp pebbles. Bringing of wet wipes and alcohol is highly suggested. Climbing to the top of the pagoda is strictly prohibited.

Day 5 –  AM – Mount Popa Shared Tour c/o a travel agency outside the hotel.

Mount Popa is the most important site in Burma for Nat pilgrimage. The Nats are spirits who have been worshipped all over Burma for many centuries. They were probably worshipped before the arrival of Buddhism. Since then Buddhism and Nat worshipping have gradually merged over the centuries.

Met fellow Filipino travelers on this tour.

PM – Bagan Nan Myint Tower. Enjoy the sunset. Not much people visit the nearby cluster of lesser pagodas. Bigger chance to take good snap shots without the crowd.

I already brought with me my Bag as I went straight to the bus station after dinner. Took the 7/8PM Min Thar Bus to Yangon. Overnight bus ride was pleasing, with international standard seat sizes and is reclinable. Comes with a blanket, pillow, bottled water and a vanity kit. Intercity overnight train is a cheaper option bit will take 18 hours or more. It was also unavailable during my visit because of Thinyan Festival.

Day 6 – Arrive in Yangon at 6 AM.  From the bus terminal, i hopped on Bus 31 to Yangon city centre, which is around an hour away. Bus stops at the city hall in front of Sule Pagoda, which is considered the center of Yangon.

Where I stayed in Yangon —> Wizaya Backpackers, located just at the back of City Hall. Walk in lang. and  they do not have a fixed check in/check out time, which was good, since I arrived 7 AM. I actually paid a bed just so I could leave my things and take a bath. I did not sleep there na as I am already flying back to Manila that night. It would have been nice though to have more time to see Yangon. I see a lot of quaint restaurants near the hostel. I might go back to Yangon mainly for the food.

I had the whole day to see Sule Pagoda, Shwedagon Pagoda and the local Market. There are several markets at Bogyoke where prices of Jade and other semi precious stones and accessories are cheaper compared to Bagan.

The Sule Pagoda. prominent landmark of Yangon. most city buses usually terminate here or nearby. From Sule Pagoda, you can also ride the RED Public bus that connects the City center to the Airport. Bus runs every 30 minutes. Red Bus is easy to spot, or just ask the police at the stop over.
Shwedagon towers up close
The main pagoda is under refurbishment when I went. It is said that the topmost part of this structure keeps gold and other treasures of Myanmar. A museum beside this displays photos of the treasures.
Most of the footpaths in Shwedagon are made of Marble, which absorbs less heat of the sun compared to concrete. Some footpaths are made of solid semi precious Jade.
One of the markets in Bogyoke. 

Evening – Travel back to Philippines via Singapore.

— End of Trip —

Cost Breakdown:

Related blog posts on Myanmar:

BACKPACKING MYANMAR:PRACTICAL TIPS FOR FIRST TIMERS Days in Myanmar: Sample Itinerary for First Timers

uploading soon :

Focus Bagan : Unesco World Heritage Site

Focus Mandalay : The Burmese Old Ways

Yangon Tour in Less Than 24 Hours

Burmese Street Food